Ingredients #2: Whipped Cream

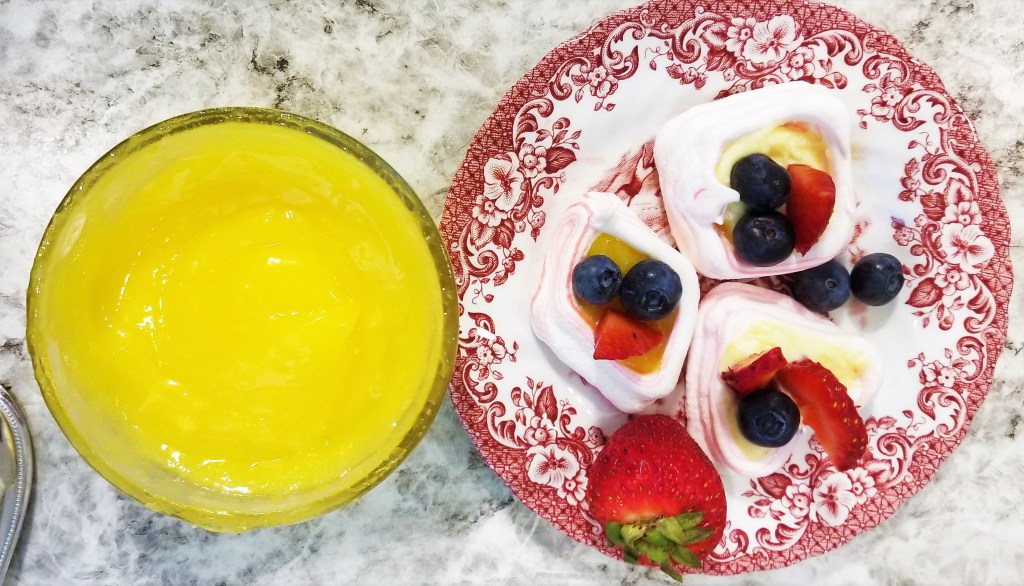
The quickest dessert ever involves taking your favorite slightly sweetened carb (e.g. biscuit, lime curd, graham cracker, fruit, etc.) and adding whip cream on top to make it fancy. A bowl of fruit and cream is severely underrated in this country. It can take five minutes to assemble cream and carb in a cute bowl and bring it out to your dinner guests while they digest the scrumptious main course on which you slaved away all afternoon.

Pick up a pint of heavy whipping cream (any brand) from the dairy area, usually by the refrigerated half-and-half, and prepare your hand or stand mixer ahead of time.
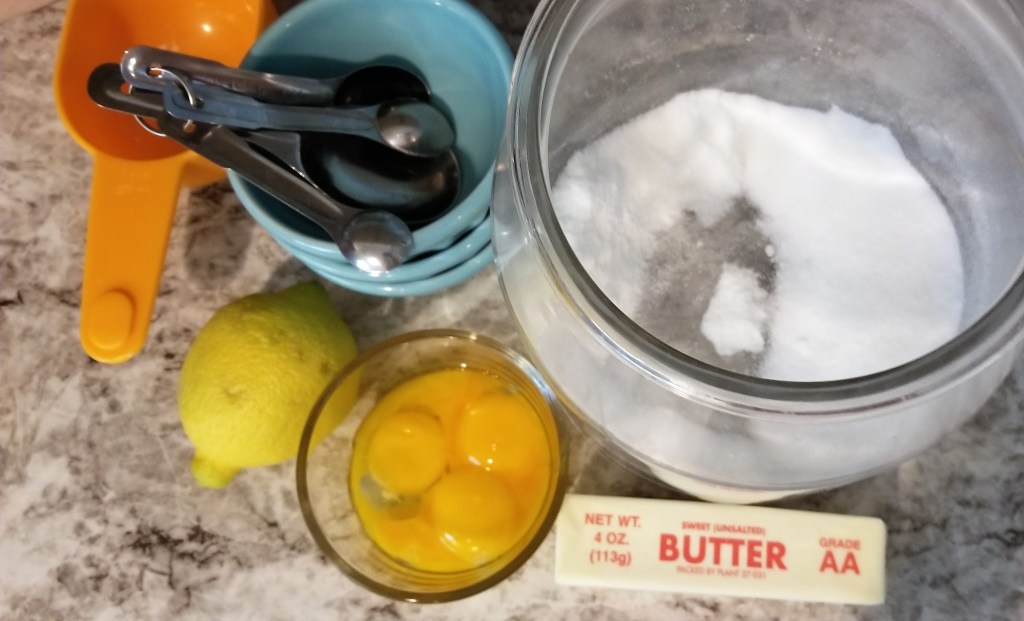
You will need:

  • Heavy Whipping Cream
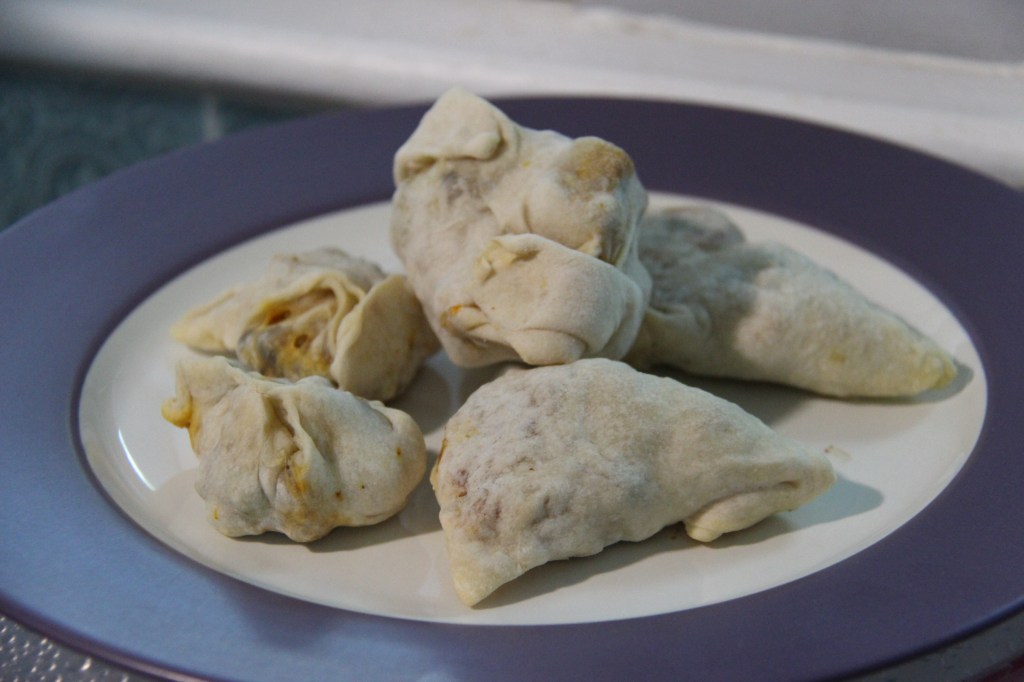
  • Sugar
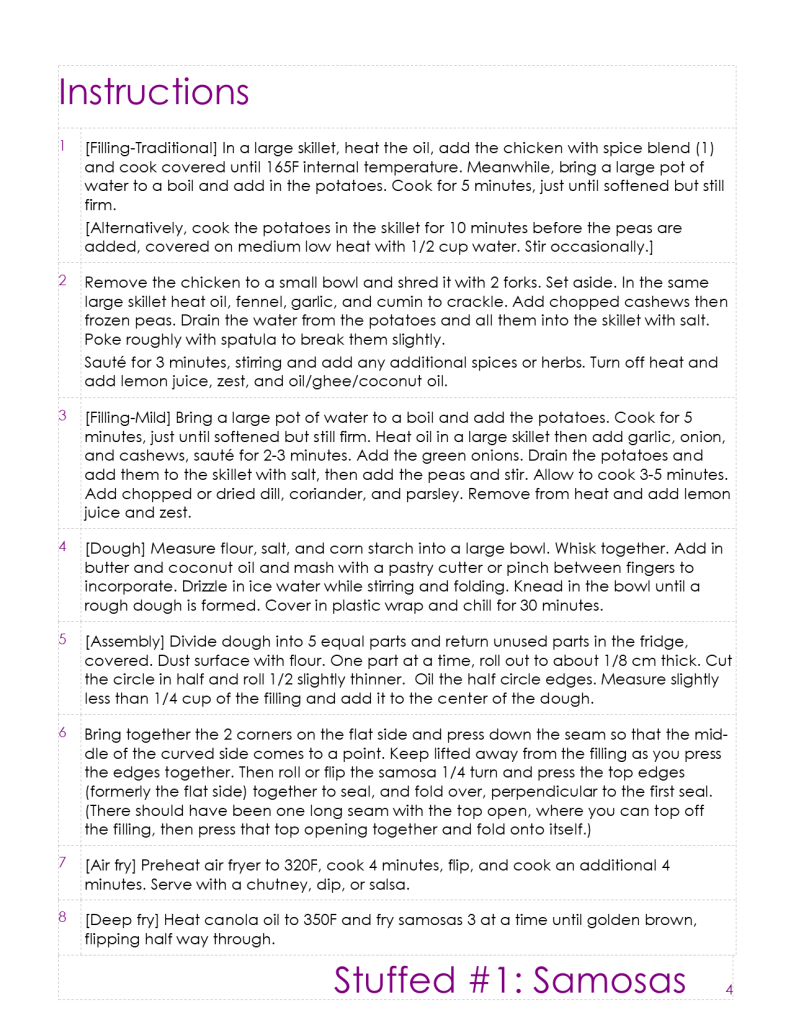
  • Vanilla Extract [Optional]
  • Dash of Salt [Optional]
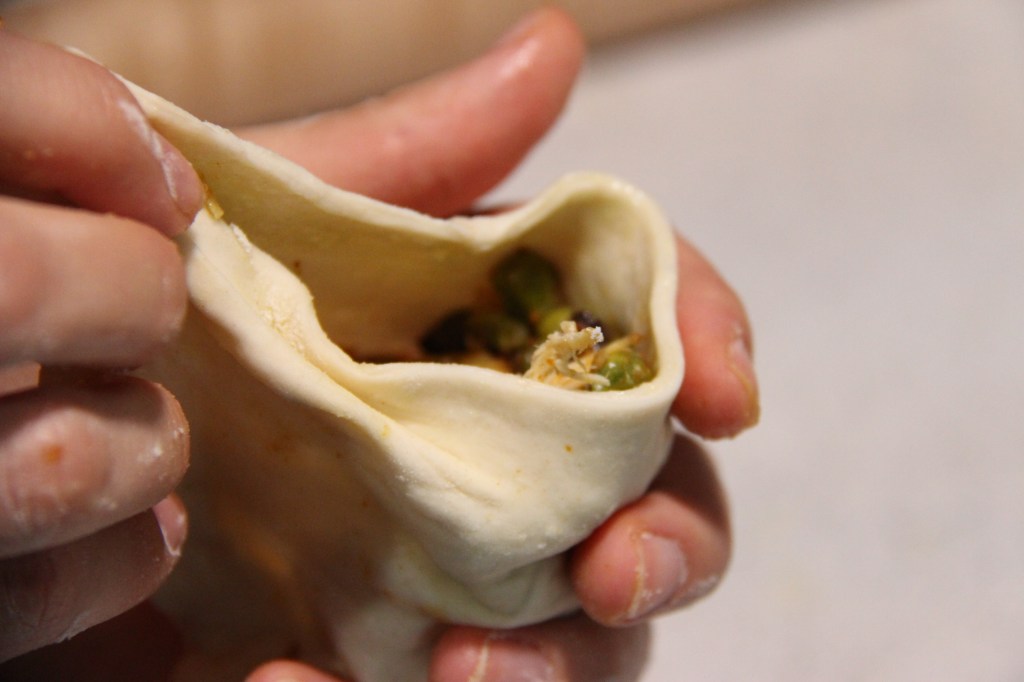
  • Food Coloring [Optional]

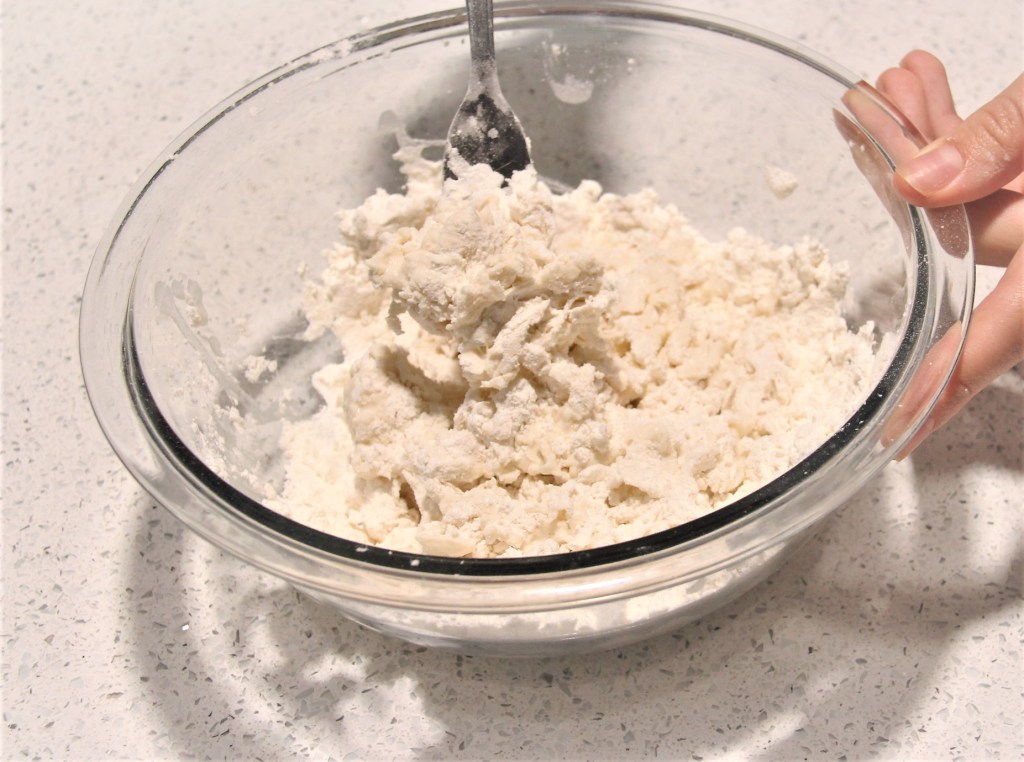
Pop a metal bowl, preferably a stand mixer bowl, and whisk attachment in the freezer while you collect the ingredients. A few minutes in the freezer will suffice to make sure the bowl is very cold or even icy. Pour as much cream into the bowl as the recipe calls for (1/2 to 2 cups) and turn the whisk on. Let the hand or stand mixer whisk the cream while slowly adding sugar (1/4 to 2/3 cup). Sprinkle the sugar in while the whisk whips air into the cream. It will grow and become light and fluffy. Once all the sugar is added, pour in 1/2-1 tsp vanilla to taste, dash of salt, and any jolly food coloring. After a few minutes the cream will be whipped and able to keep its shape. Stop once it has reached a fluffy consistency, do not over-whip. It will be chunky, thick, and like curds if over-whipped.

If you over-whip, simply drizzle in more cream while the mixer runs on a low speed. It should return to an airy state and loosen.

Transfer the cream to a pipping bag fitted with a fun tip (star tip is popular) and pipe it onto your carb. Top with chocolate, preserves, candied nuts, or the works! Keep leftovers in the fridge for up to 3 days.

Ways to use left over whipped cream:

  • pancakes
  • ice cream
  • chocolate cookies
  • cookie cake / angel food cake / shortcake
  • neutral or sweet biscuits with preserves
  • pudding
  • pies / mini pies
  • in custard to make a light cream (crème légère)
  • eclairs / puff pastry
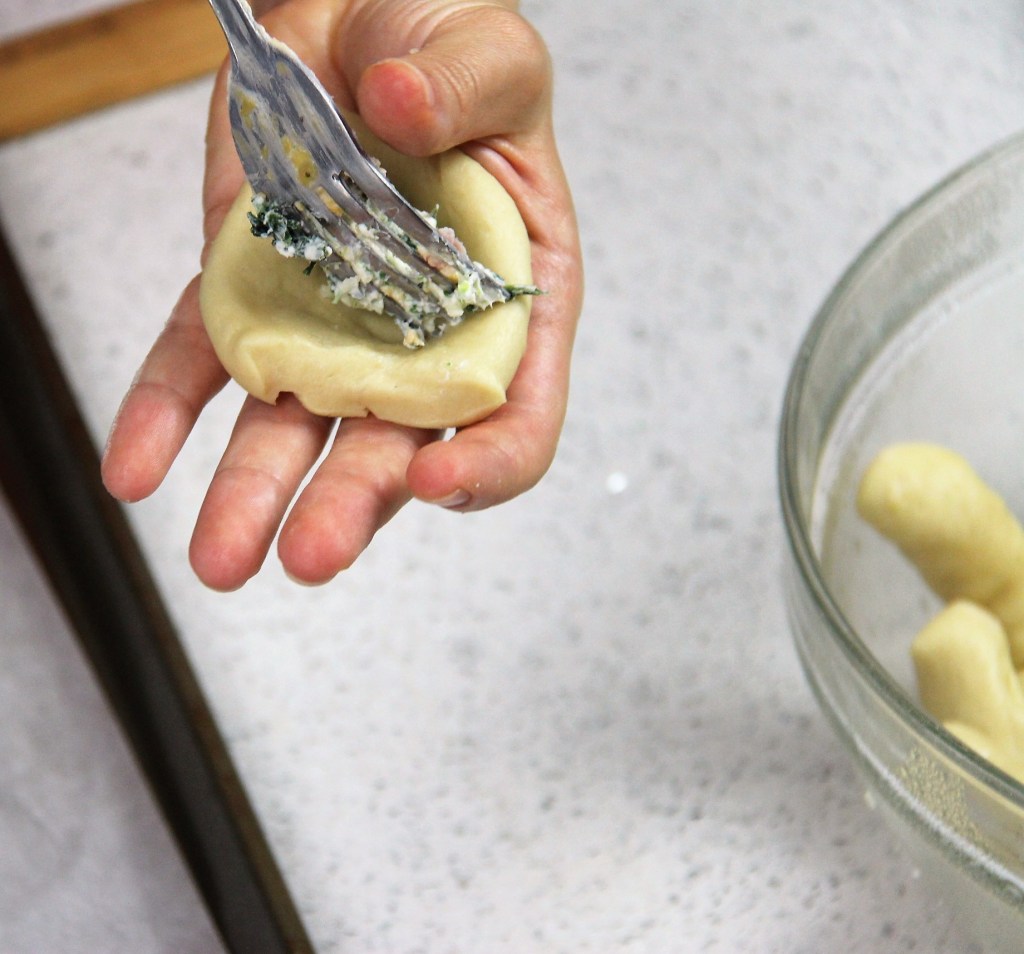
  • doughnuts – bomboloni
  • crepe
  • coffee / hot chocolate
  • yogurt parfait
  • in tomato soup (substitute some of the milk)

Take-Home Tips: If you want to use the cream as a topping without sweetening it, perform the same whipping steps, omitting the sugar. I would still recommend the vanilla and less of the salt.

Ingredient #1 – Lemon Curd

Lemon flavored anything is a win. End of story.

It was only about six years ago I heard of lemon curd for the first time. My roommate and I were making a braided puff pastry log filled with cream cheese and lemon curd. It has since become a favorite and we make it way too often. If you use frozen puff pastry (which any baker who values their time would use) then it is a simple, elegant, 100% success rate dessert for breakfast, lunch, or dinner. When my roommate sent me to the store to purchase lemon curd I had never heard of it, never seen it, had no clue where its lemony goodness would be located. This was the same trip I learned about cream of tartar (no connection in the recipes) and had to seek professional assistance in the Kroger. The stockboy and I traveled up and down the isles looking for these two ingredients that I could not even describe to him.

I’ve come a long way.

Now that I know that lemon curd is a delectable, fresh topping for all kinds of desserts I surprisingly get really annoyed at buying it. My store sells these tiny jars for almost $4 for the Dickinson and $8 for the Stonewall. The store kind is also embodies more of a gelatin consistency and color whereas the homemade embraces the curd idea a bit more. The difference is subtle, but considering it would almost take you longer to walk across the supermarket to get the curd than to just make it yourself, it is an ingredient worth making.

Give yourself 5 minutes for homemade lemon curd and you will be ready for all the happy, fresh citrus goodness. Also, the egg whites and rind of the lemon have too many other uses to not take advantage of the opportunity.

What is in lemon curd?

  • 1 lemon, juiced [or 1/2-3/4 cup of lemon juice]
  • 4-6 egg yolks
  • 1/2 cup sugar
  • Zest of 1 lemon [Optional]
  • 1 tsp vanilla extract [Optional: to bring out the flavor]
  • Dash of salt [To bring out the flavor]
  • 1 stick butter, cut into ~8 pieces
  • 1 tsp cornstarch [Optional, I do not used but it will thicken lemon curd if needed]

How to make lemon curd?

  • In a pot crack 4 to 6 egg yolks, depending on the size of the lemon.
  • Add lemon juice, sugar, and salt. [Optional: vanilla and zest.]
  • Whisk steadily over medium-low heat until the sugar dissolves.
  • Whisk in the butter pieces until combined.
  • Remove from heat, continuing to stir. [Option to strain through a mesh sieve if seeds, pulp, or zest remain.]
  • Transfer to a 1 cup Pyrex (or similar) storage container. Cover with plastic wrap, so that the plastic is touching the top of the lemon curd, until cooled. Refrigerate until ready to use. Use warm or chilled.

How is lemon curd used?

  • Deserts and pastries mainly. It is a topping or a filling and can be baked or eaten chilled.
  • In pies, with mousse, on pastry, in pastry, on cookies, pairs well with meringue, lemon bars, with cream cheese, in scones, on or in cake, to fill donuts (or bomboloni), to give as a gift or in a gift basket, and so much more!
  • In practically any lemon flavored dessert or to incorporate a yellow color.
  • Makes your kitchen smell fresh.
  • Replace the lemon with other citrus fruits – orange, lime, or tangerine.

August is for Ingredients

Too many recipes call for special ingredients that require a grocery trip and added expense. My heart sinks when I look up last minute dinner ideas and realize I am missing a key item which I generally purchase. The new and interesting recipes either never come to fruition, or revert back to the basic meat, grain, vegetable. What are all these cookbooks for if I can’t simply whip up a recipe from my pantry?

I often reflect on some items on the “what you’ll need list” and how they ended up in the kitchen centuries ago. To make a cake for Marie Antoinette, farmers would have had to grow (soft) wheat and other grains, pay a miller to mill the grain, after manually harvesting and purifying. At the millers it would age for a couple of months to dry and whiten before being transferred into sacks (for private millers) or barrels (for commercial millers). All this happens before it ever reaches the counter.

An illustration from The Young Millwright and Miller’s Guide, depicting the processes of an automated grain mill. (From the collections of Henry Ford Museum & Greenfield Village.)
Read more

Although I am not interested in pursuing a career in flour production industry, there are other key ingredients that are simple and sometimes cheaper to make at home. Besides cost, there are other reasons you might be interested in making your own ingredients: special or restrictive diets (i.e. clean eating and Whole30, vegan or vegetarian, and allergies to additives), to know or learn the composition of foods, for the experience, to modify or make it your own, in order to limit the quantity of the ingredient or reduce packaging and waste, or even to prepare dishes in the future without running to the store for one item.

For August we are going to focus on some popular, or special, ingredients that pop up in recipes which you can make at home. Never again will you buy a quart of buttermilk only to use 1/2 cup in your pancakes. You will be able to whip these foods up for any opportunity that arises or contrived for spontaneous dinner recipes. Knowing how to turn your more commonplace pantry and refrigerated foods into packaged ingredients will turn challenging or inconvenient recipes into multiple easy meals.

Stuffed #5: Doughnuts and More

A reflection on stuffed foods.

We have visited a version of the doughnut before, back in February we tackled bomboloni. However we want to share a reminder that there are endless stuffed food we enjoy across all cultures. Italy might boast donuts and calzones, Portugal introduced us to the empanada, there is the hibachi favorite gyoza from Japan, not to mention every culture seems to have a form of dumpling perfected and iconic of their traditional foods.

There is an unfathomable abundance of stuffed foods around the world. It begs the question around why. We learned that stuffed foods are not necessarily easier to make – dumping the ingredients on top would surely be easier. For the most part the innards escape as soon as the crust is broken. Encasing the mince of the filling in the smooth, pale golden crust certainly makes it look more appealing. Like with fashion, the ascetic of food is a crucial part of modern cooking. If it is not Insta worthy, why make it at all? The effort put into each dish is often linked to a motivation for displaying or sharing it with friends, family, or guests.

Whether or not the result is worth the effort can only be determined on the individual level. I recently made Texas Roadhouse copy cat rolls and the perfectly paired whipped butter. It was fun, relaxing, took almost no time at all, and tasted great. To me it was definitely worth making for her enjoyment. When I presented them to my friend to serve at our dinner party, she was flabbergasted. As a new mom, she could not fathom spending “3 hours” (including the prove time, about 1 hour active) making rolls. To her, it not only was not worth the effort, it would have seemed an impossible task.

For the most part, my husband and I agree that stuffed foods are not necessarily better, tastier, more enjoyable, or even that much more appealing to the eyes than all the ingredients served next to each other. We often make creamed spinach stuffed chicken which involves butterflying, tenderizing (with a hammer), and mixing a cheese and spinach sauce together to stuff inside. The chicken is then sealed and baked. Before we perfected the method, the cheese sauce would seep out during the bake. We found a solution to that one, but without fail, the stuffed chicken cannot hold itself together when sliced with a knife. The filling spills out over the dinner plate and we always end up just piling it (and the left over filling) on top and eating it that way. All that effort and still an annoying mess on the plates.

On the other hand, certain pastries or baked pockets, such as calzones or ravioli, bring purpose and ease to eating meals. When it solves a problem such as eating food on the go and saving the mess in the car or on the shoes, then stuffed foods might just be worth it! Stuff the food that make the most sense or are practical. With the others, learn to display the ingredients elegantly.

Leave a comment if you would like me to share any of the recipes for the dishes listed in this post.

Stuffed #4 – Pierogi (no egg)

Ravioli style pierogi (optional)

In case you have not been exposed to my theory on dumplings permuting every culture, in their own versions, pierogi are an exemplary example of Polish dumpling magic. Please comment below if you know of any cultures which you are certain do not claim a traditional dumpling-like dish.

Our intellectual friends define the dumpling as

noun
1. a rounded mass of steamed and seasoned dough, often served in soup or with stewed meat.
2. a dessert consisting of a wrapping of dough enclosing sliced apples or other fruit, boiled or baked.

Dictionary.com

Steamed or boiled, the dumpling is best described as stuffed dough surprising humans with its versatility for centuries. Chinese dumplings as well as American dumplings spell it out in their title, but the German maultaschen and knödel, Italian ravioli (I mean, aren’t they?) and culurgionis, madombi, my old roommate’s favorite – empanadas, and the heavenly khinkali all represent their cultures in dumpling form. Each stuffed dough is a treasure and a treat.

Time to stop drooling and focus on potato stuffed pierogi!

Did you know Pierogi is plural and there is no need to add an “s” to the end? Americans are fond of throwing esses to the ends of words, and when Polish is not a popular language across this country, pierogis in the American vernacular can be forgiven. Now you know though, pieróg vs. pierogi.

We make homemade pasta a couple of satisfying times a month in our house. The formula is easy: flour + egg + salt + oil. Viola! (or whatever the equivalent is in Italian.) For pierogi dough used to always make it the same disappointing way, often times the crimped ends would cook to be too chewy or hard for our tastes. I researched alternatives and solutions and learned that in Poland, where grandmas also do not measure their dough ingredients, there is debate about whether the dough should be made with or without egg.

As the title of this post spoils the suspense, I will go ahead and tell you what we tried and why I recommend no egg. The challenge the no egg method presents is that extra care needs to be taken to build the gluten in the dough. While pasta does not generally require heavy gluten build up, the no egg pierogi dough can be very supple, and almost melt in your hands. It needs to keep some structure in order to hold the filling and travel from the counter to the boiling water.

Although slightly more effort might be needed to keep the dough from sticking to the counter or from avoiding the desired half moon shape, the results more closely resemble restaurant pierogi than the version with egg.

Take-Home Tips: Take care to knead this dough thoroughly, several minutes at least, to build gluten. Mind the water temperatures, and try not to exceed them to help. Heavily flour your surface before rolling out the dough and use a bench scraper if it sticks. If the dough becomes frustrating, fold it around your filling until it is covered, regardless of the shape and rest assured it will cook and taste the same. When cut, if the rounds are too soft, it is best to leave them uncovered to dry.

No cookie cutter, no problem! Use a cup (plastic probably best), mason jar lid, small bowl, or even free cut them with a knife. Just make sure whatever you get creative with, that you clean it beforehand. As you can see from the photos, we made half of them in the ravioli mold – as a demonstration for our dinner guests. Do you call them potato stuffed ravioli? We ate them along side our pierogi and were very pleased.

For the filling, create your favorite, flavorful potato recipe, or go wild and crazy with a new version. It is best when over salted or seasoned. It was almost lip-puckeringly salty and we still could hardly taste the seasoning in the final product. It is best to keep it on the dryer side; there is no need to add milk or sour cream to these potatoes, as the cheese and butter will add enough moisture.

Ground turkey in a beef broth and bolognese sauce for the side

Scoring: 9 of 10. Taste, texture, tincture and touch (eh, C effort there) combined to form the best pierogi yet. The preparation took a negligible amount of time that our dinner guests were able to join us for the whole process: dinner and a show. Make them ahead, freeze before boiling, and it you can start the water boiling when your guests pull in the drive way. Scrumptious, filling, easily made vegan (cheese is not required but could add nutritional yeast, maybe substitute some vegan butter), and serve with vegetables for a lighter take.

Stuffed #3: Calzones

Imagine gracing the streets of Naples with your esteemed presence when you pass by a stand-alone stall selling, what looks like, could it be, pizza? No certainly not, there is too much crust. You approach the stall and overhear the owner’s son describing their food as a pizza turnover. It has all the best parts of a pizza, but it is folded, exposing only the crust to save the toppings from falling away. The only acceptable reaction to such brilliance is to marvel at their invention! A pizza that can be taken to go and eaten on the beach without worrying about the birds plucking away or drawing close for the runaway tomato that fell off.

While the calzone most likely evolved from a folded pizza sold at a cart on the streets of Naples, we are assured of the ingenuity. Stuffing all the toppings inside, converting them to ingredients, retains all the favorite flavors of pizza with greater possibility. Everyone has their sworn by method for eating pizza (e.g. flat, folded, or forked), but the calzone was invented to fulfill a need – eating on the go. Once it is cool enough to dive in (patience has never been more trying) pick up your stuffed dough and test this method for keeping the stuffing inside. Although in theory, it is folded pizza, you are going to want to double check your seal before starting the calzone trials over grandma’s white sofa.

Instructions:

  • Begin by making the best simple pizza dough recipe from last July. Once that proves over night (for the flavor) divide into 5 equal portions, depending on your generosity.
  • Let each dough section rest on parchment paper for 5-10 minutes.
  • If using a pizza stone, place in the oven per manufactures instructions (likely 450-500F).
  • Roll or spread it out with your gentle fingers. Toss it like a pizza if you have that skill. Make a large round with the dough about 1/4″ thick – fairly thin but no holes.
  • If baking on a baking sheet rather than a pizza stone, preheat the oven at this point to 450F.
  • Starting with the sauce, pile in your favorite dry toppings (to avoid adding any more moisture), leaving room around the edge to seal.
  • Fold in half, pressing and folding the edges to ensure a solid seal (for the sofa test later). [Suggestion] Use a fork to crimp the edges if the dough is thin enough, otherwise folding the bottom over the top works well.
  • Lightly coat in an egg wash and sprinkle italian seasoning on top. Cut 2 slits in the top to ventilate.
  • Bake on the parchment paper (with or without a preheated pizza stone) on the bottom rack for 15 minutes.
  • Allow to cool thoroughly before devouring with additional sauce if desired.
Plus 2 to 24 hours proof

Stuffed #2: Pretzel Bites

Spinach Cream Cheese Stuffed Pretzels

When served in a restaurant, the soft pretzel is displayed in all its salty glory on a board or plate with cheese dip or mustard. Although breaching perfection as it is lowered down to the dining table, there is the opportunity to consider the possibilities. What if there was no need for a dipping sauce? What if the cheese or sauce came already stuffed inside?

Possibility has turned into reality! Inside-out soft pretzels are packed with cheese, which delightfully oozes out during their short bake in the oven. Toss out the Hot Pockets and prepare your pallet for the salt, the savory, the splendor of the perfect crust concealing melted goodness within its walls.

The filling options are endless. The plethora of cheeses the fromager has to offer the pretzel world has already filled us with excitement for the surprise bursts of flavor locked in the pretzel bite. Until that first exposure is made through a tentative nibble, it would be challenging to guess the type of cheesy filling. Could it be feta and herbs? How about Gruyere, white cheddar, and Parmesan for a light three cheese? There is also the classic cheddar, bacon and dried onion stuffing which is sure to be a crowd-pleaser. If the hard stuffed pretzel snack Combos has taught us anything, it is that the cheese stuffing inside makes all the difference in this salty snack. Also in the savory world, turn the pretzel bite into a jalapeno popper, with a better exterior. Honey mustard and finely diced chicken could make these a satisfying meal. Go Italian with a touch of tomato sauce on fine Italian sausage crumbles and spinach.

Breaking away and expanding beyond cheese will lure the senses past convention. Chocolate and peanut butter would fit right in, then the other smooth nut butters can certainly join or replace. Likewise, a hazelnut spread would be similar enough to work. It would be simple and fun to turn your favorite chocolate (filled) candies into pretzel bite filling. Sweet and salty were meant to reign supreme.

How do you stuff your pretzels?

Bonus recipe opportunity: Hot dog pretzel buns! Comment below if you are interested in inspirational hot dog buns made of pretzel.

Take-Home Tips: It is important not to over prove the dough, however it can be made ahead of time and stored in the fridge to prove for up to 24 hours. The flavor will develop, but once the dough is formed, take care with proving thereon. Bread flour, or flour with 12-14% protein, is necessary to give this dough the structure it needs. When you do not have access to bread flour, substitute part of your low-protein flour (all-purpose) and create a high protein blend. To do this there are 2 simple steps that involve some math(s).

Calculating Protein Flour Blend Ratios

Step 1: Determine the % protein in the flours.

From the nutrition label, take the (protein in grams per serving x 100) / total grams in a serving.

  • For example: Walmart brand all-purpose flour has 3g protein per 30g overall serving size.
    • (3g x 100) / 30 = 10% protein content

Step 2: Calculate the ratio of each type of flour.

It may look complicated, but take a moment to read through and it should become clear. The goal for this recipe is a 14% protein blend. We need to determine how much of each type of flour to use. Take the higher % protein flour (calculated in Step 1) and add the % to the top left of the tictactoe board. The other (lower) % goes in the bottom left. The goal goes in the middle (14%). Find the difference diagonally, in this case 35-14=21 and 10-14=21. Take the total of those parts, the total grams of flour needed, and the parts per flour type (in this case all purpose and soy) to proportionally find the missing part. Below the total flour (480g x 4 soy flour parts) / 25g total parts = 77g of soy flour needed. Perform the same calculation but replacing for the AP flour to get 403g. We will round 80/400g for simplicity. The ratio is then 1:5, 1 part soy for 5 parts flour.

Scoring: 8 of 10. Immediately the alkaline baking soda flavor attacks the tongue, but is equally as suddenly forgotten when the filling rushes to replace that strong taste. The opportunities abound with filling ideas. They are great warm, room temp, for snacks, or a bunch for lunch.

Stuffed #1: Samosa

I was first introduced to samosas last year when my Indian colleagues produced them during Diwali. Why some variation of them are not a traditional part of American Thanksgiving, I will never know. Imagine mashed potatoes and stuffing inside a deep fried dough. Add the right spices and you basically have samosas. Incorporate shredded turkey and this would be a great way to use those leftovers.

Describing how to fold the samosas for that classic shape is not an easy task. It took several tries to get it right even after watching my colleagues demonstrate. Do not give up! Watch a video and master through practice.

Take-Home Tips: The ingredients are suggestions, feel free to use all, none, or throw darts to select your spice. I highly suggest some kind of chutney or my Summertime Dill Dip as they can be very dry when air fried. Your option to replace all butter with ghee (more traditionally Indian) or vegan oils.

Scoring: 6 of 10. Samosas are not a personal favorite, however they are much better deep fried than air fried. Although healthier in the air fryer, they will need assistance with how dry they become. Be generous with the garam masala for a more authentic touch.

Spices are up to you!

Bring the Heat; Bring the Celebration

July marks our 1 year anniversary at DelightMeMonthly! Celebrate with us as we stuff the world with happiness.

During pastry month (check out June’s blog posts) we discovered some traditional recipes targeting each of the 6 internationally popular types of pastry. It got us thinking outside of the box at creative alternatives to these tried and true recipes. How can we improve, revamp, and recreate these recipes with a modern twist? What else can we stuff them with for an ideal full-mouth explosion?

Roll over November because July is taking the stuffing over and shedding a whole new light on fillings. Reflect on your favorite filled food. Is it savory? Is it sweet? Does your mouth come alive with a kick of spice, or does cream spill out of it when you take a bite? Share your favorite treasure chests with us and we will unlock the secrets of the stuffing within.

Read on for a twist on these classic fillings.

Prost, cheers, salud to your support in our first year.

Vinegar for Pastry

When adding vinegar to pastries, such as puff or filo pastry, which vinegar you apply can make or break the structure. The acid can be incorporated into the dough, to tenderize and relax the gluten built up. The acid found in vinegar is preferred over stronger or weaker acids found in other products or foods because a small amount will not be detectable by the tongue. Considering the word vinegar derives from the French word for ‘sour wine’, unsurprisingly vinegar is often made from wine.

Both pros and cons, vinegar can uniquely influence the flavor, texture, and color of your recipe. While a limited amount can lighten the texture and flavor, a generous helping will convince the tongue of the acid’s sourness as well as weigh down the puff. The amount of acetic acid in vinegar helps distinguish one from another, with the pH scale applied for everyday understanding. However it is more precise to measure the acetic acid. The percent acid is defined as the number of grams of acetic acid per 100 mL of vinegar. 1

  • White (Spirit) Vinegar: more pure (clear). Sugar cane + fermentation. Great for cleaning. 5-20% acid. 2
  • Distilled Vinegar: from ethanol; liquid is separated from the base mixture. Can be made from a wide range of foods: rice, wine, apple cider, cane sugar, honey, coconut, kiwifruit, etc. Flavor not muted by other acids. Best for cooking. 5-8% acid.
    • White Wine Vinegar: from white wine + bacteria fermentation. Milder, but more tangy than other vinegar. Use for tenderizing meat, stews, and Hollandaise sauce.
    • Red Wine Vinegar: tartaric acid helps mute the acetic acid flavor. Grape selection can specify the varietal vinegar.
    • White Rice Vinegar: from fermented rice wines, typically found in Asian cuisine (soup and stir fry) and salad dressings. Often flavored because the flavor is weaker, sweeter than other vinegar.
    • Apple Cider Vinegar: the highest acidity, strong green apple flavor (malic acid). Commercially filtered with a clear light brown color while naturally cloudy when unfiltered. Often used to pickle fruits.
  • Others: Cane, Malt, Balsamic, Sherry, flavored vinegar

For pastry, apple cider vinegar makes the strongest impact. If the vinegar does not have a sufficient level of acid for the protein in the flour (which builds up the gluten) then the impact will not be noticeable. If you tend to overwork any dough, add a tablespoon or so vinegar to try and counteract that damage. It also reduces the oxidation (discoloring).

This multi-purpose acid is as diverse as it is useful. Use it to bake, make cheese, poach eggs, make meringue, marinate meats, clean your shoes (ammonia-free), heal minor ailments (athlete’s foot), remove stains and smells (especially left from cats), and even to destroy weeds. Use the acid in vinegar to reduce the enzymes that brown cut fruits such as apples. The opportunities seem endless.

Design a site like this with WordPress.com
Get started