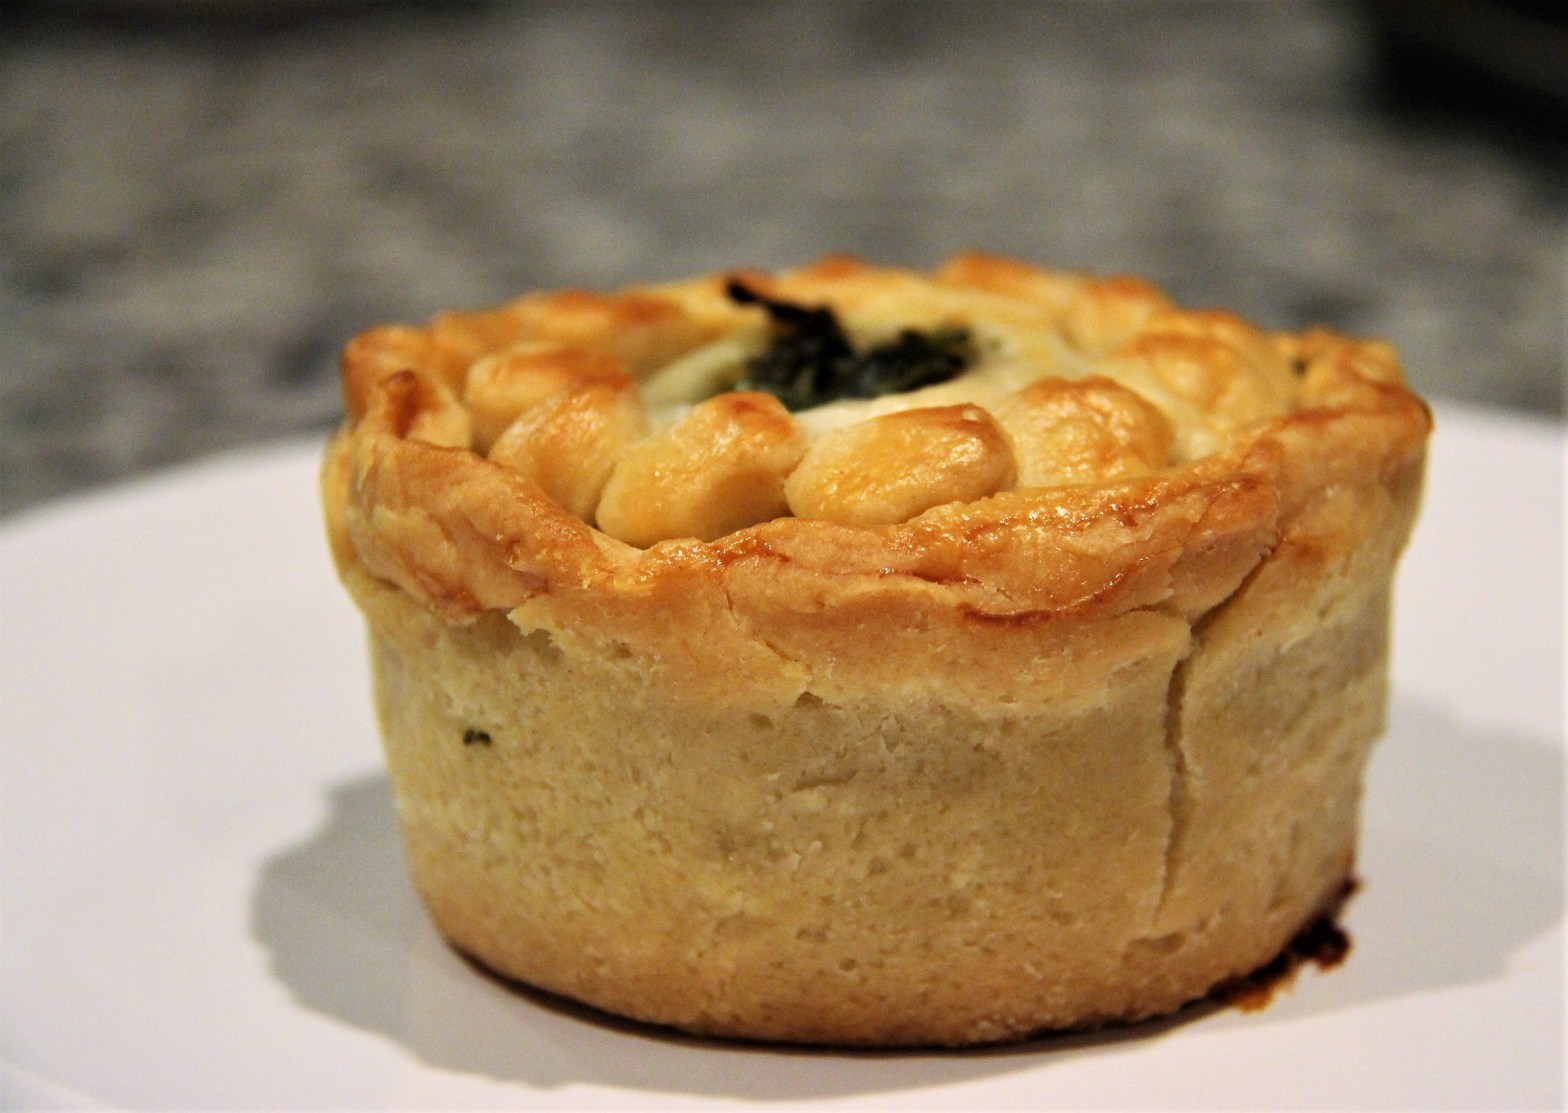
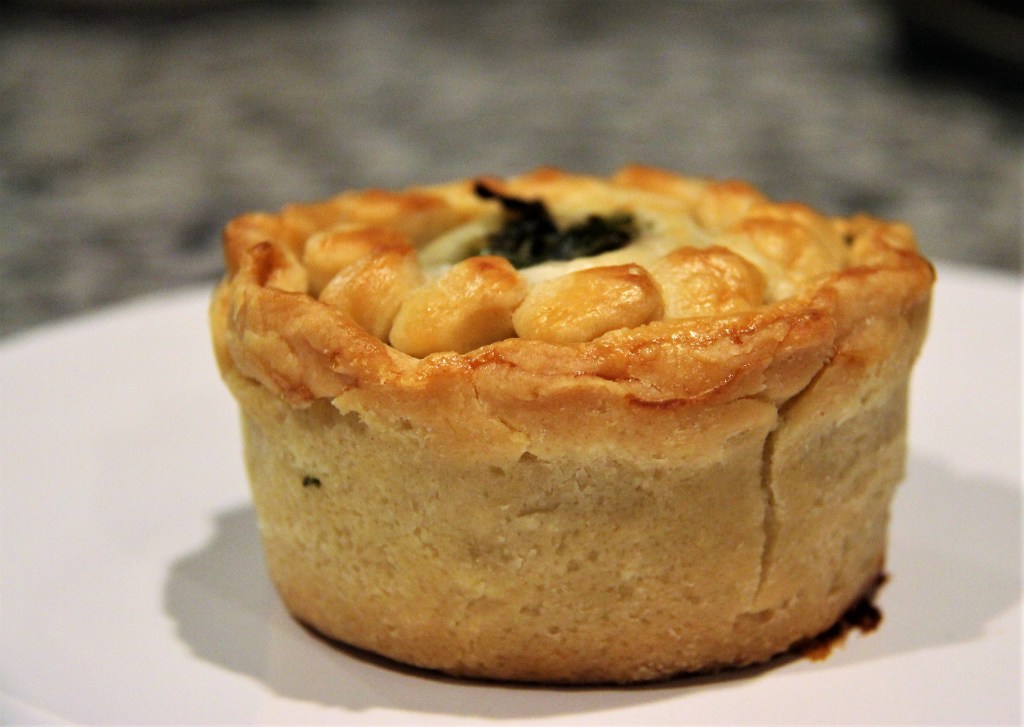
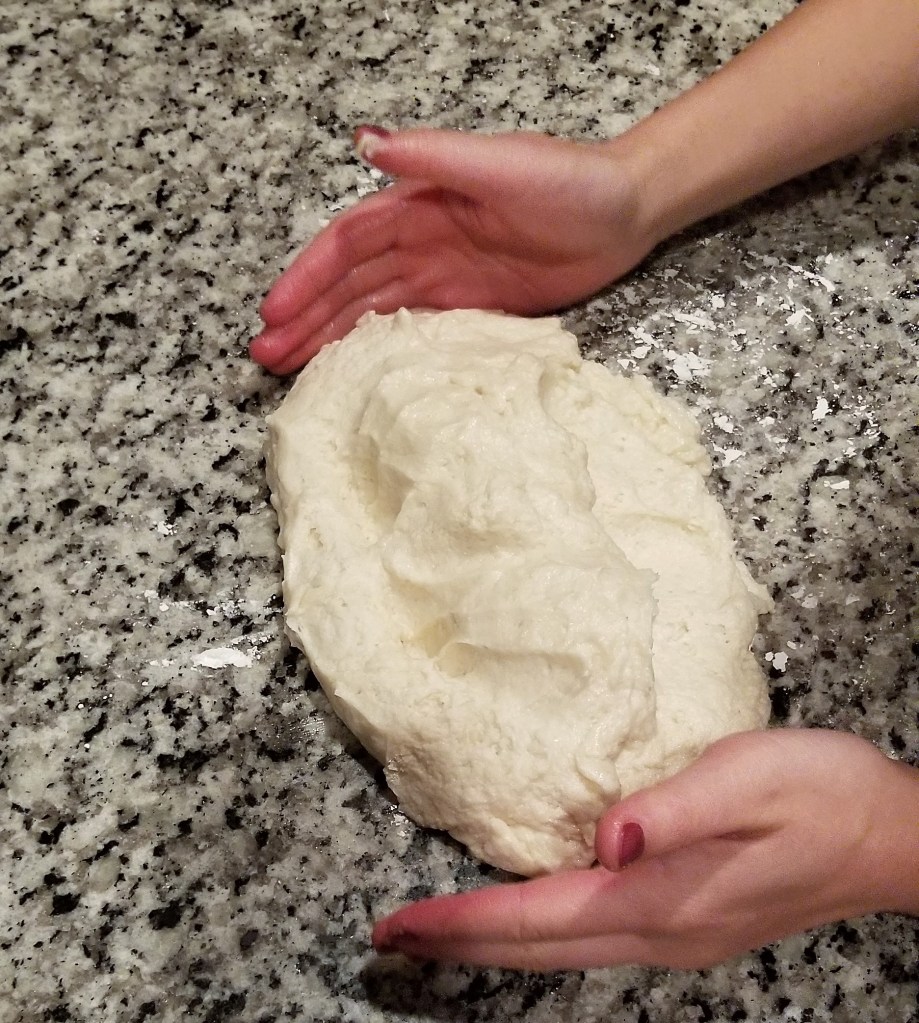
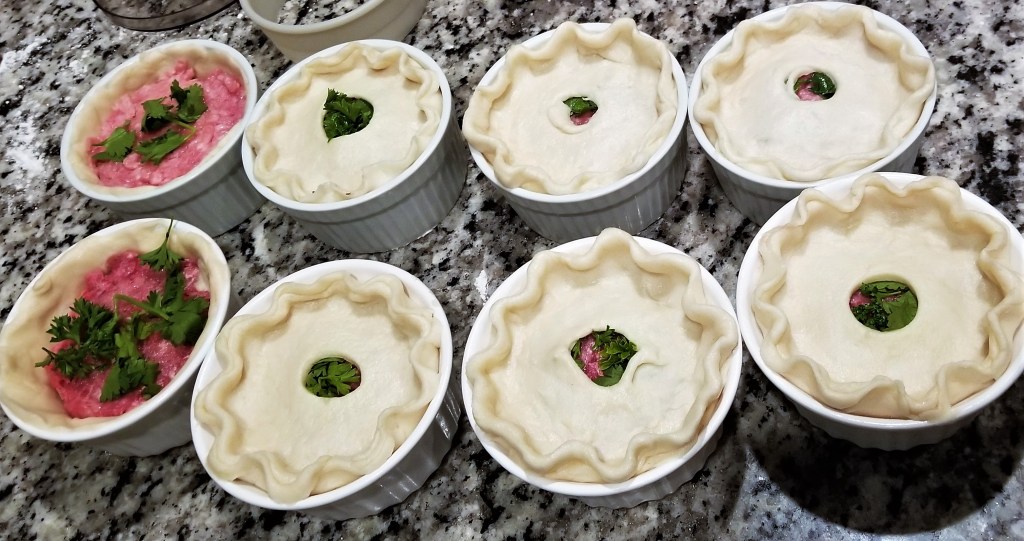
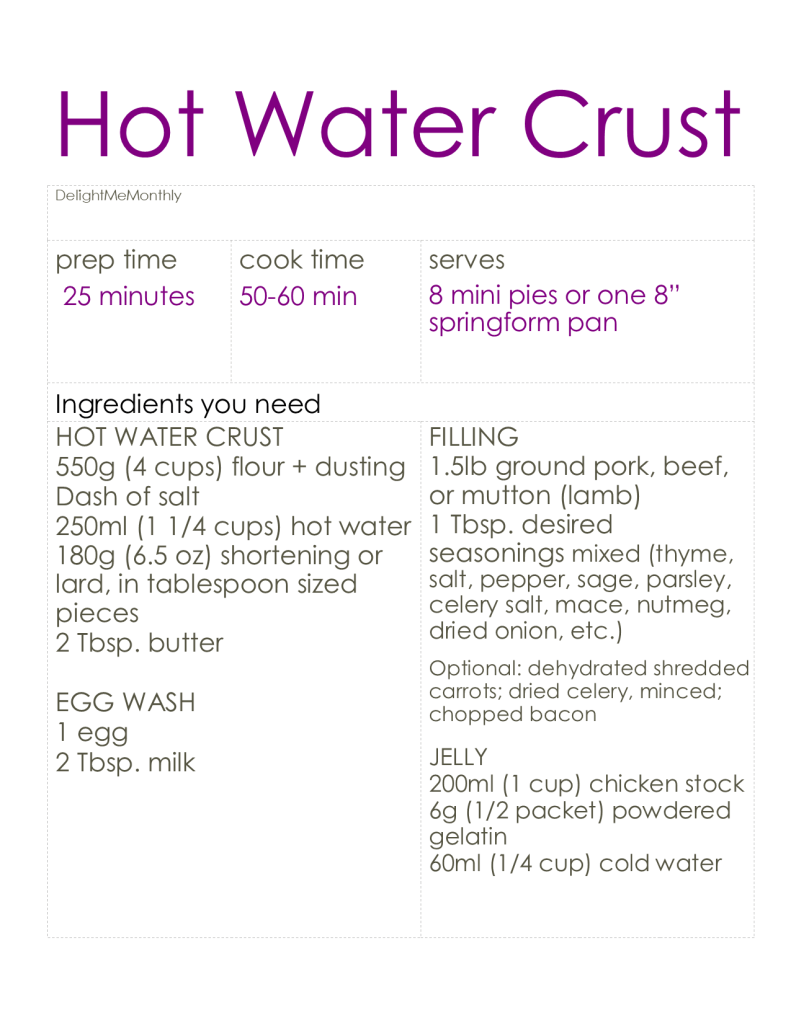
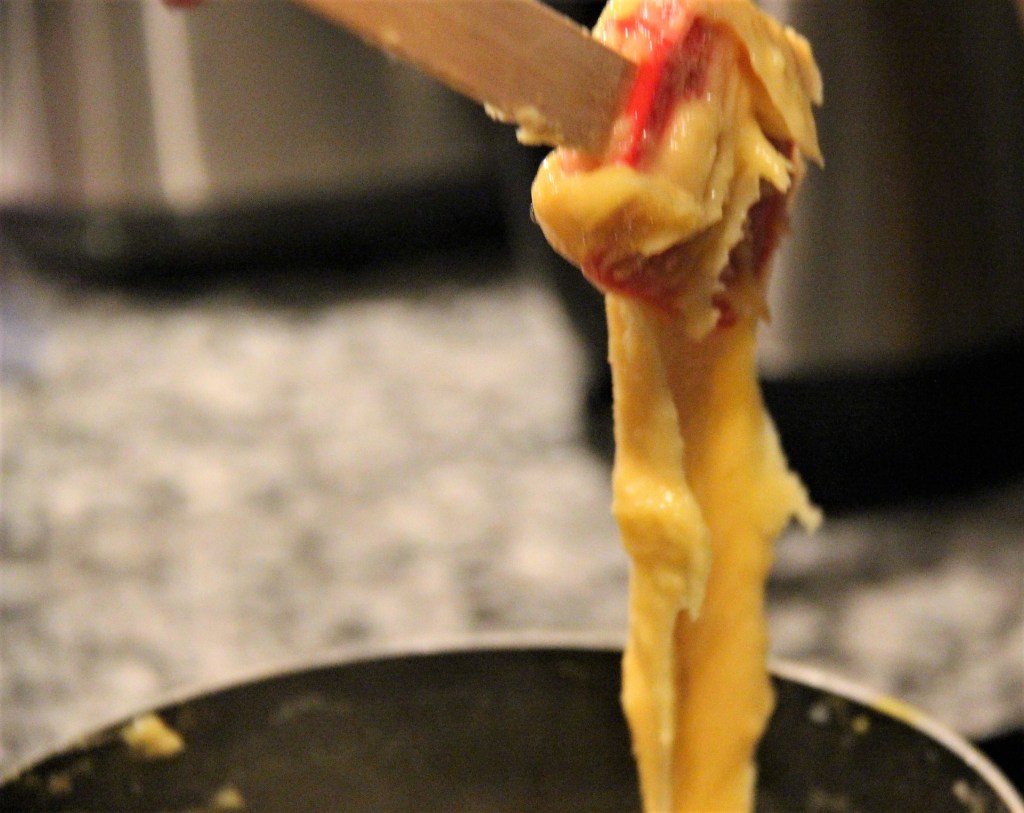
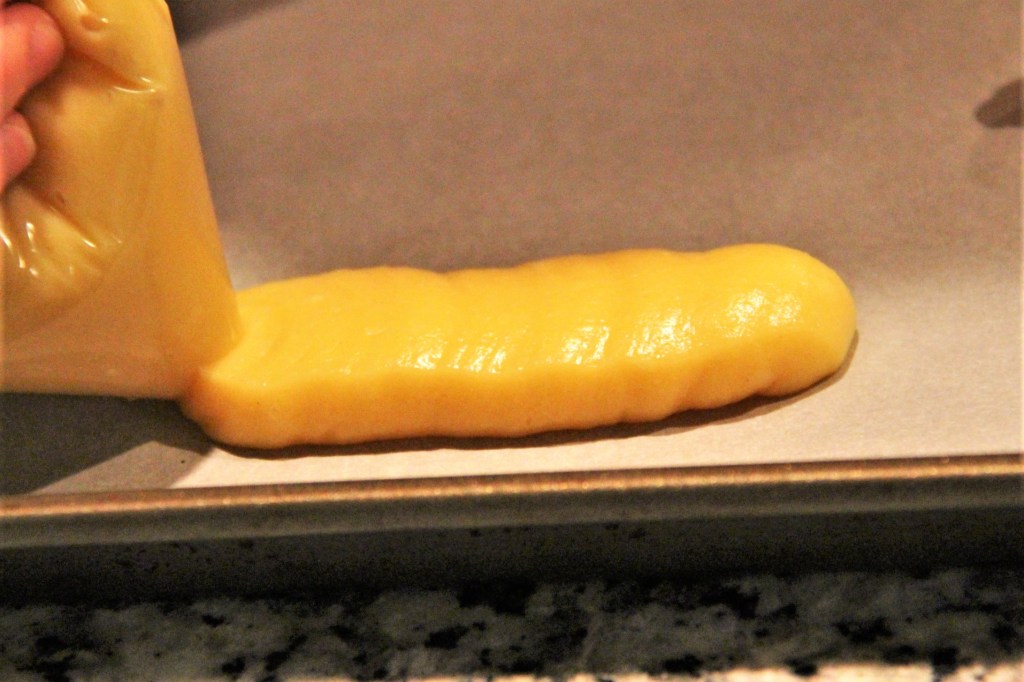
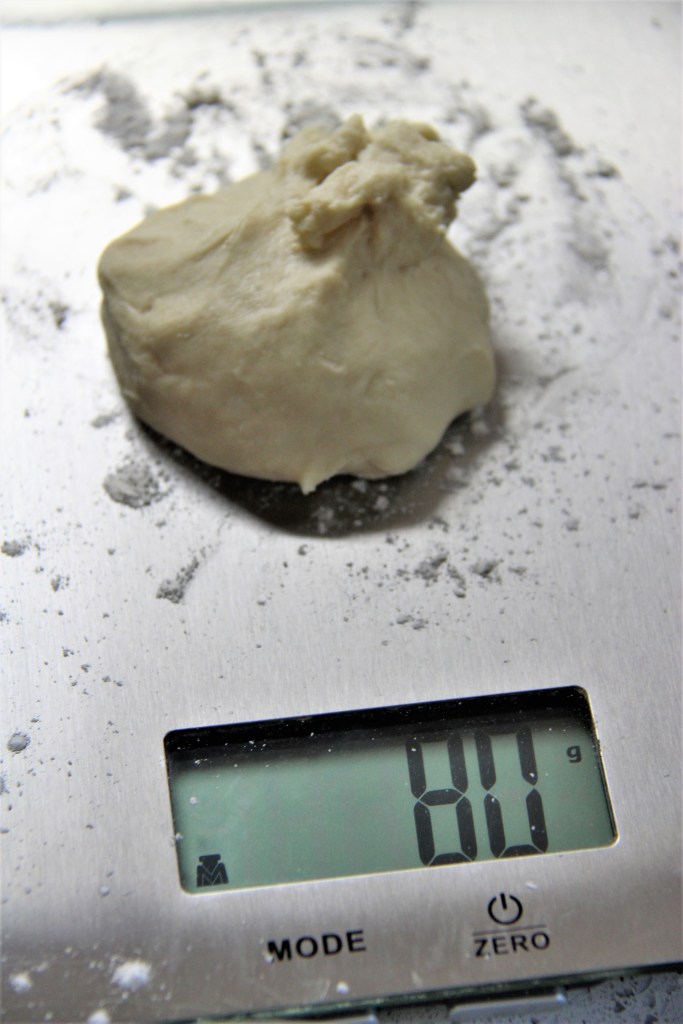
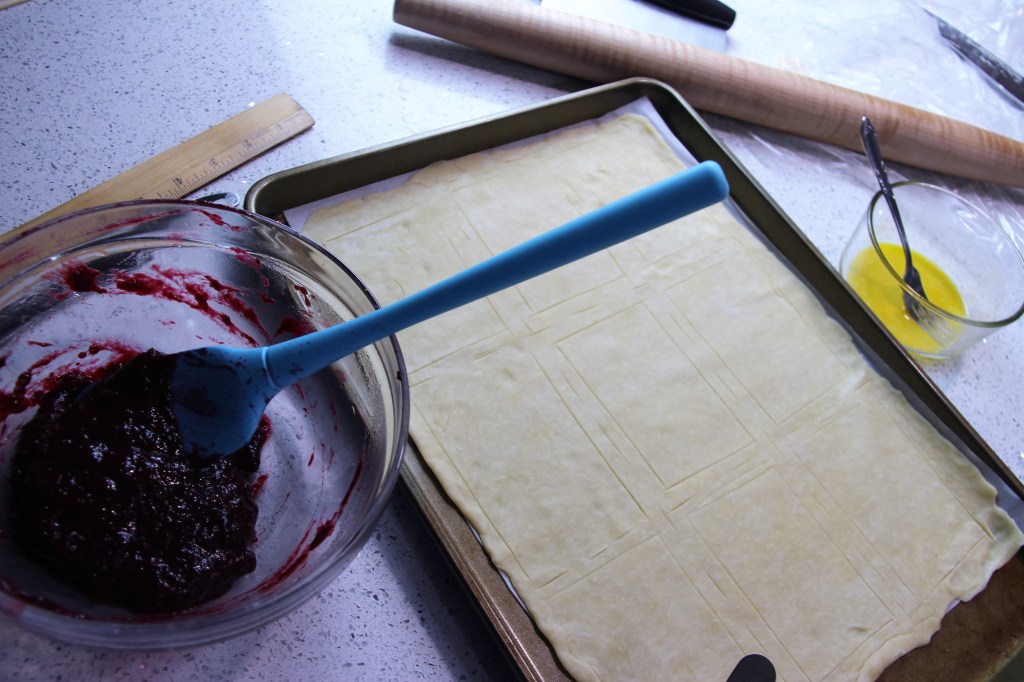
The tradition behind hot water crust pastry is for use in making game pies without a mold. The lord of the house and the hunting party would go out, tackle the skies (and forests) with their weapons and with the assistance of their pups, bring game meat home for supper. Keep in mind there were points in history where it was illegal for anyone but the nobility or aristocrats (in France) to hunt in this manner. These pies would not have been a pauper’s delight.
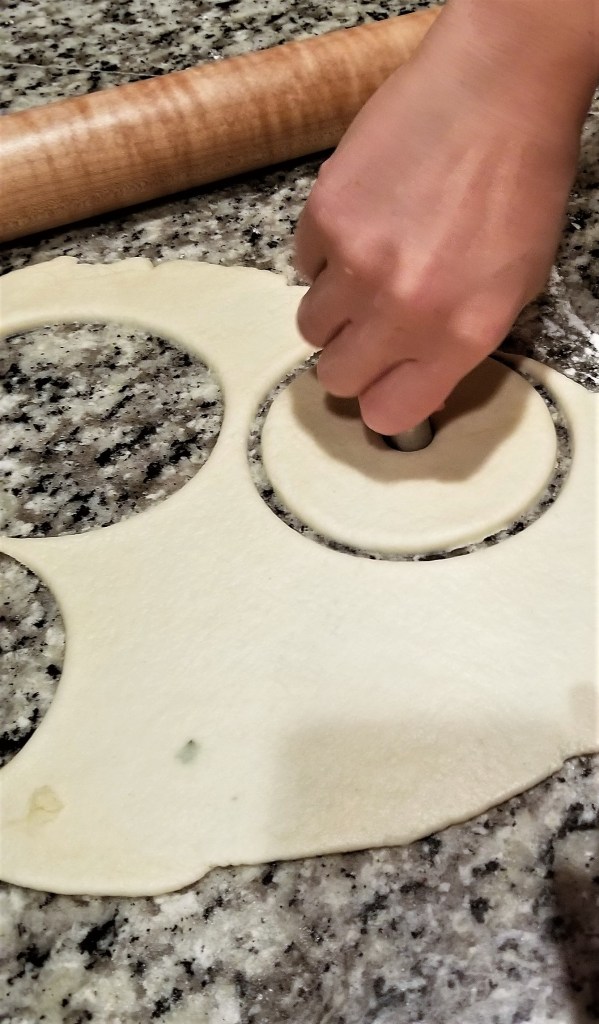
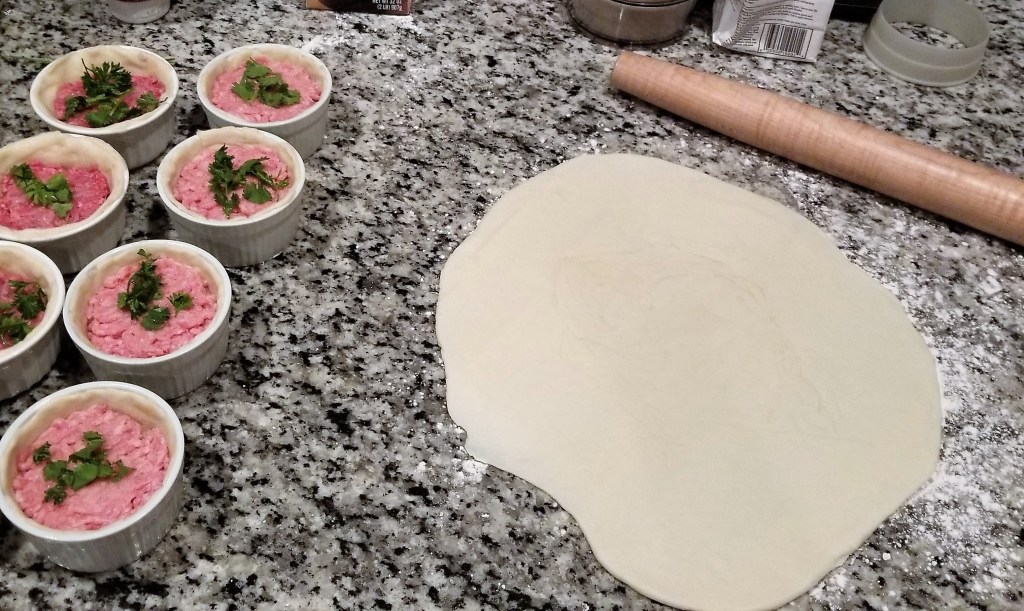
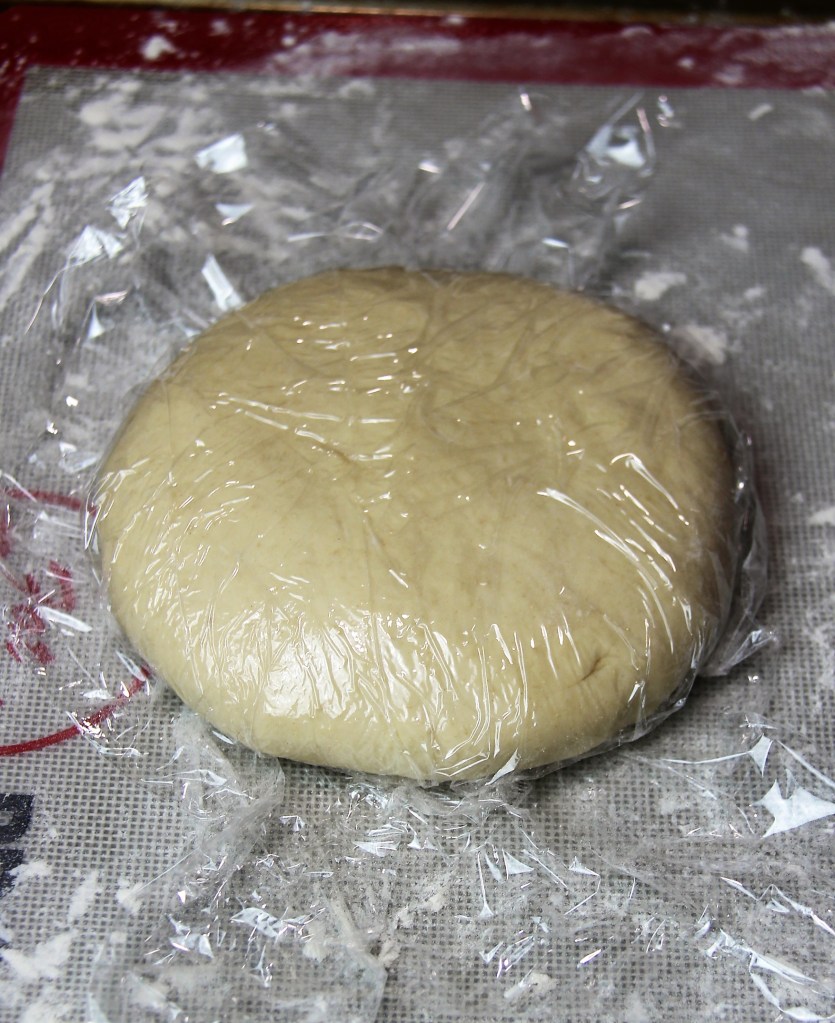
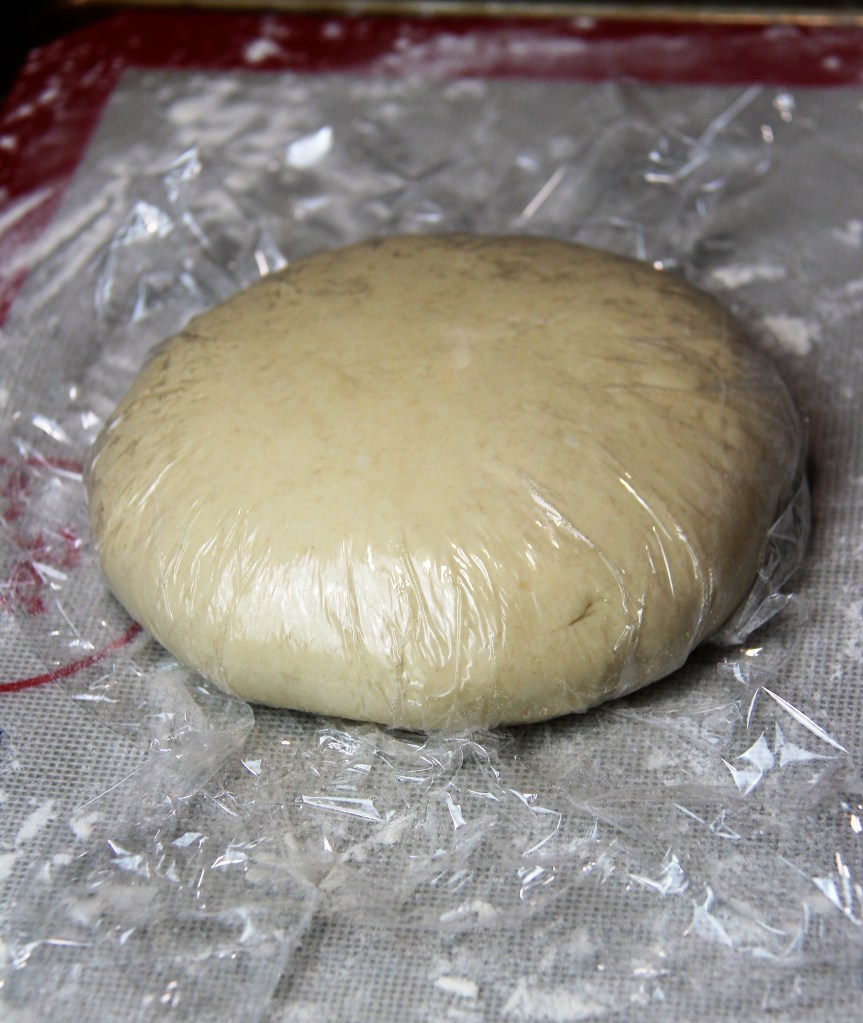
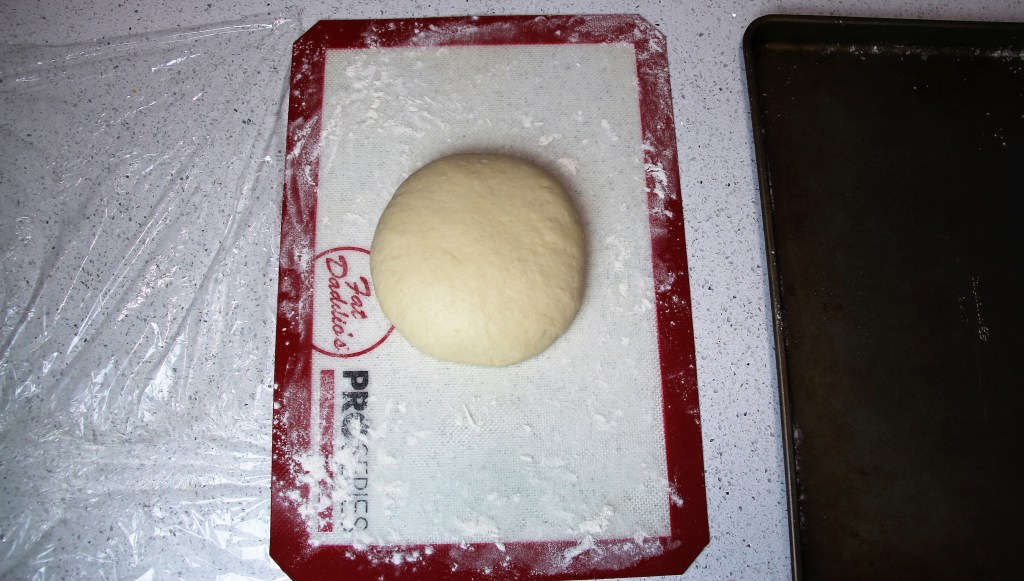
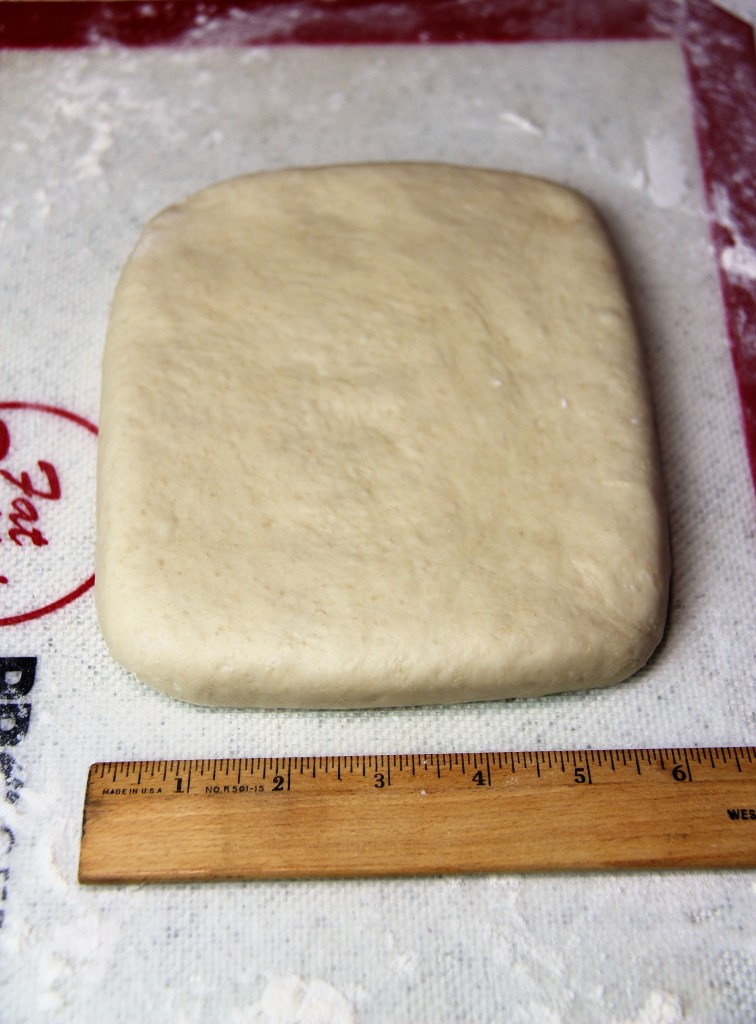
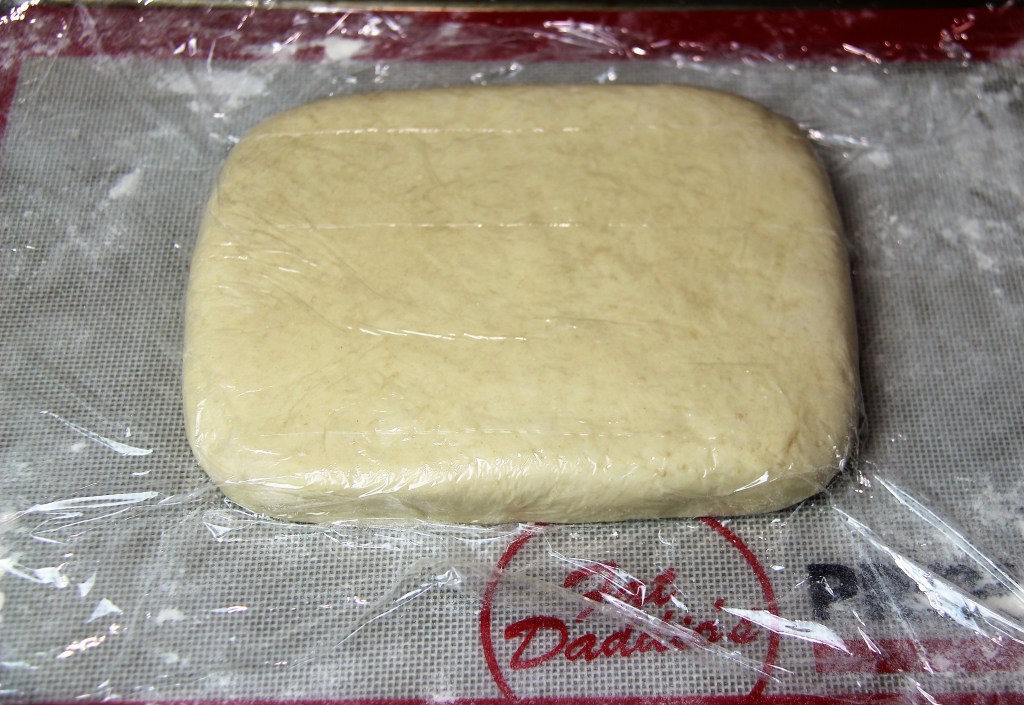
Today, other meats have been embraced, typically fatty and flavorful pork or beef, and are made in tins. If you want the real experience, use pigeon or other such poultry and skip the mold. If you choose not to use a mold, there are 2 options: shape your crust about 3 days in advance, and allow to harden before adding the filling and baking; alternatively use twine and parchment paper to wrap around the pies (mini pies, don’t try this on a 9″) and blind bake well before filling. To help shape, I still recommend using a mold or the outside of a 1-2 cup Pyrex bowl dusted in flour, separate dough from bowl and allow to sit in the fridge for 5-10 minutes. Then fill, and wrap in parchment paper and tie with twine. Use a fresh dough for the lid (roll thinner) of the pie and dust with a coarse flour.
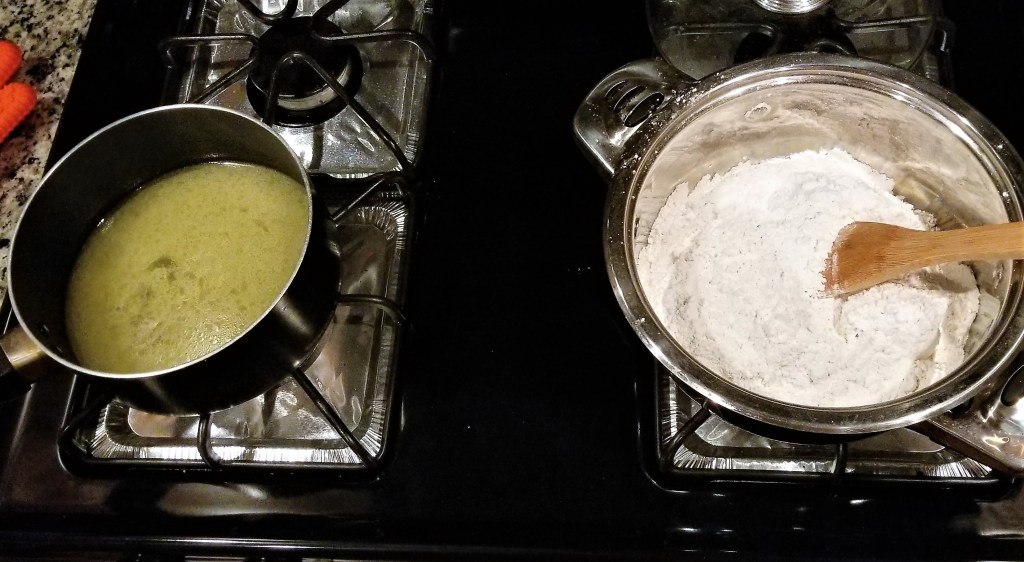
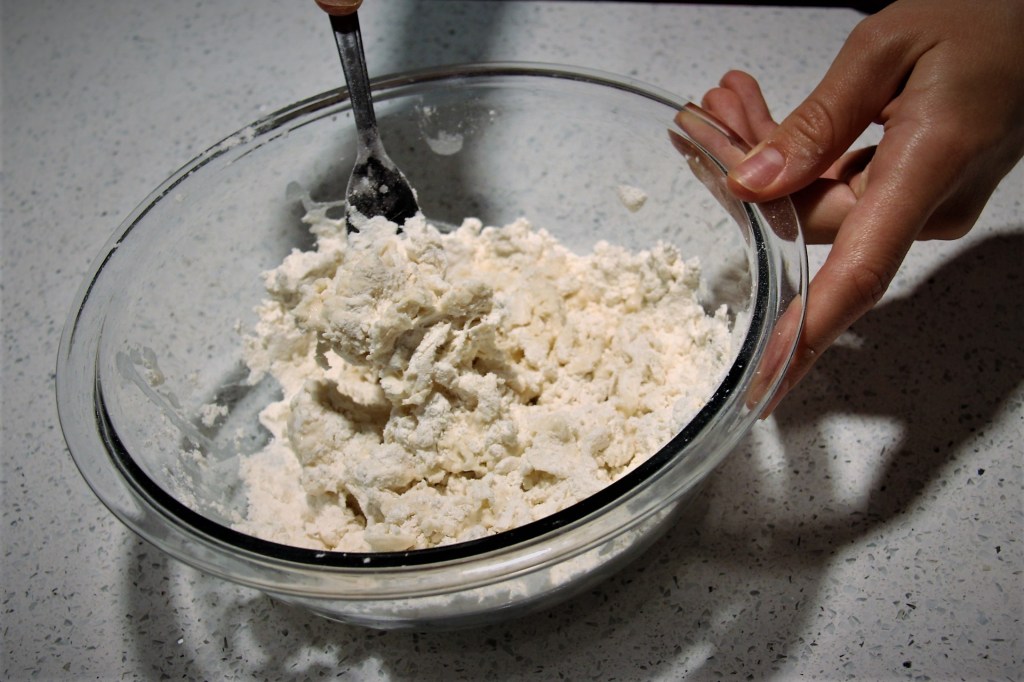
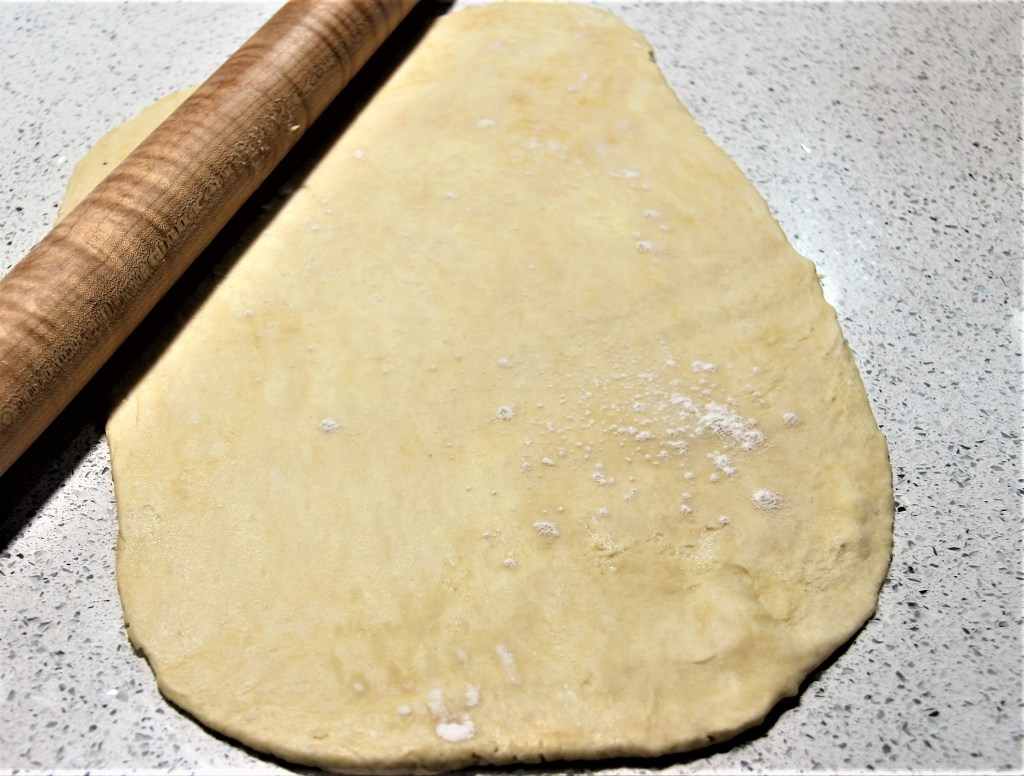
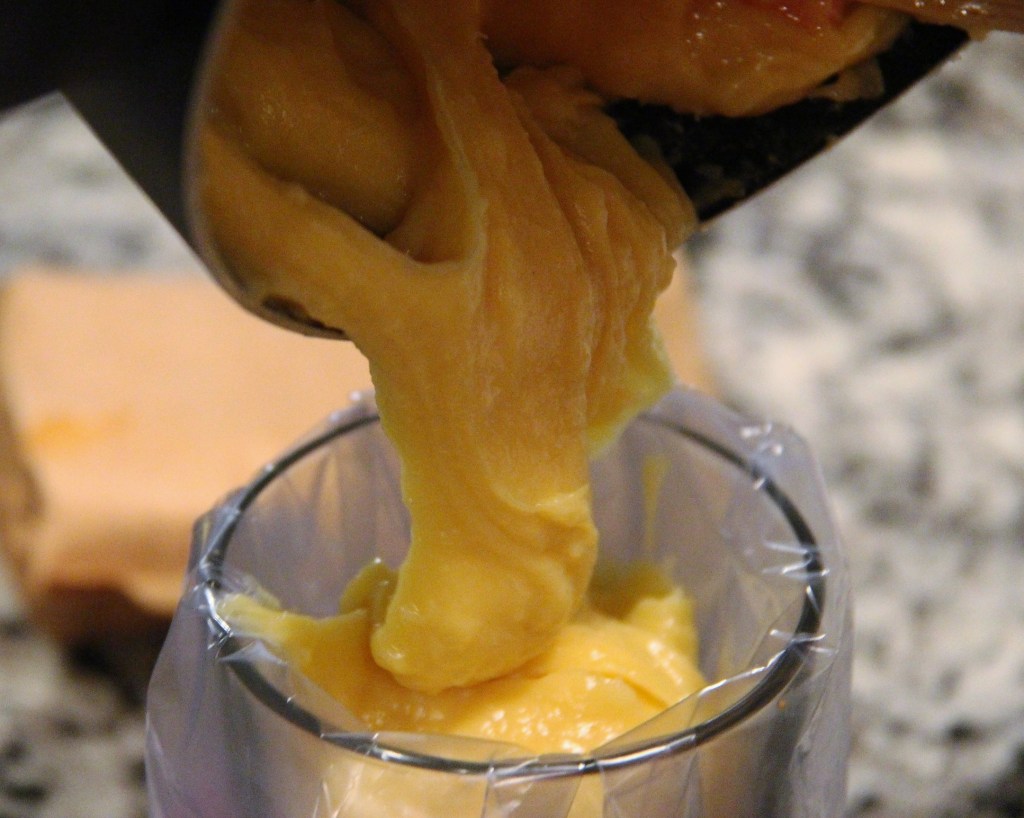
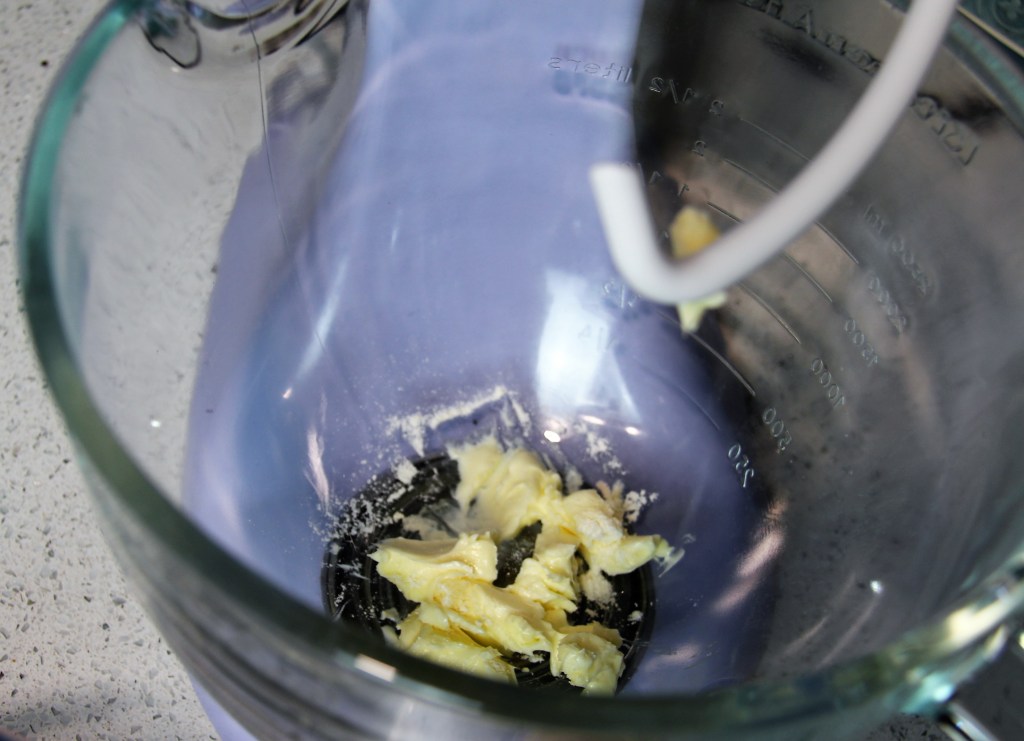
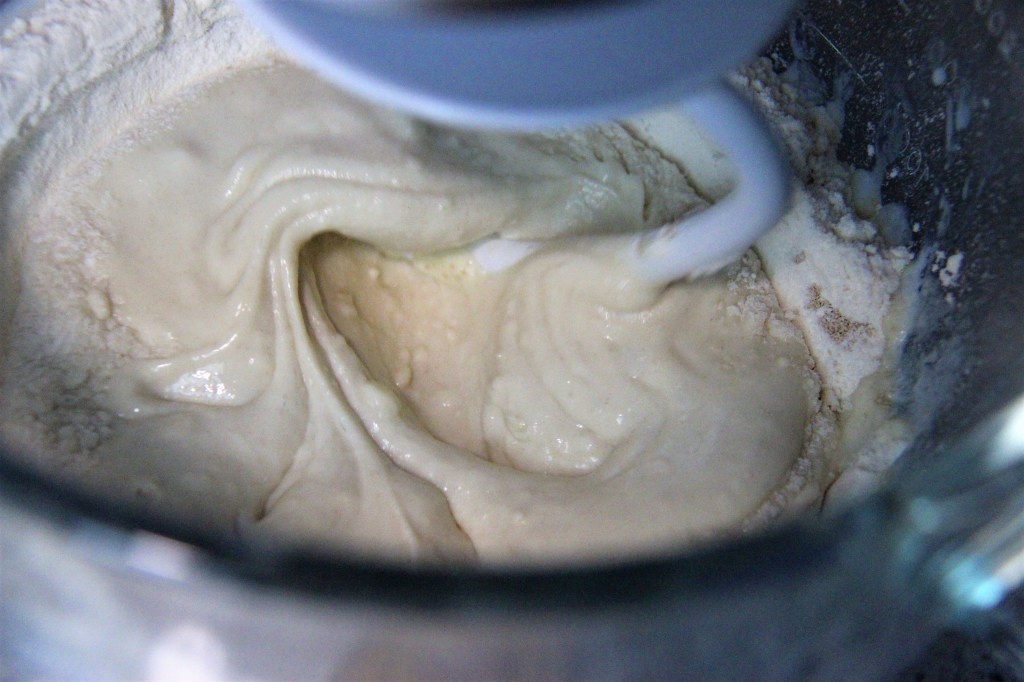
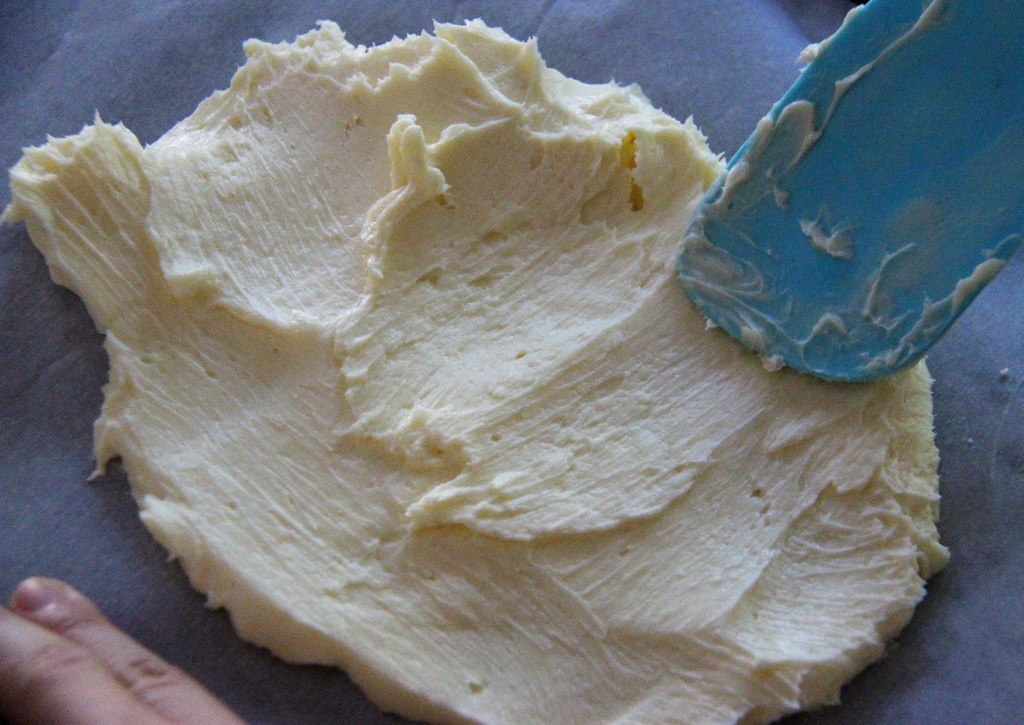
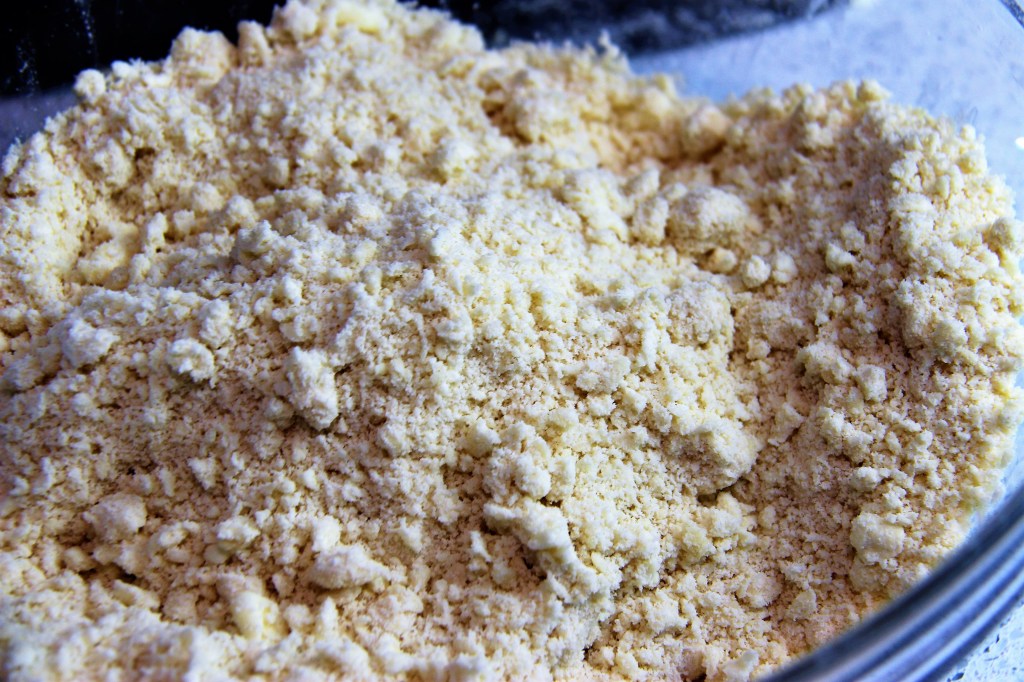
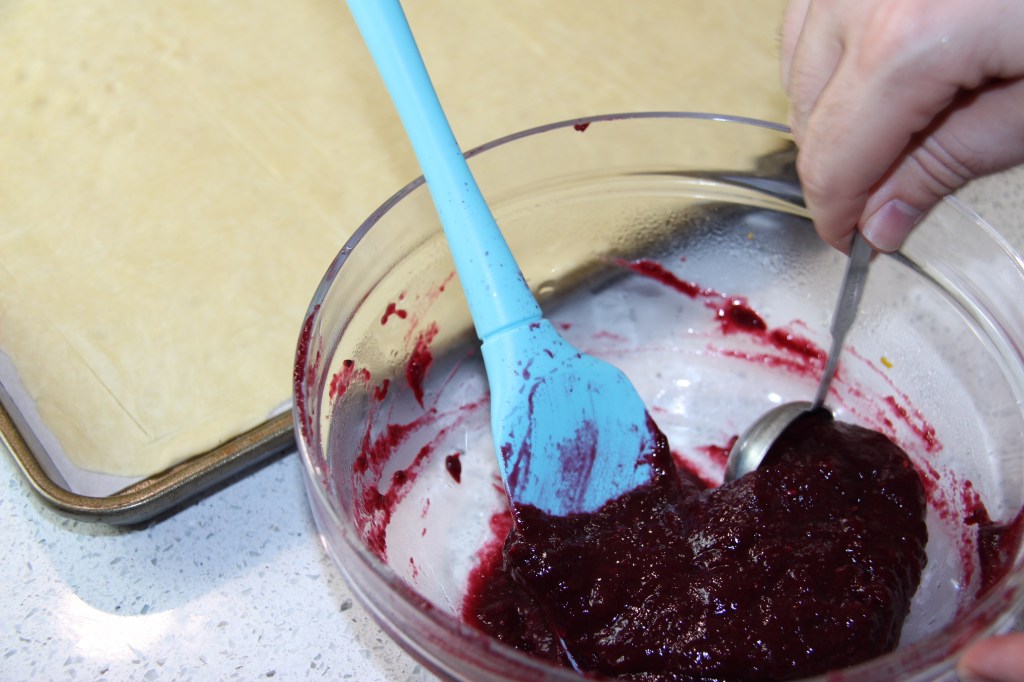
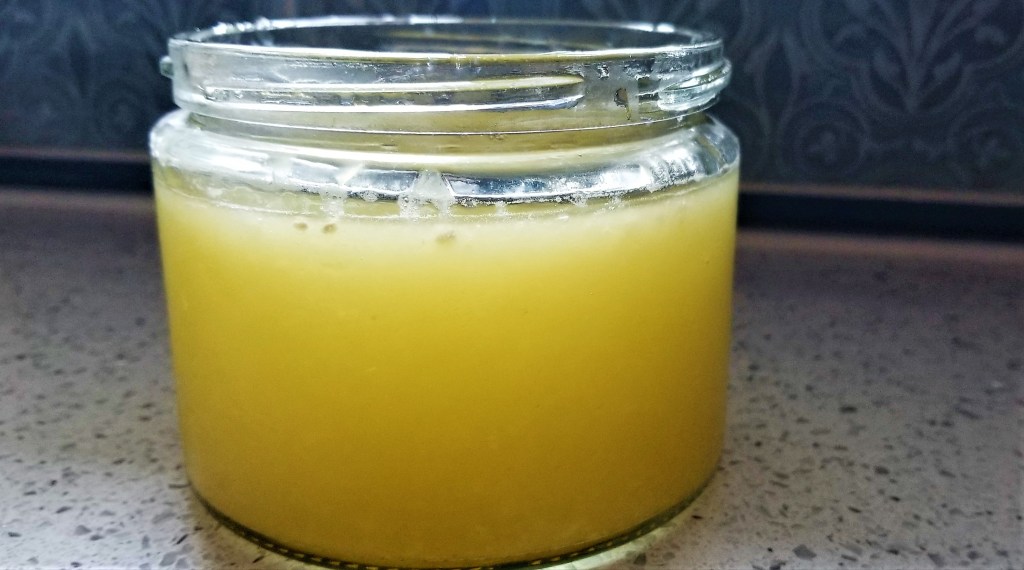
Melting the shortening (the fat) into the hot water lends strength to the crust as well as giving it that tender, flaky texture.
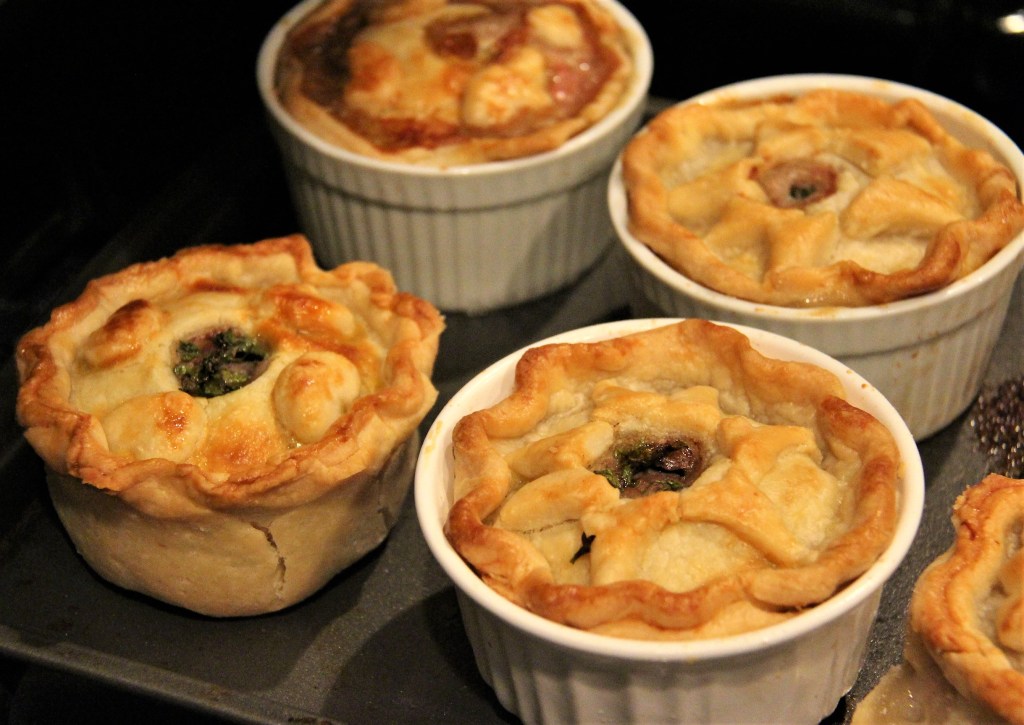
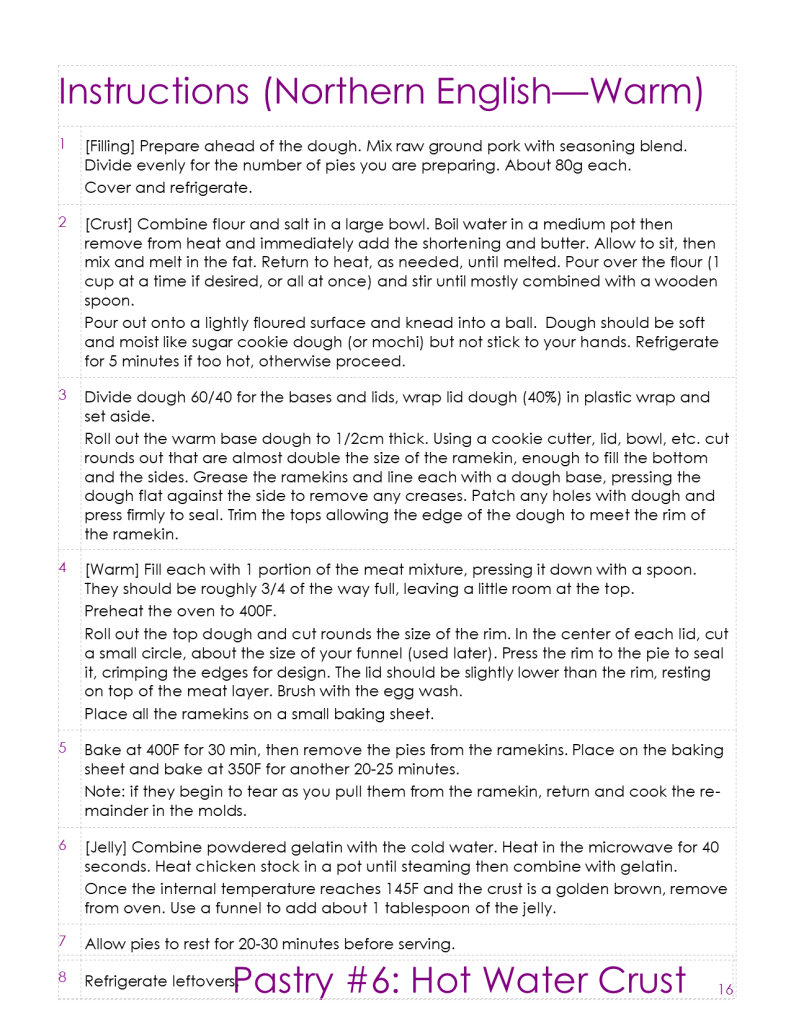
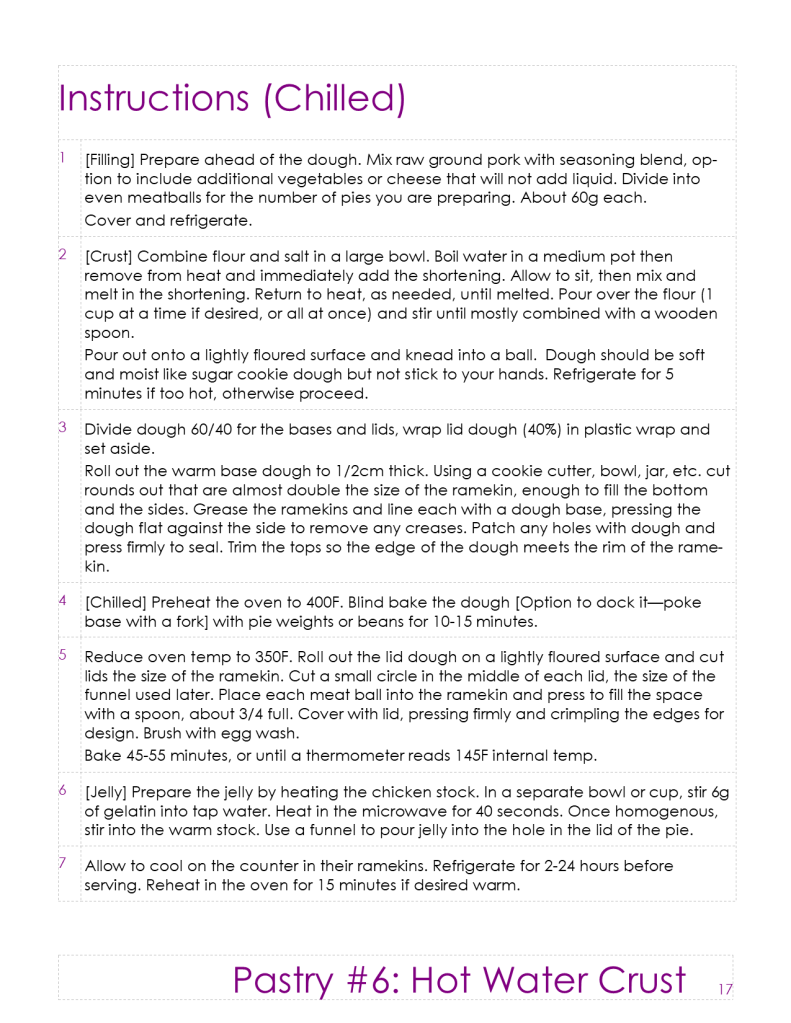
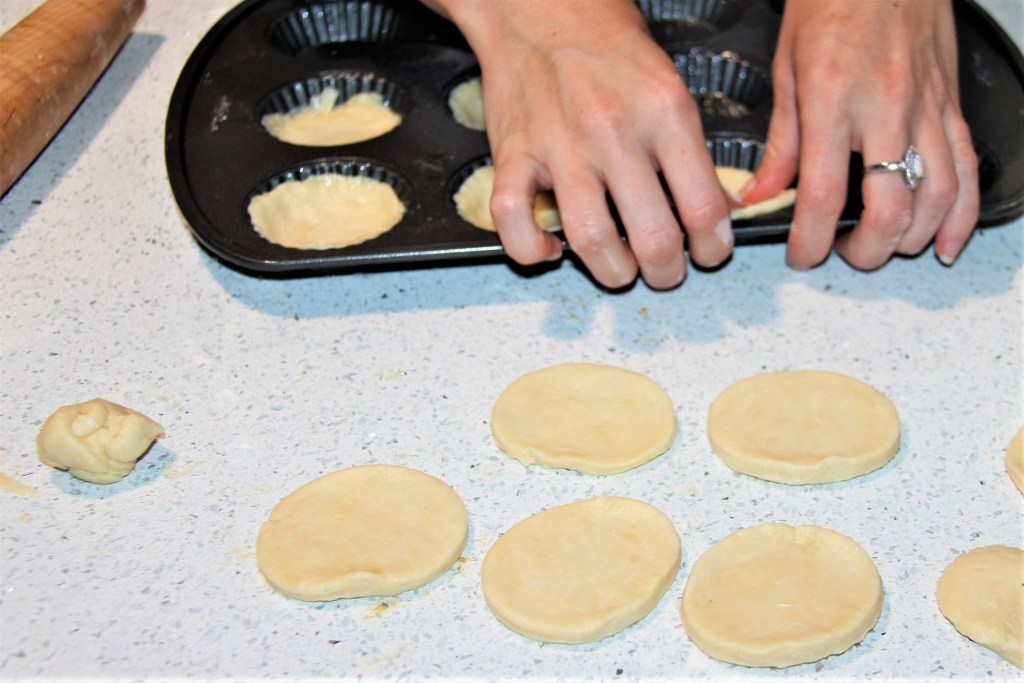
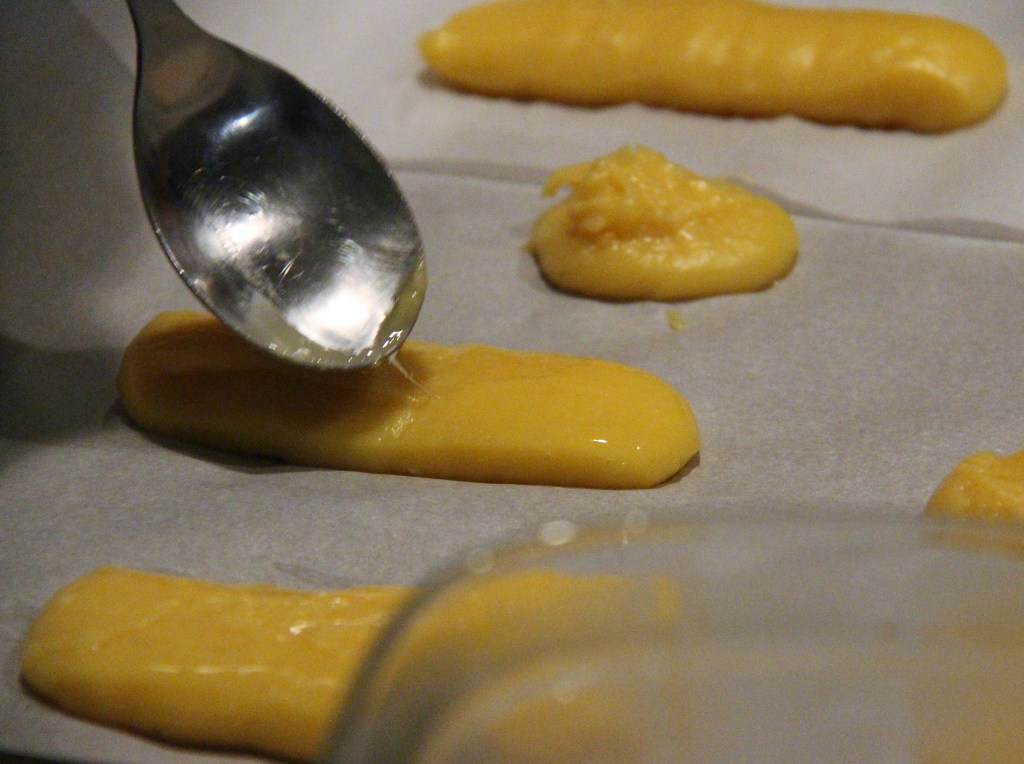
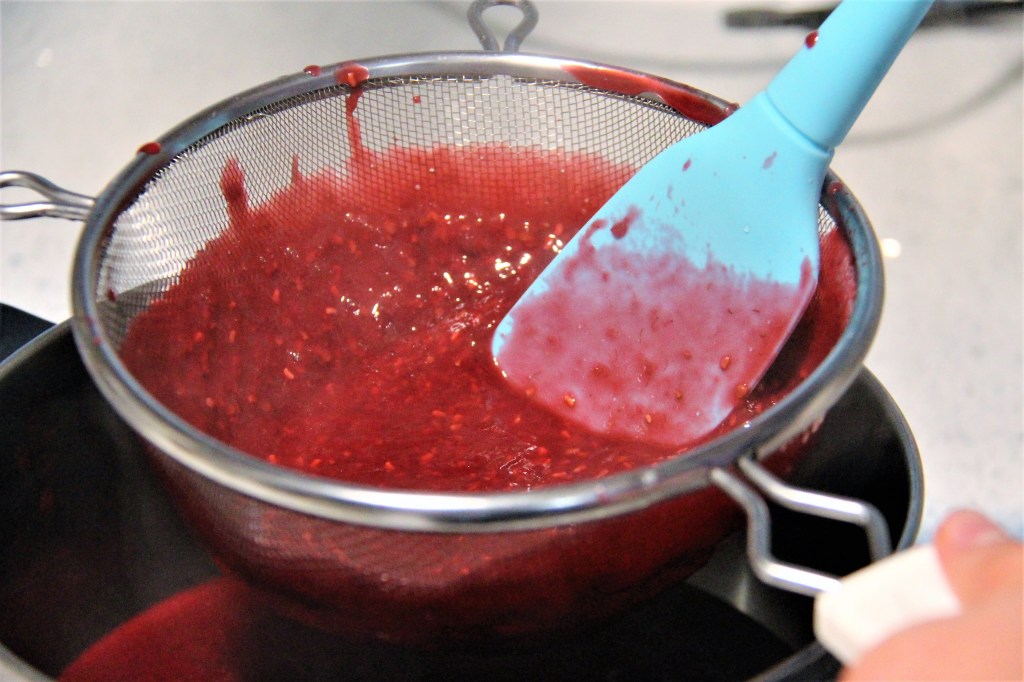
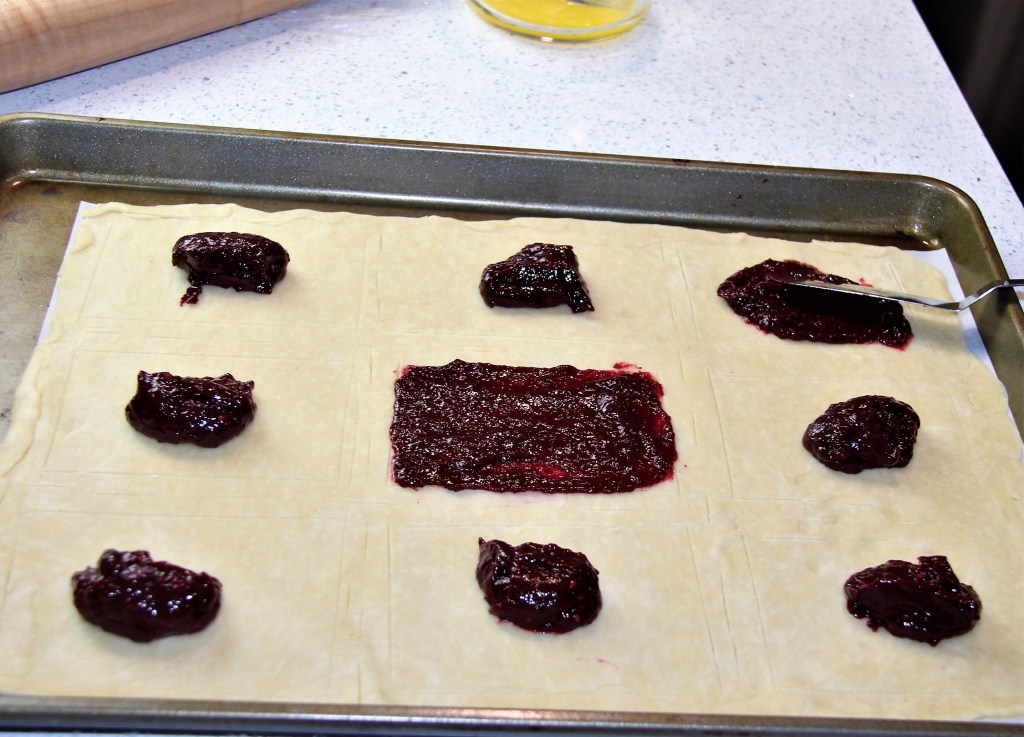
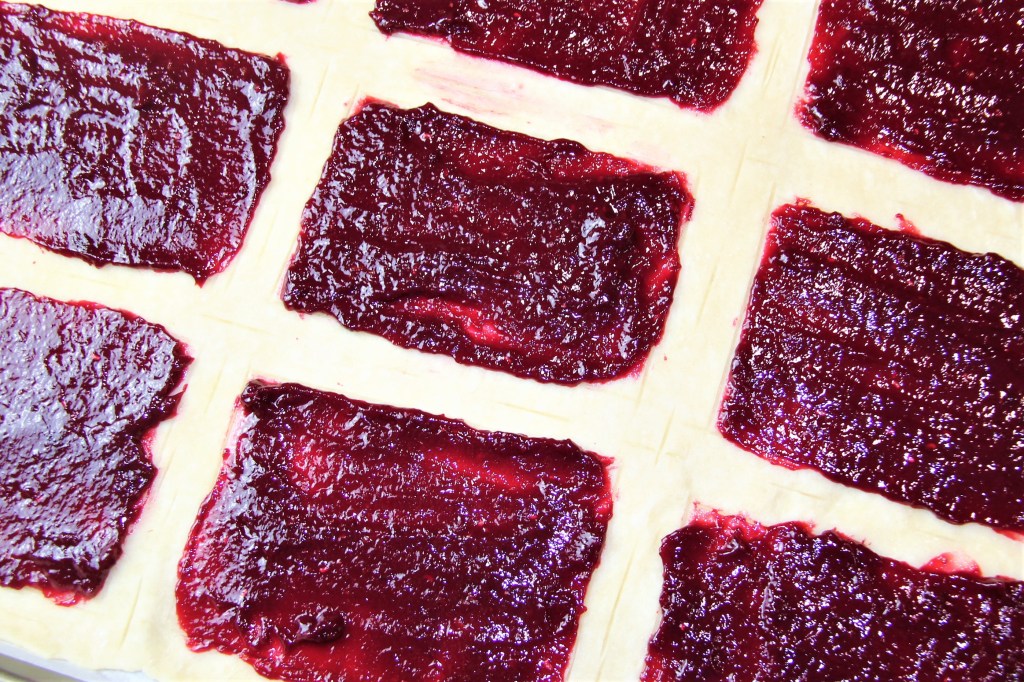
Take-Home Tips: It is possible to tear off a piece of dough to help press the bases into the ramekin if using your fingers is causing trouble (long nails?). The pie lid should be tucked below the crust’s edge, rather than doming above it. Flute the rim and cut the excess dough into shapes to decorate. Dust the finished product with a coarse flour (rice flour) for texture and biting apart. If you do not have a funnel, you can pipe (with a baster) the jelly into the pie.
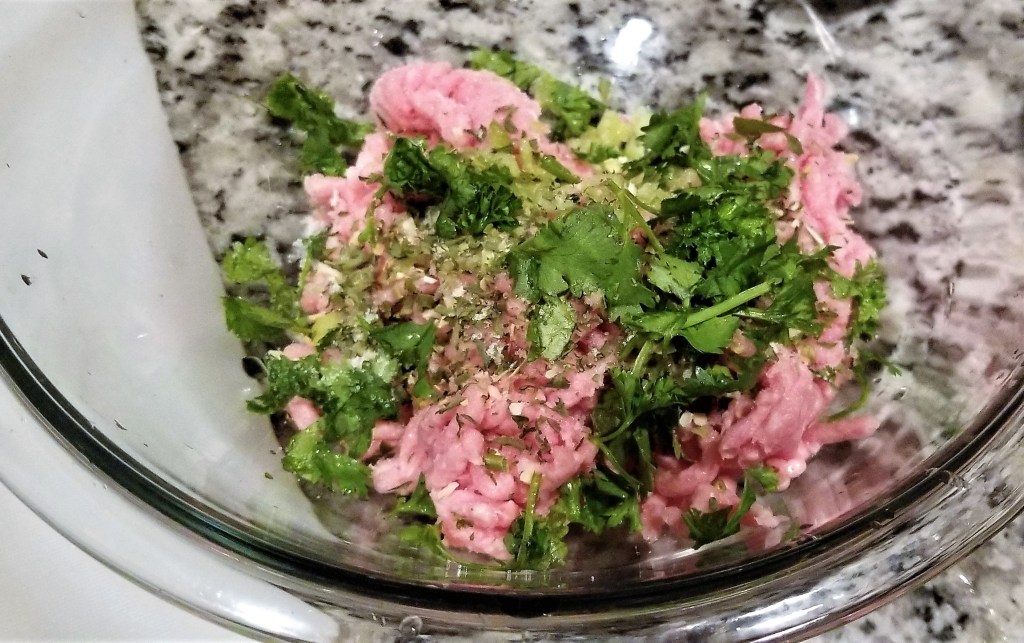
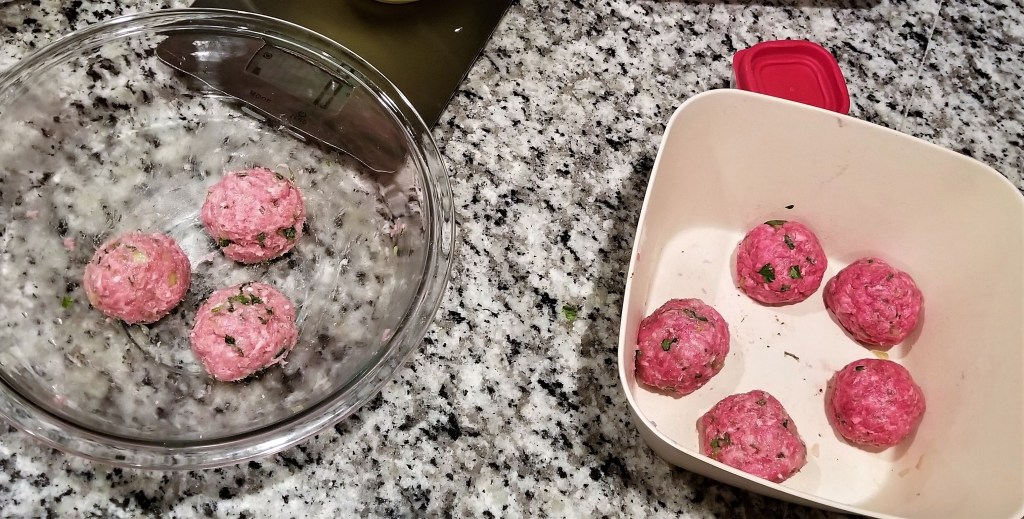
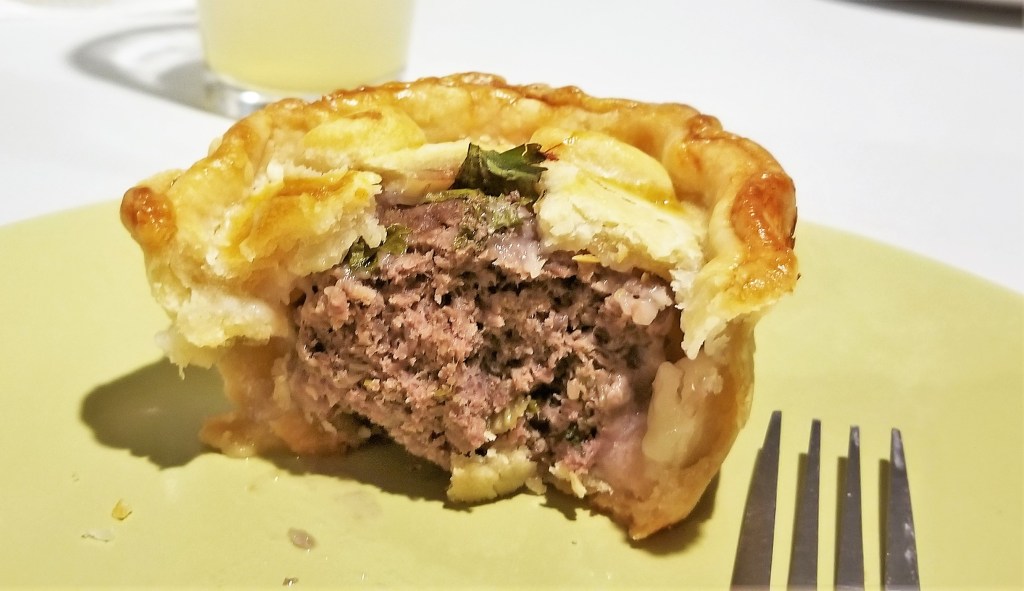
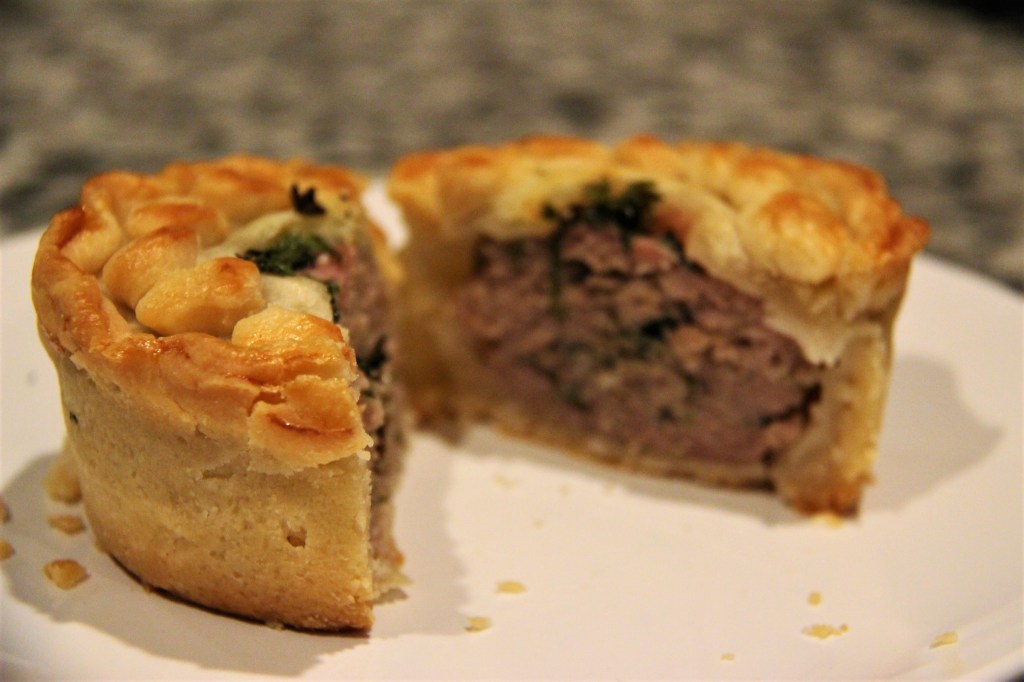
Scoring: 6 of 10. The actual hot water crust, deserves a 10 of 10. It is the perfect amount of crisp yet melts in your mouth crumble. It held together really well, taking the pressure of its contents and maintaining its shape and decorative topping. However, because we over worked the meat, rolling it into balls and mushing it together, the filling became a stiff meatball-like consistency. This can be avoided by not overworking the meat, not pressing it into its mold, and keeping a loser middle. Yet, it was eaten and I did enjoy it. I would recommend eating it as you would at a sporting event, pick it up and bite into it.
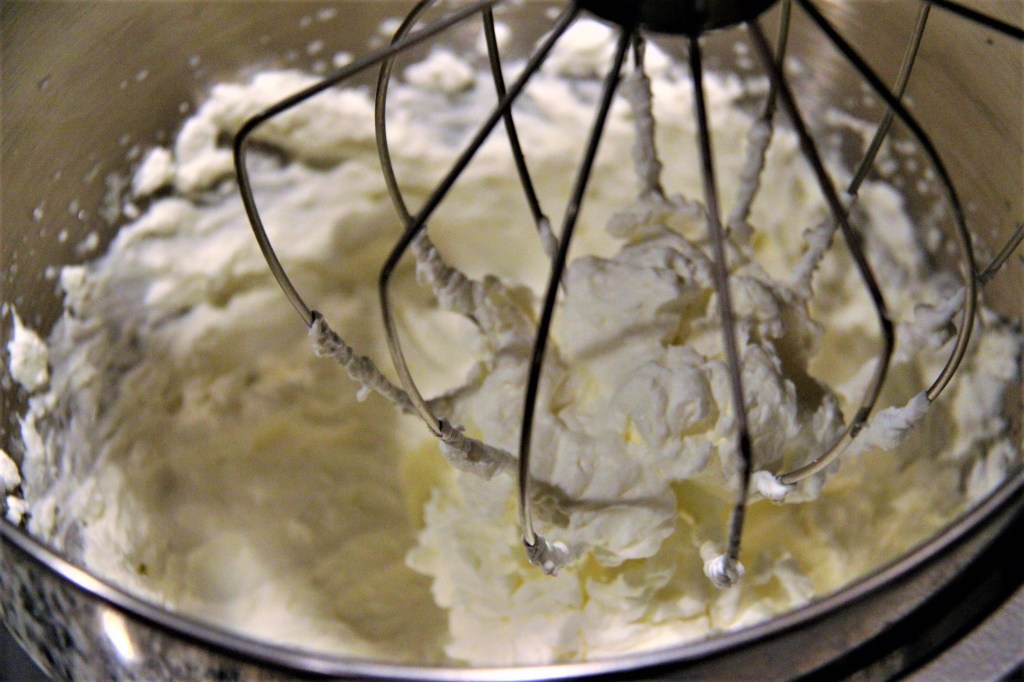
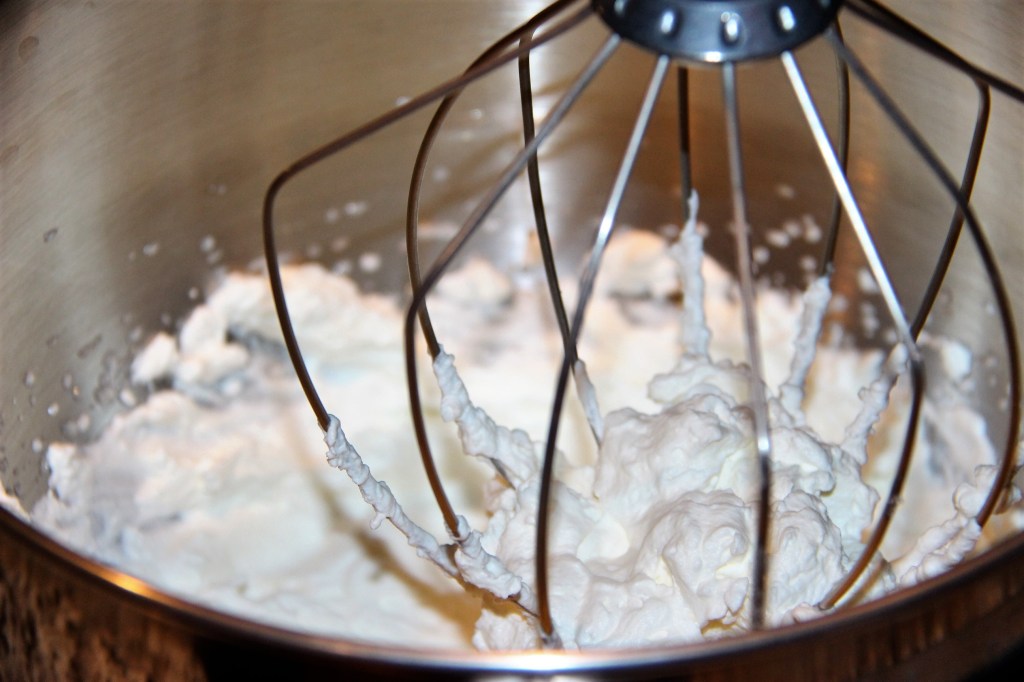
After preparing 5 spectacular types of pastry dough, I am surprised to announce that Shortcrust is my favorite (so far!). I have never been a dedicated fan of pies and thought the sound of dry Shortcrust sounded unappetizing. Short, meaning crumbly, rather than airy, sounds like the worst imaginable dessert. Yet, the simplicity of the recipe and the perfect crust to filling ratio really set this dish apart for me.
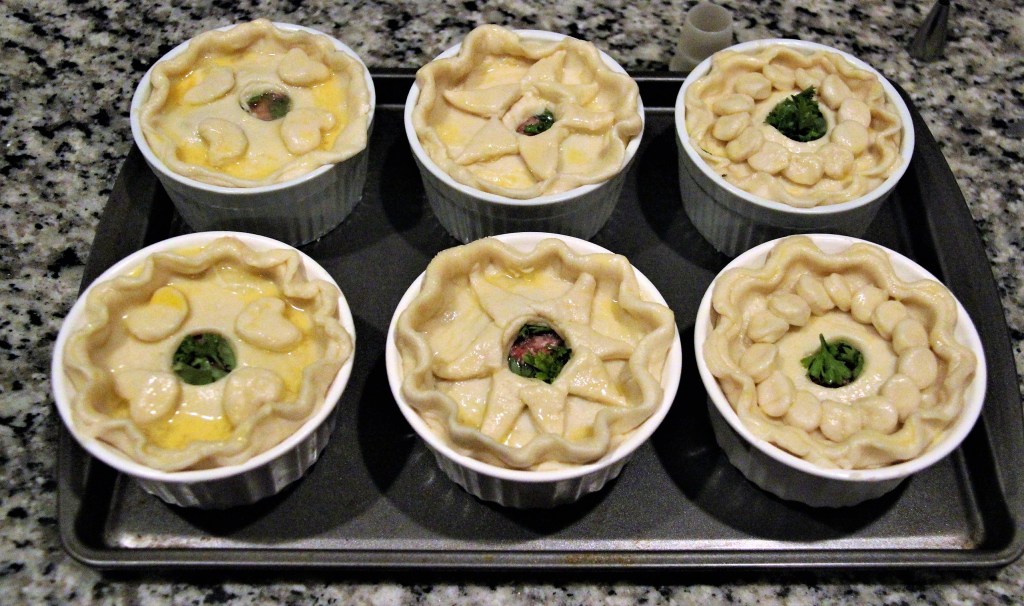
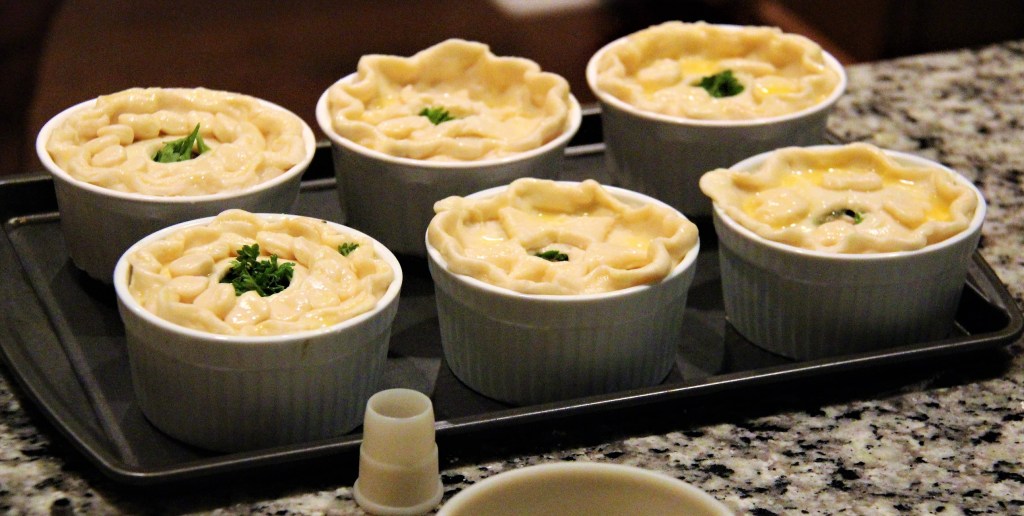
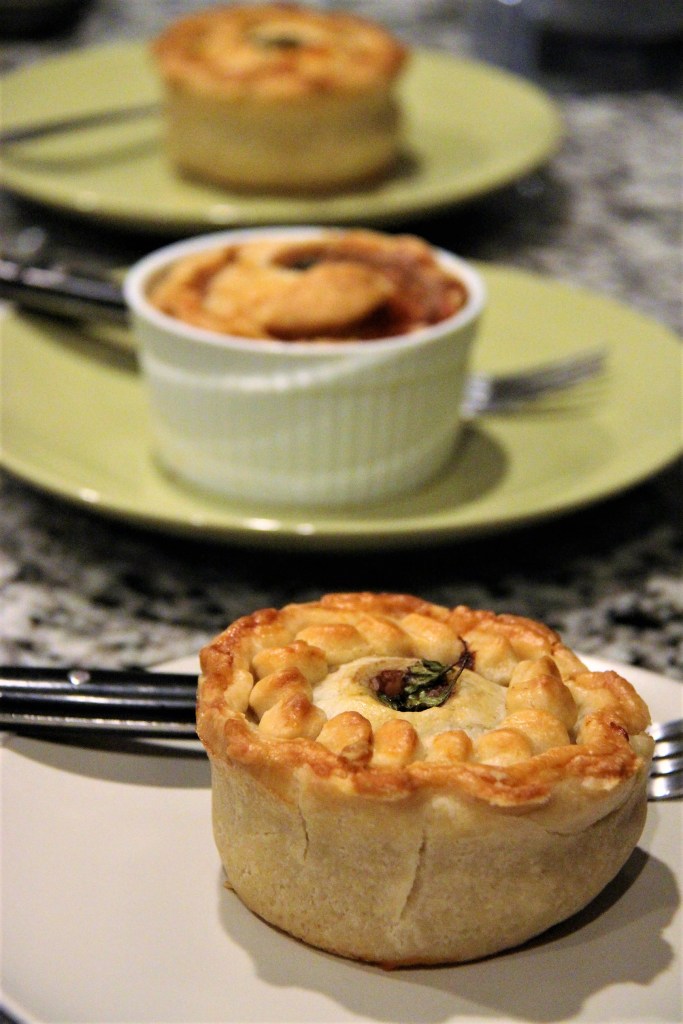
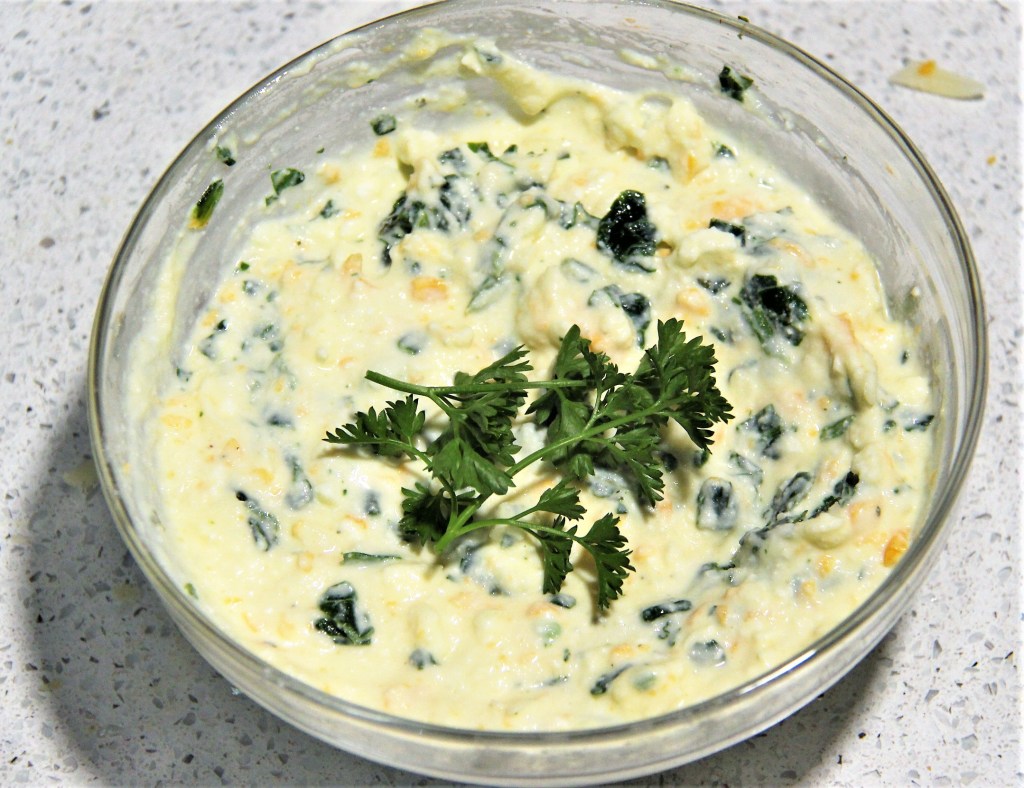
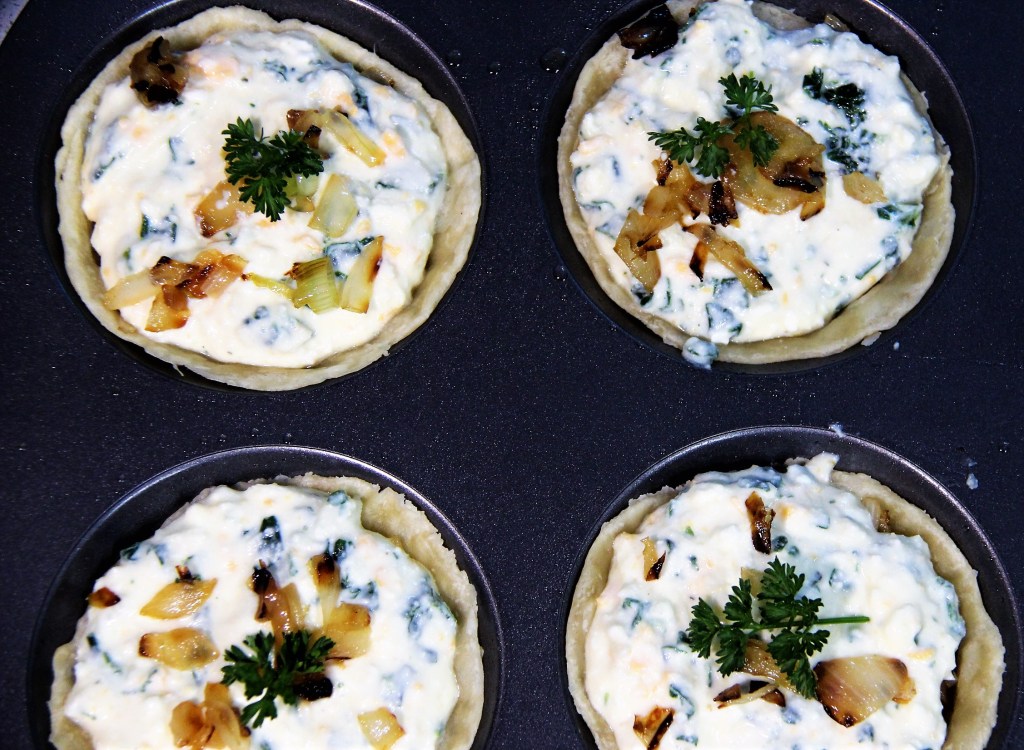
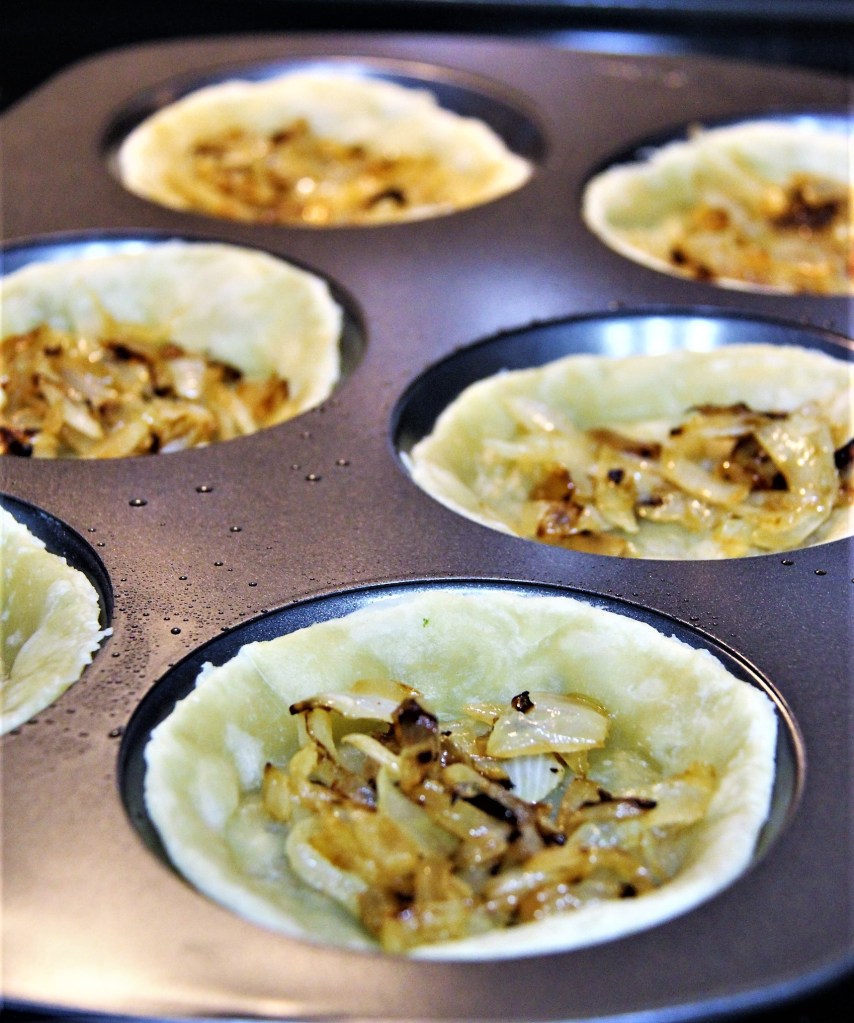
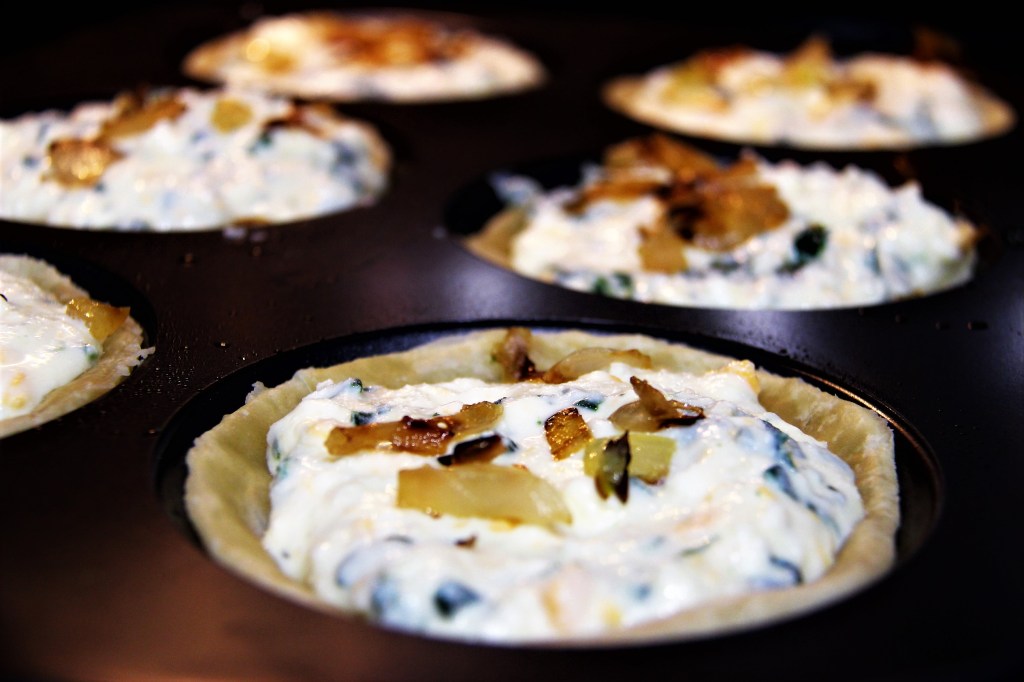
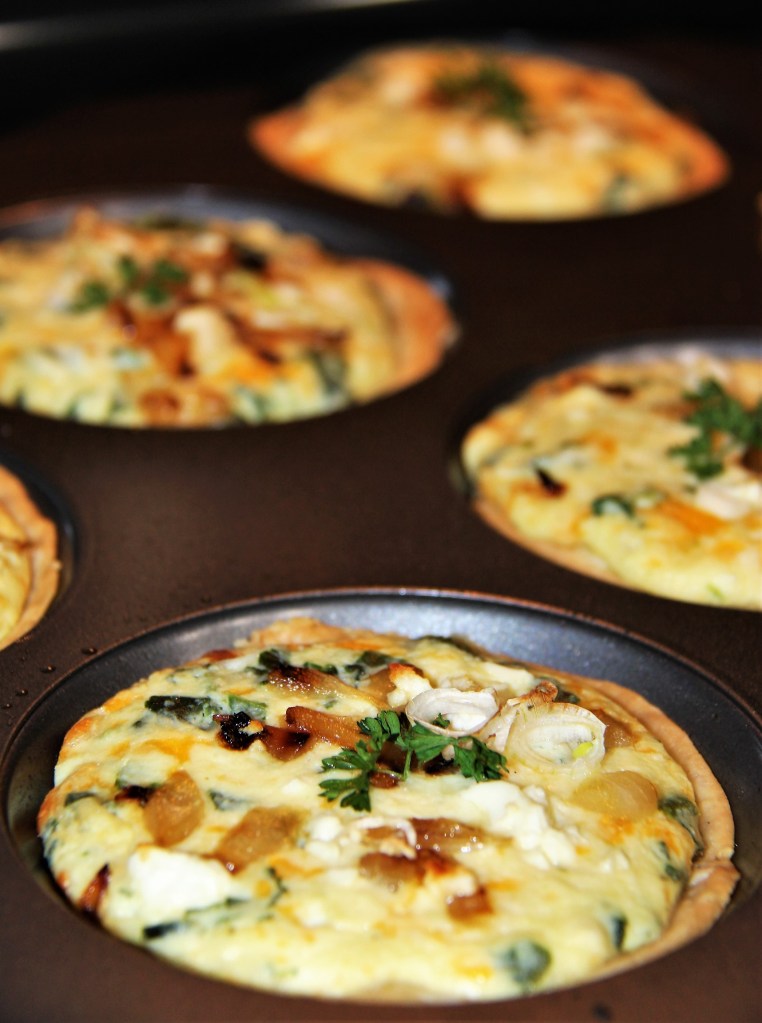
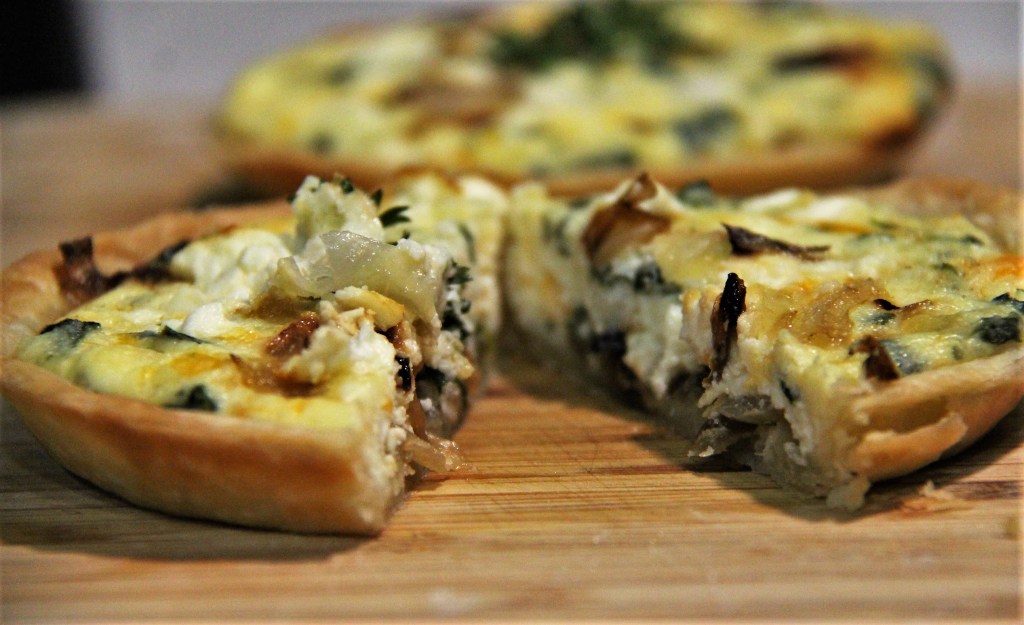
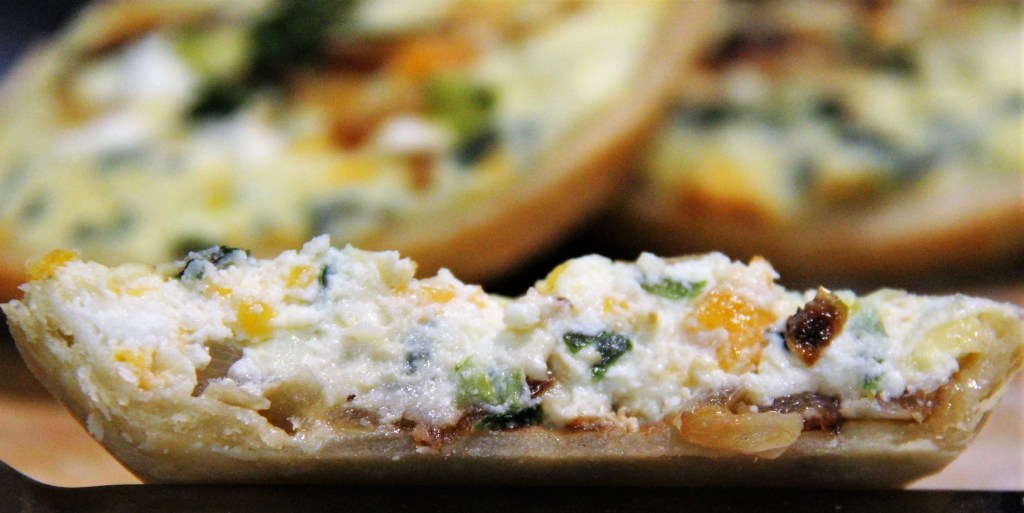
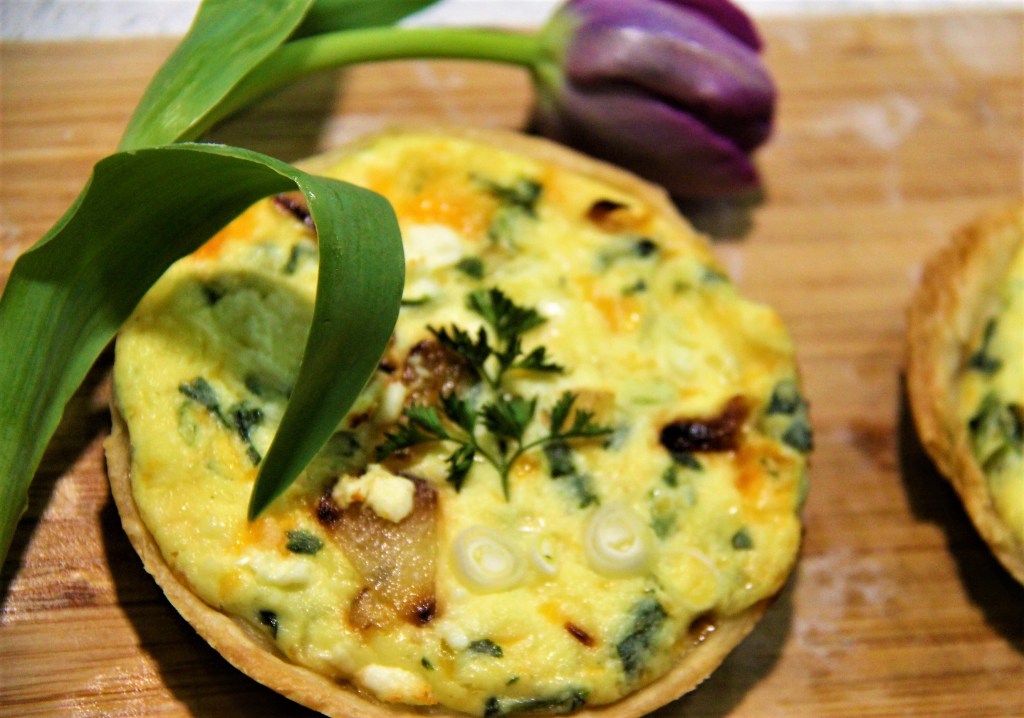
Second only to making fococcia, the Caramelized Onion Mini Pie is my absolute favorite recipe. Breakfast, brunch, lunch, dinner, snack, midnight snack, you name it and these are perfect for that time of day when you need a solid snack or 2 for a meal (or 3 or 4). I proposed to make them for a friend who was joining me in the kitchen and she tried to wriggle her way out of preparing them. Fully disappointed, I pried from her the reason why she did not want to eat savory, cheesy pies for dinner. Little tip for you: When offering these mini pies to your friends and family, do not refer to them as “Onion and Cheese Pies” because apparently no one wants to eat that.
Half of the onions on bottom, half on top
Just wait. Once they see these scrumptious, perfectly balanced pies, they will have to try one. Once they take that first bite, they will be asking for another. We tried cutting them in half and sharing with one another, but ended up just eating each and every one. However, I can assure you that although not as good reheated in the microwave, a toaster oven does salvage them if you managed to save any for leftovers.
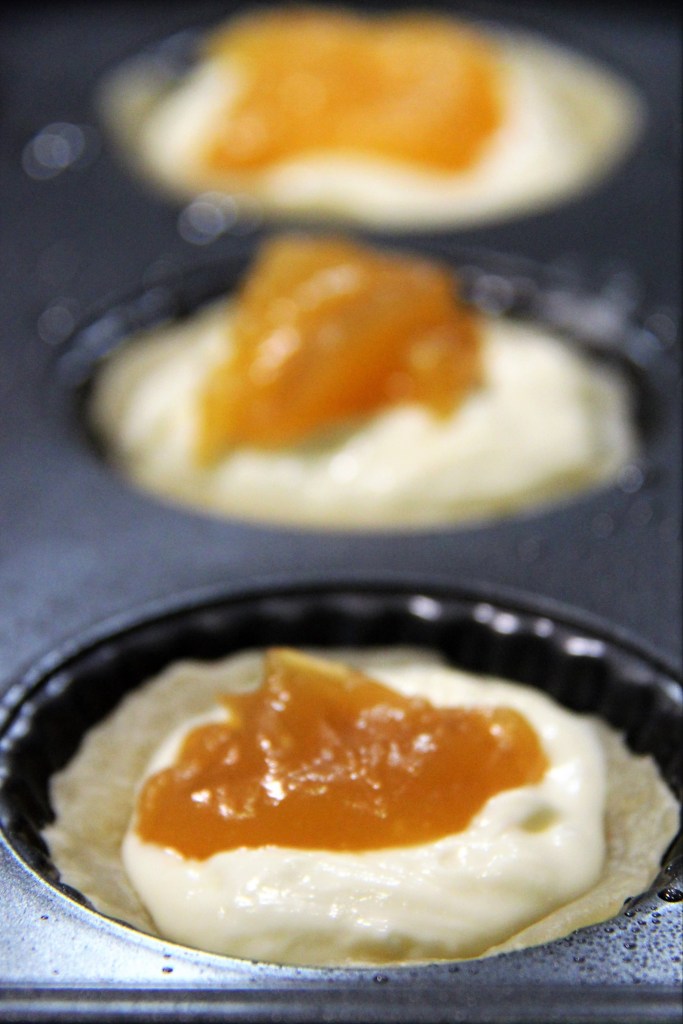
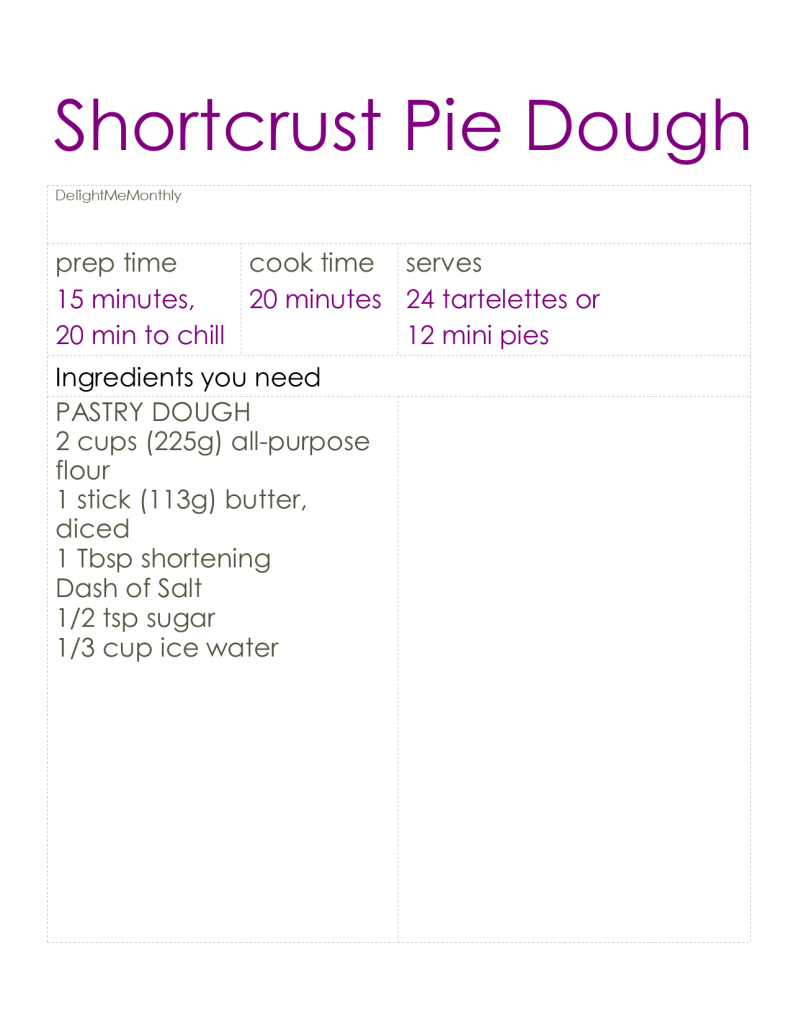
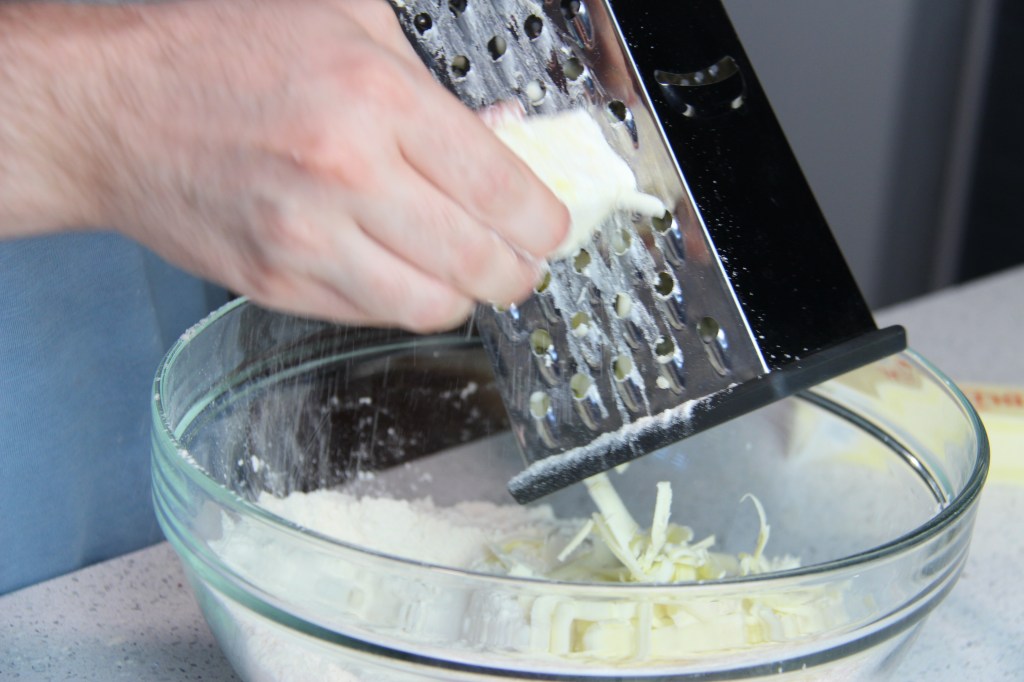
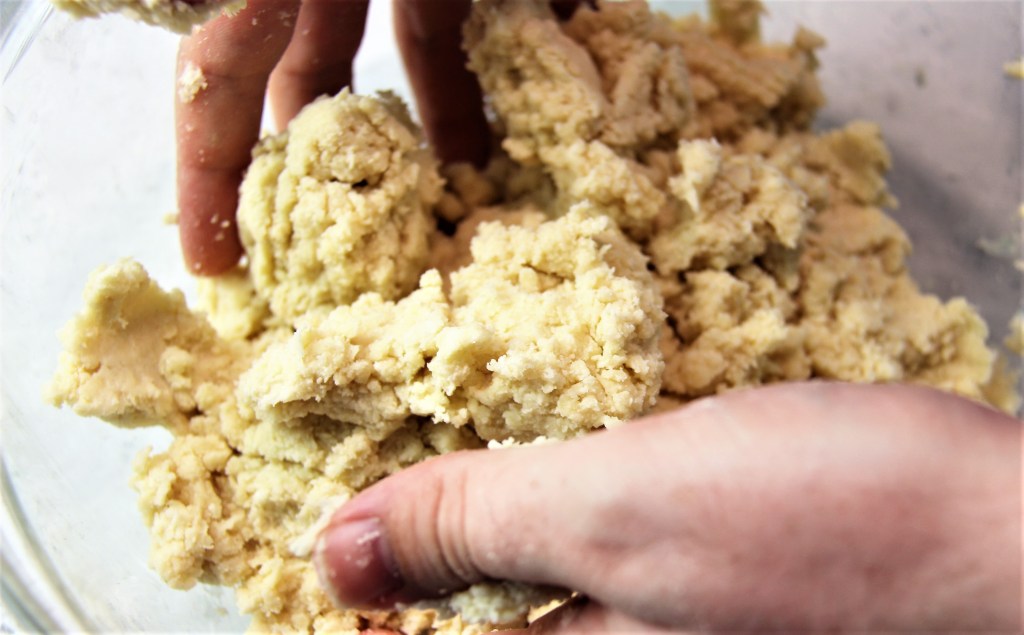
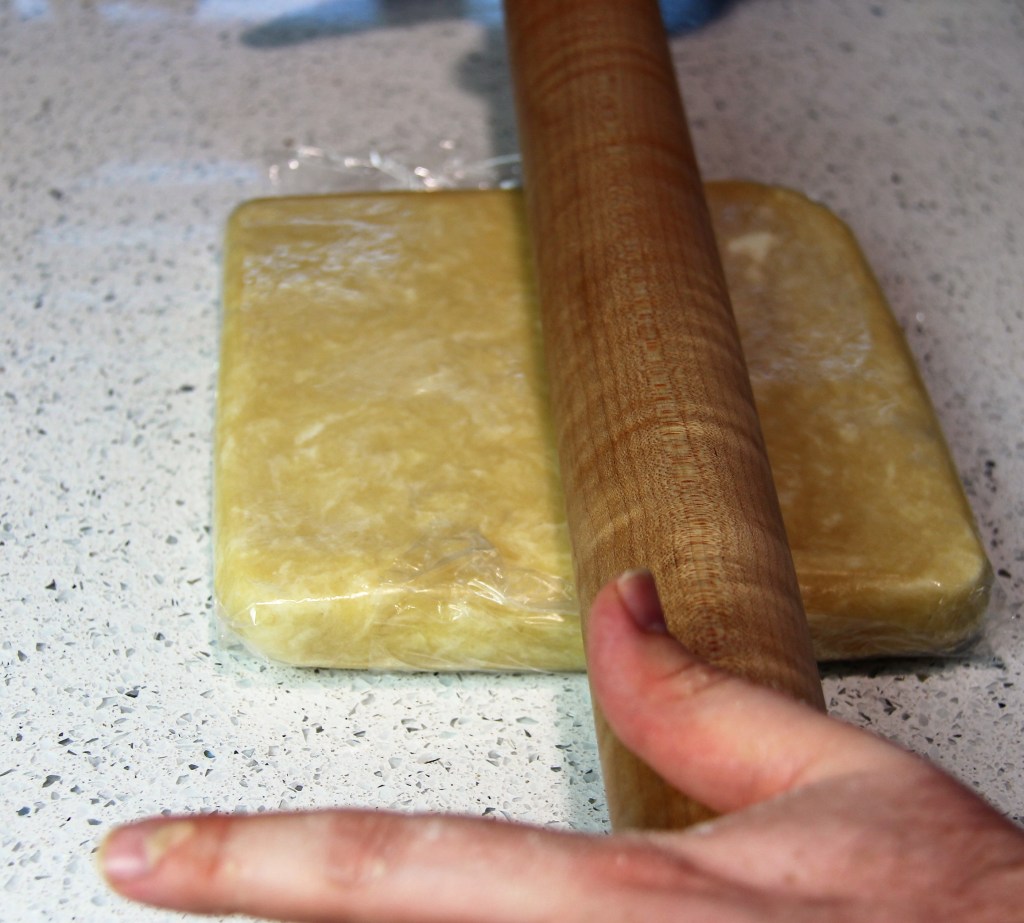
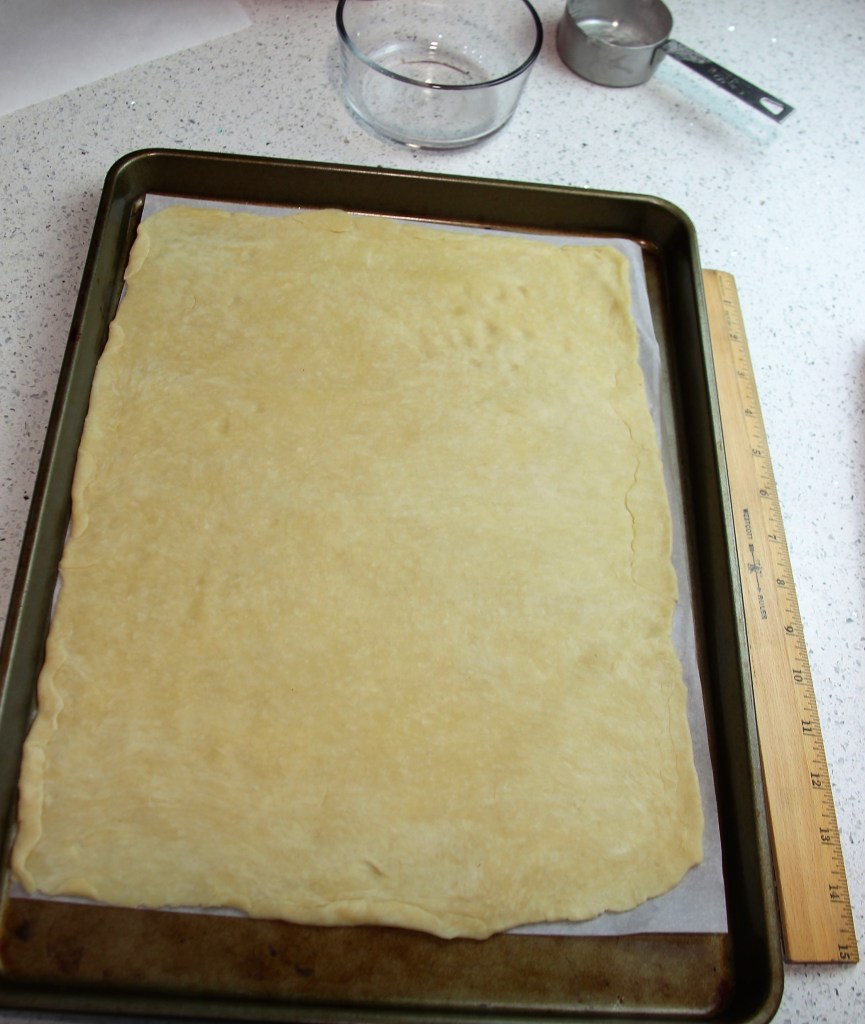
Take-Home Tips: The Shortcrust is easy to make, but be careful not to over-mix or it will get tough and be hard rather than crumbly and a pleasure to bite into. Also adding only the bare minimum water is key to reducing the gluten build up. If your crust is too crumbly (short) it probably had too much fat, was over-mixed, or needed more water. Adding the shortening helps reduce this possibility. Do not skip refrigerating the formed pies prior to baking because they can shrink away from the sides and ruin your shape. Ensure all ingredients are very cold, add very little flour when rolling out but I did find I needed to flour my rolling pin and work surface, use parchment or wax paper to roll out if necessary, and keep refrigerated as needed. The dough recipe makes enough for 1 tray of each filling, 6 mini pies and 12 tartelettes.
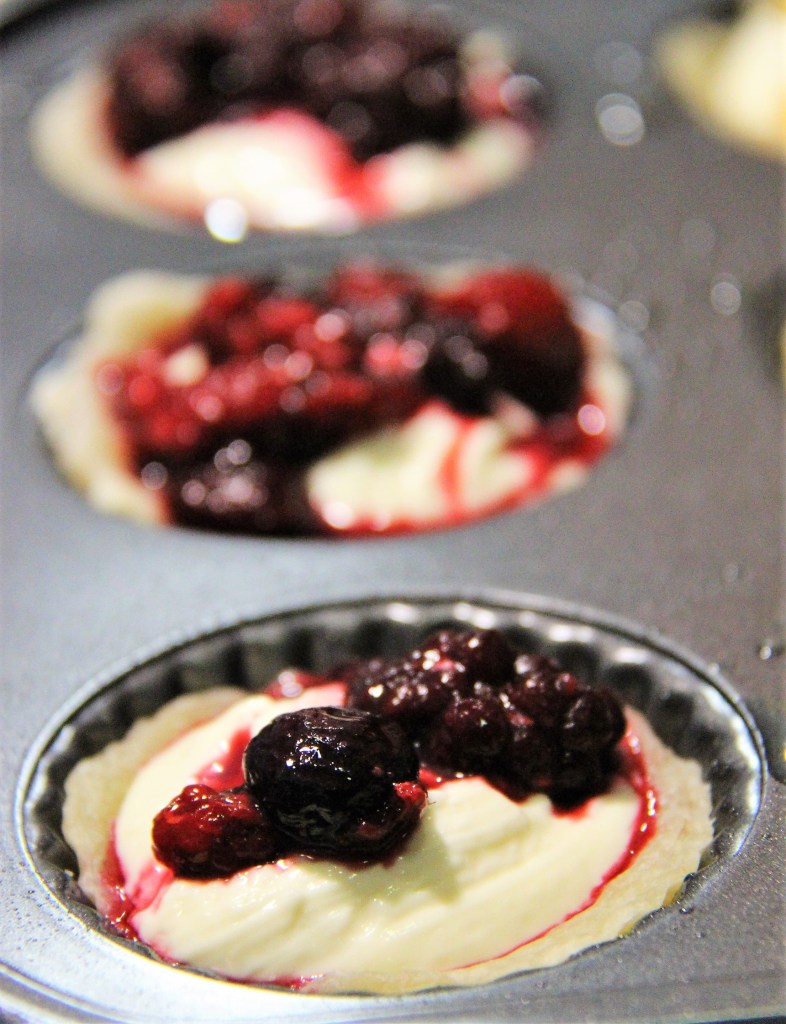
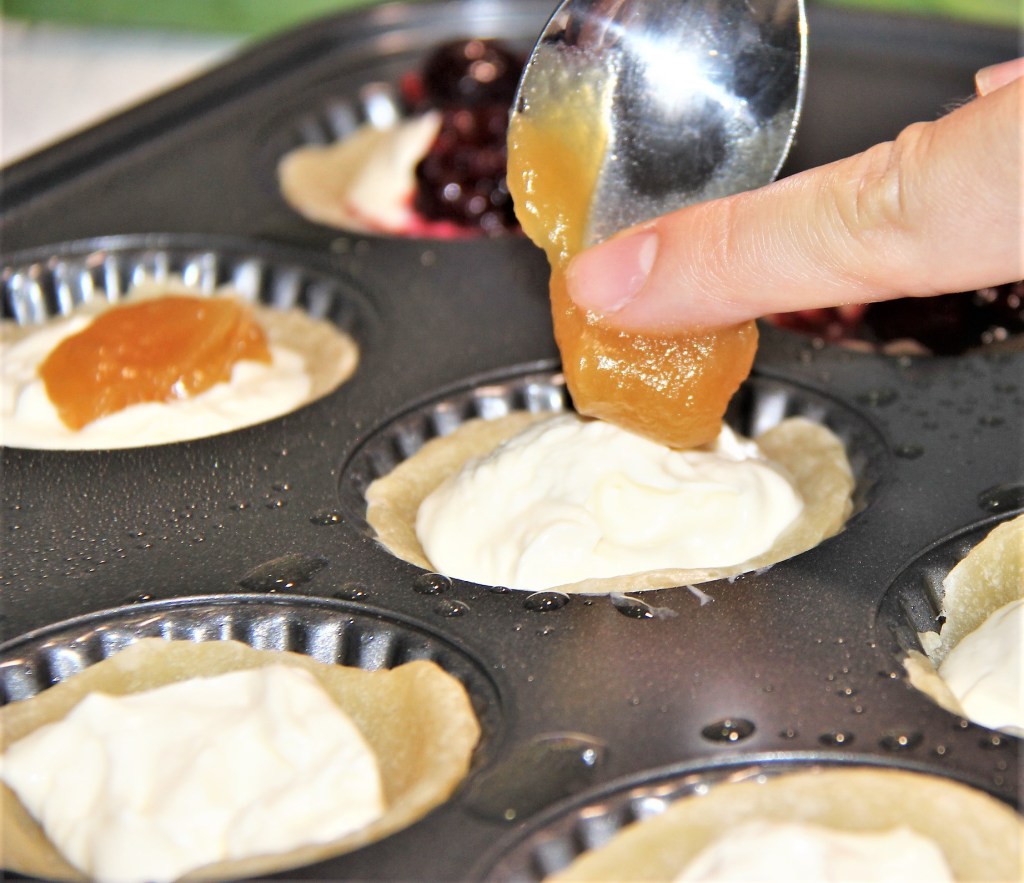
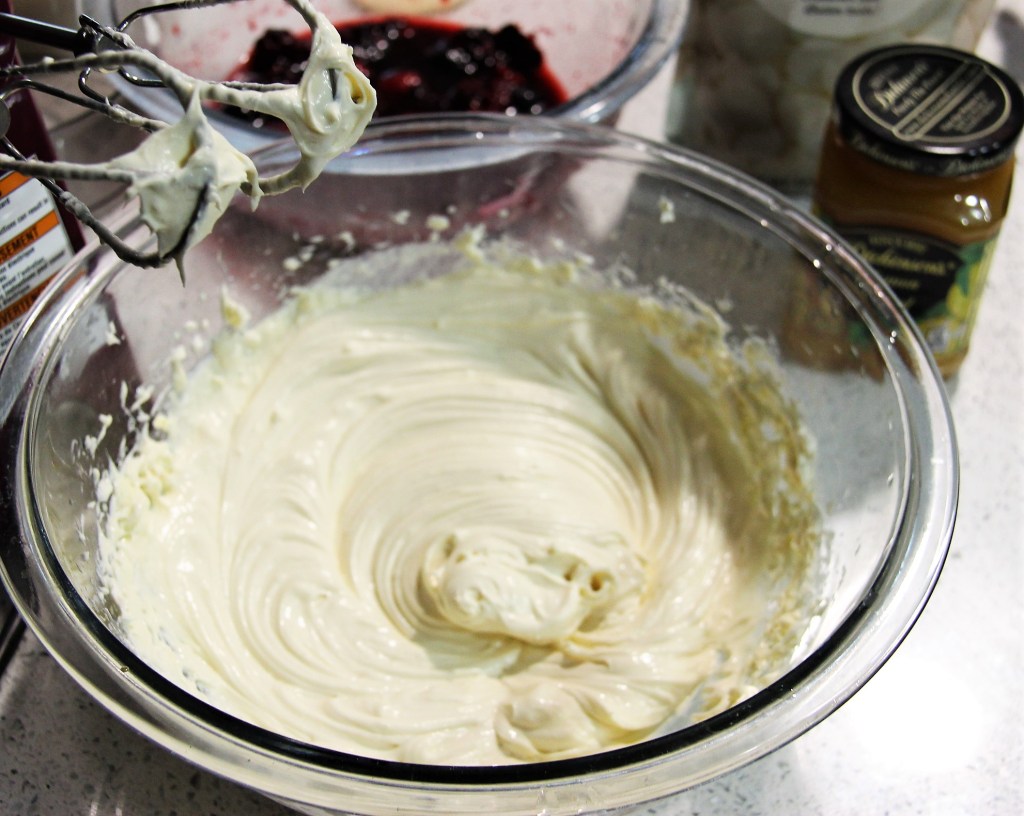
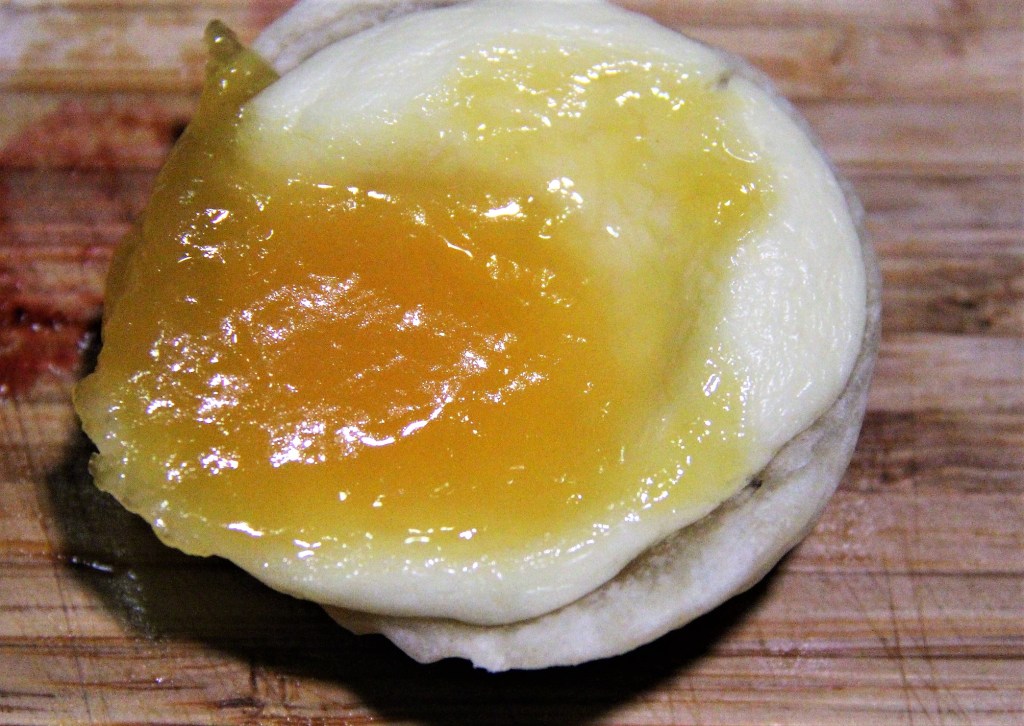
For the fillings, use your favorite cheeses for the Onion Pie and feel free to add mushrooms and chopped bacon if desired. For the Cheesecake Tartelettes, frozen or fresh berries will work but drain the excess juice and do not bake them. Prepare a graham cracker crust for any leftover cheesecake filling and bake and refrigerate those mini cheesecakes.
Scoring:10 of 10 = Shortcrust, just the crust itself colored beautifully, no soggy bottoms, and held together very well. 10 of 10 = Caramelized Onion Pies, thought I might be a bit jaded. My family and friends agree they are much better day of, and this should drop them down to a 9 of 10, but I just cannot allow such a demotion. 7 of 10 = Cheesecake Tartelettes, the recipe has been updated to sweeten them. They definitely needed more sugar and possibly just the lemon curd or just shaved chocolate topping.
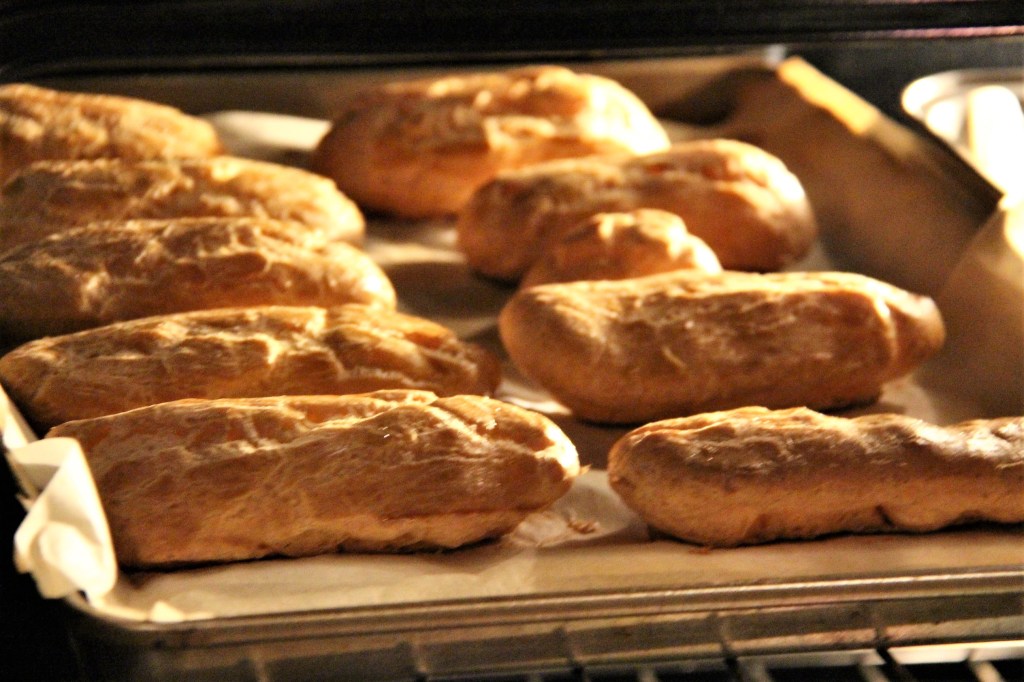
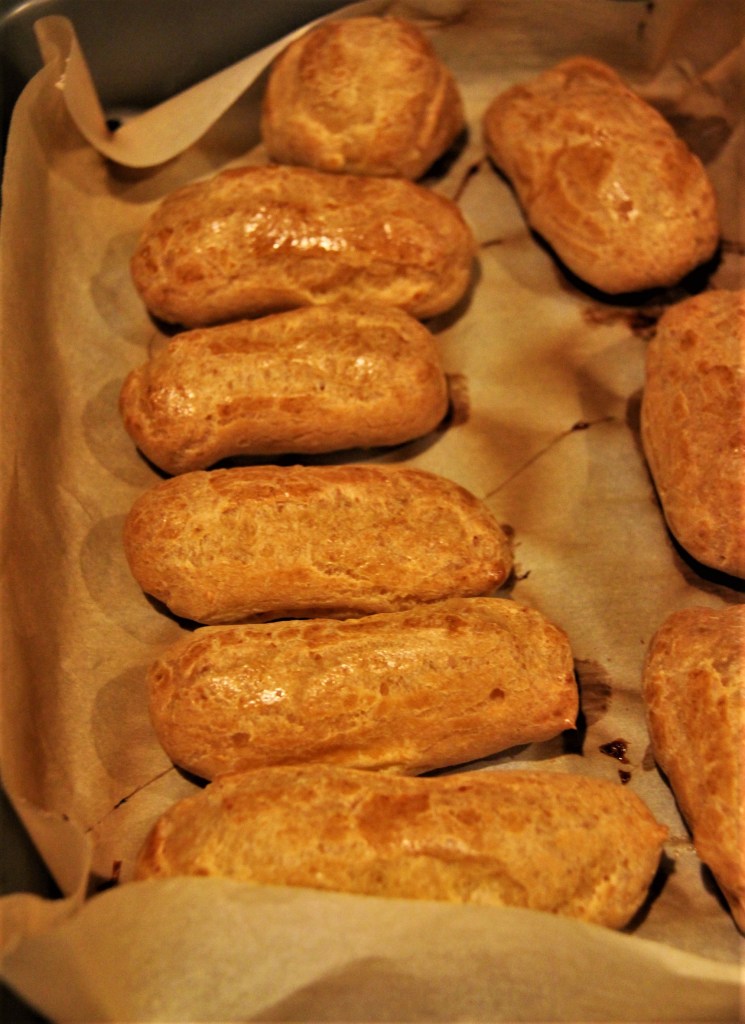
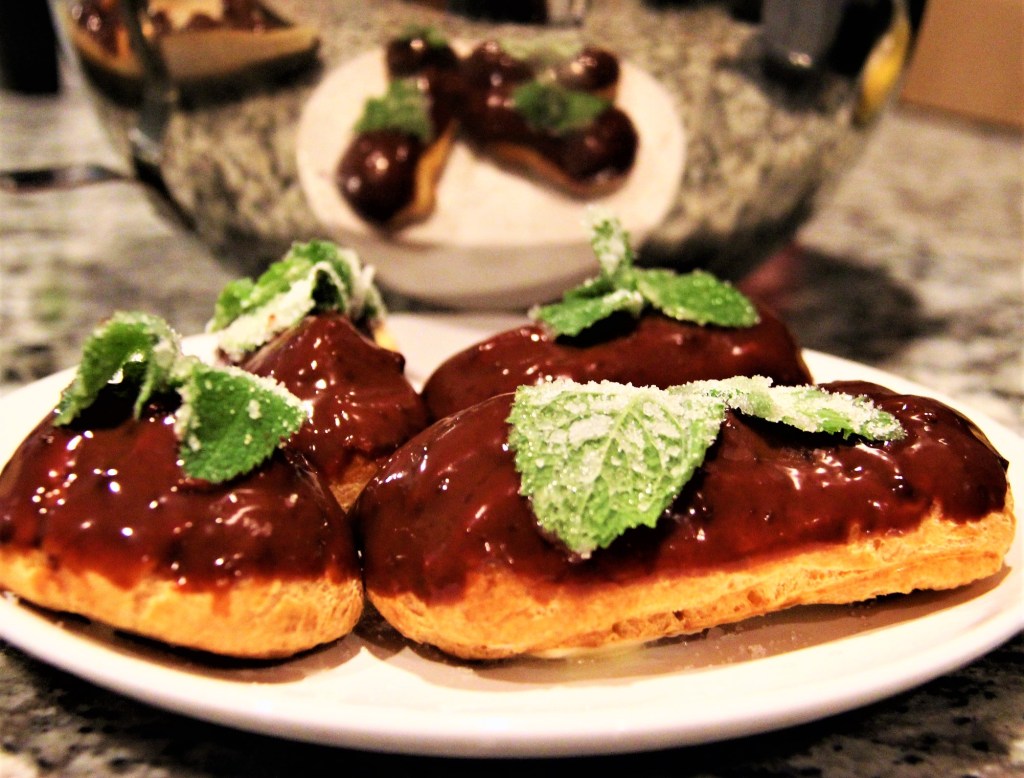
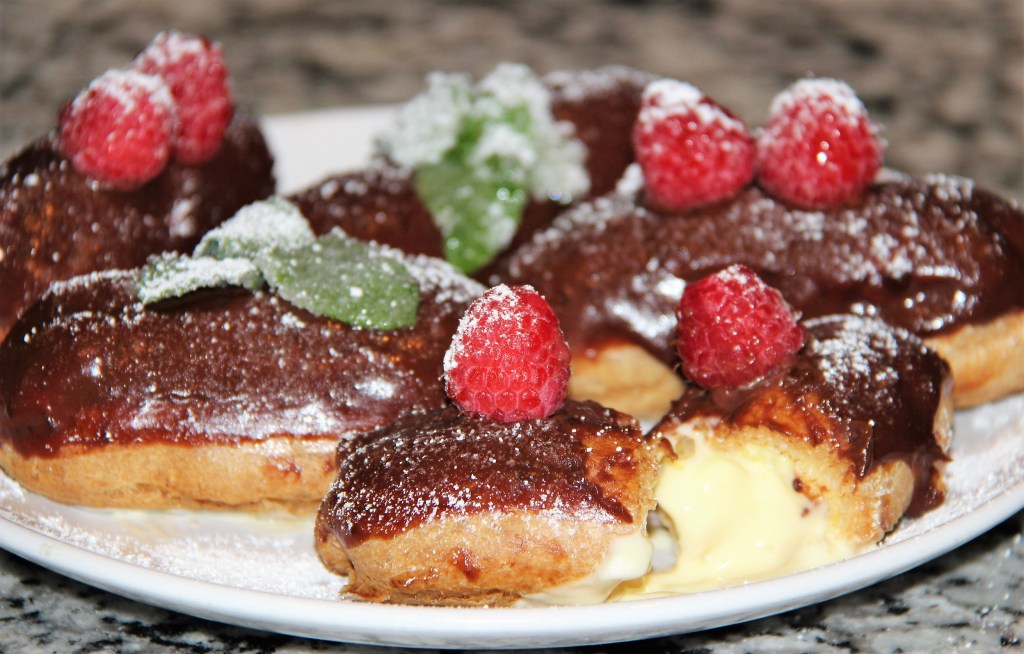
The classic French eclair is a long, puffed up pastry that encases a smooth sweet cream and topped with a shiny chocolate. The name pâte meaning pastry and choux meaning cabbage together cabbage pastry does not inspire cravings for a sweet dessert. However, it does spark inspiration for what all choux pastry can be used to create. Here, we will stay within the dessert category for our eclair recipe, but I do challenge you to consider the possibilities for a dinner, savory, or other snack variety for this puffed, hollow pastry.
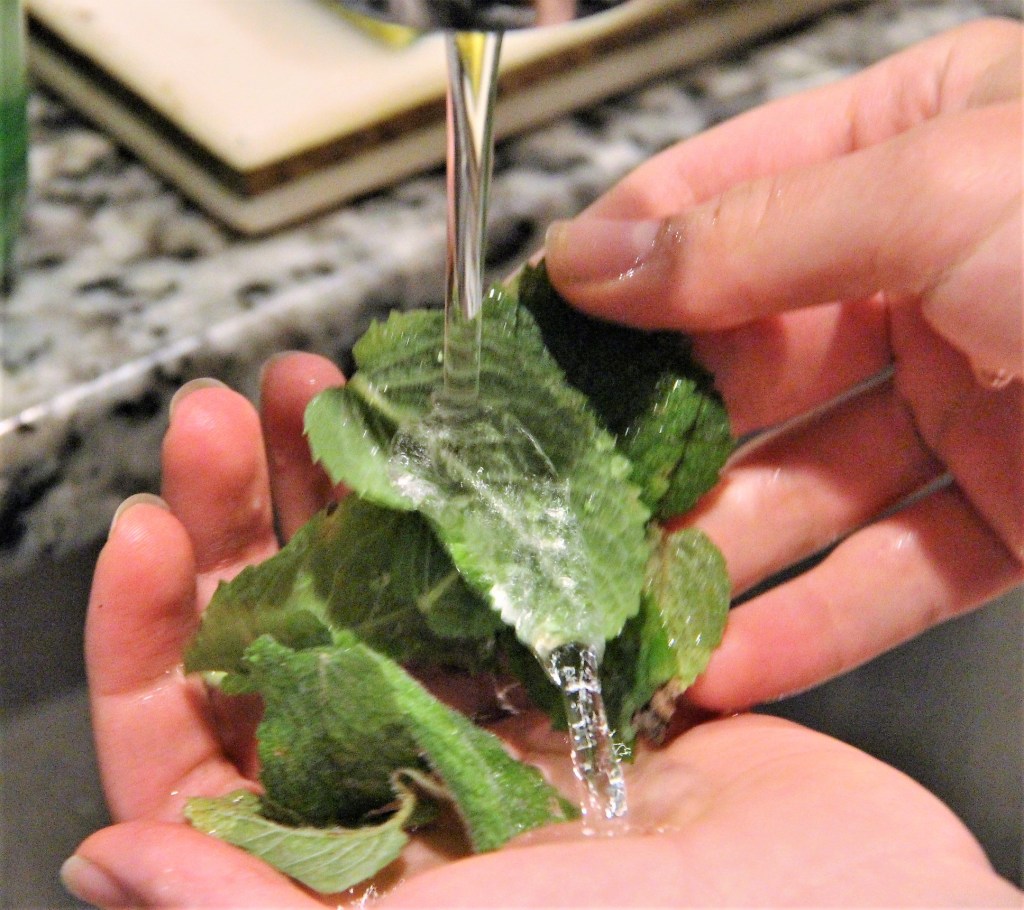
Wash the mint
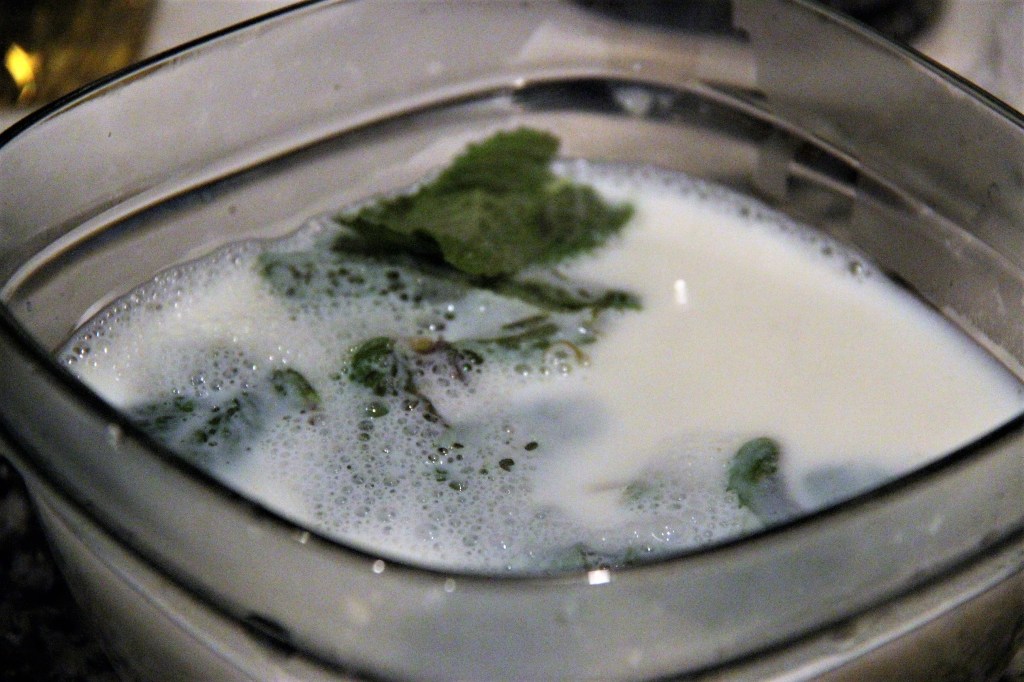
Bubbles just along the edge
Learning about the variations of pastry cream (crème pâtissière) has been an enlightening and enriching educational experience for me. I am providing here 3 variations of typical eclair fillings to provide an explanation of the options available for filling choux pastry.
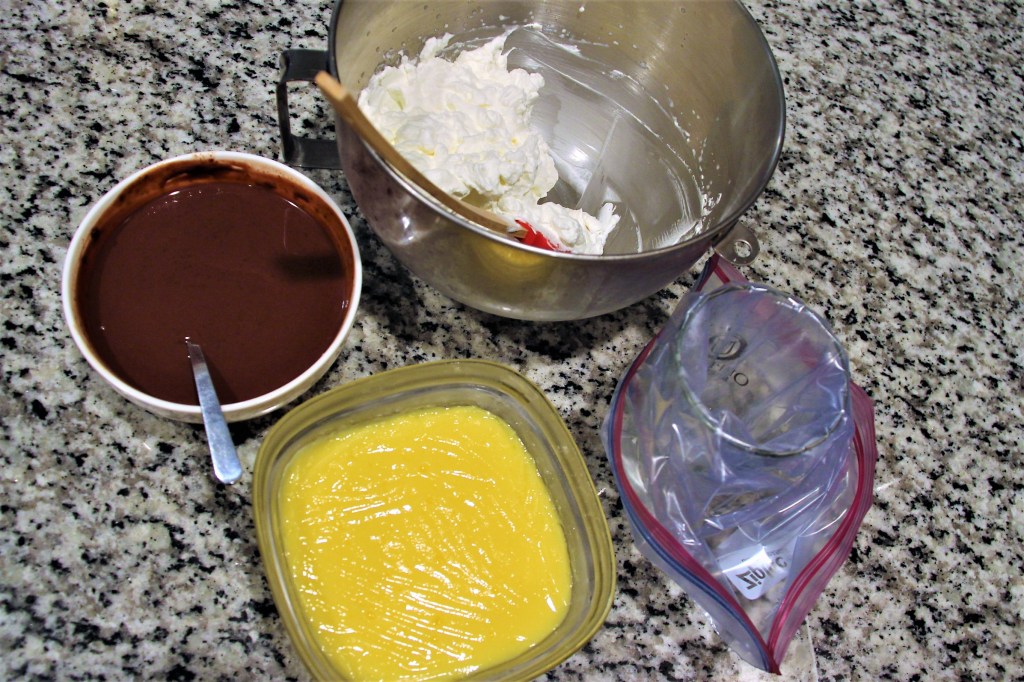
To summarize: crème pâtissière is a thick custard which is typically piped into pastries such as profiteroles (round, filled, usually frozen pastry), cream puffs (round, filled pastry), or eclairs (long, filled pastry). When whipped cream (crème Chantilly) is added to crème pâtissière, it becomes a light cream (crème légère), which can also be pipped into pastry. If gelatin and optionally other flavoring is added to a crème légère, it becomes a crème diplomat. Whew, that is enough crème!
I am including 2 variations of the Crème Légère under [Filling 1] and [Filling 3] [Option 1]to show that the significant part to making a cream is the richness the eggs bring and their reaction with the heated milk. While every recipe needs balance, the amount of the ingredients and the order they are incorporated is not as significant here (i.e. if the vanilla is added pre-heat or post will not make a huge difference). Try the variation that suits you best and determine for yourself which you prefer.
crème pâtissière
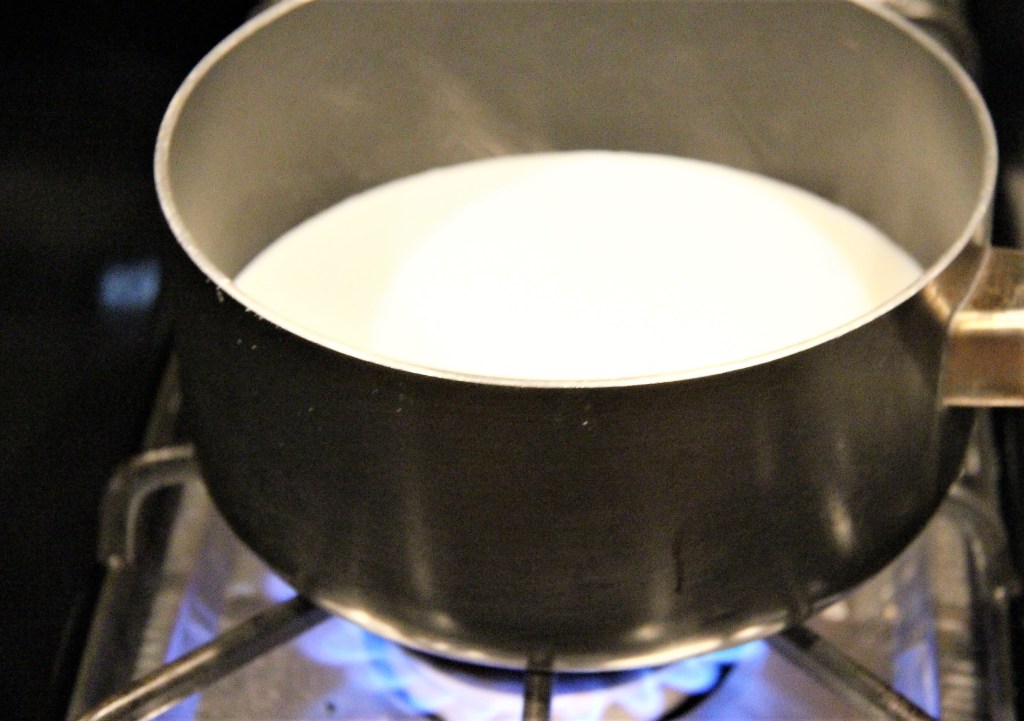
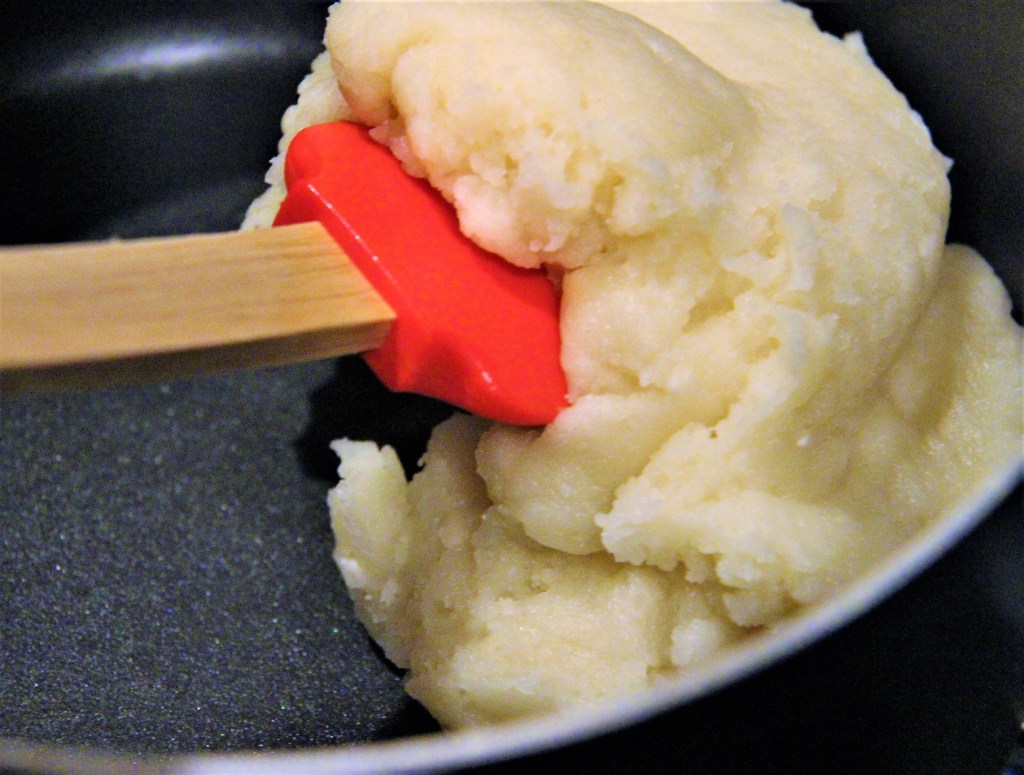
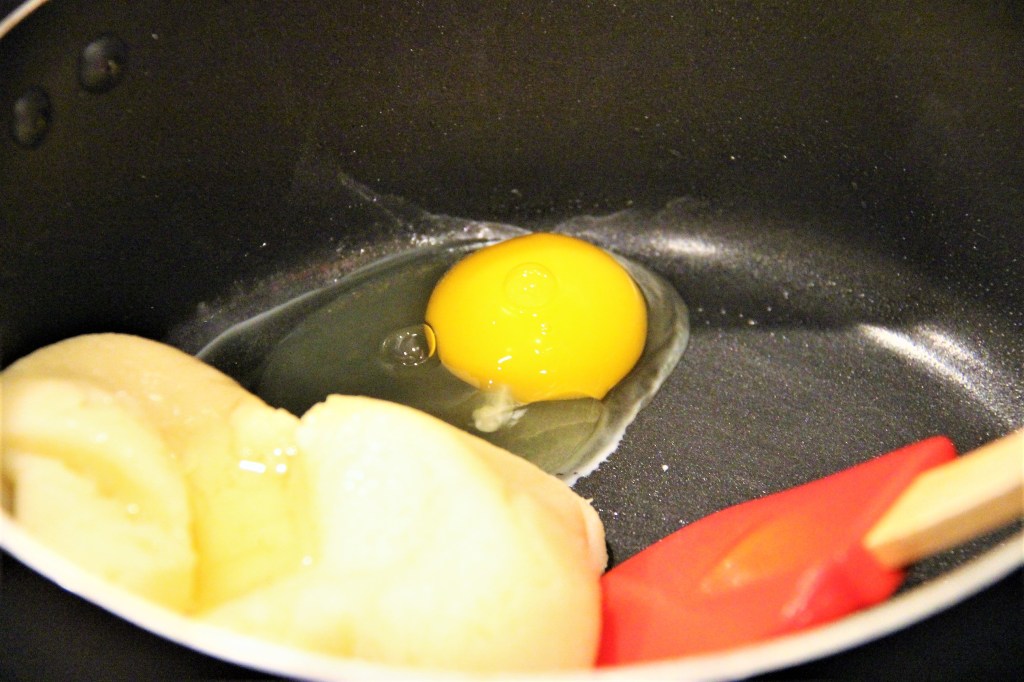
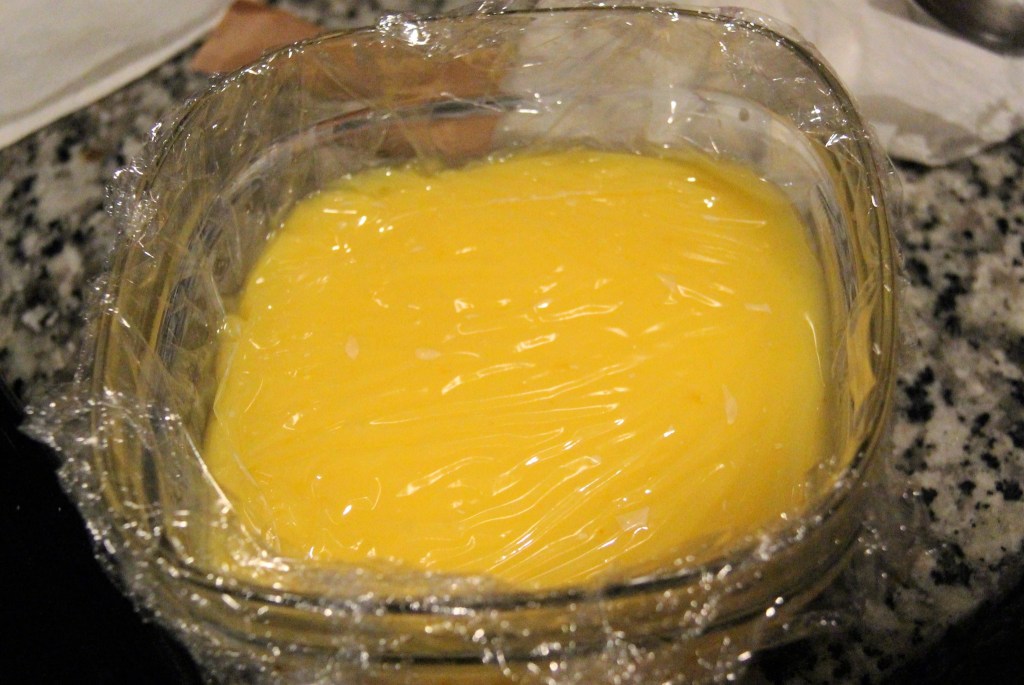
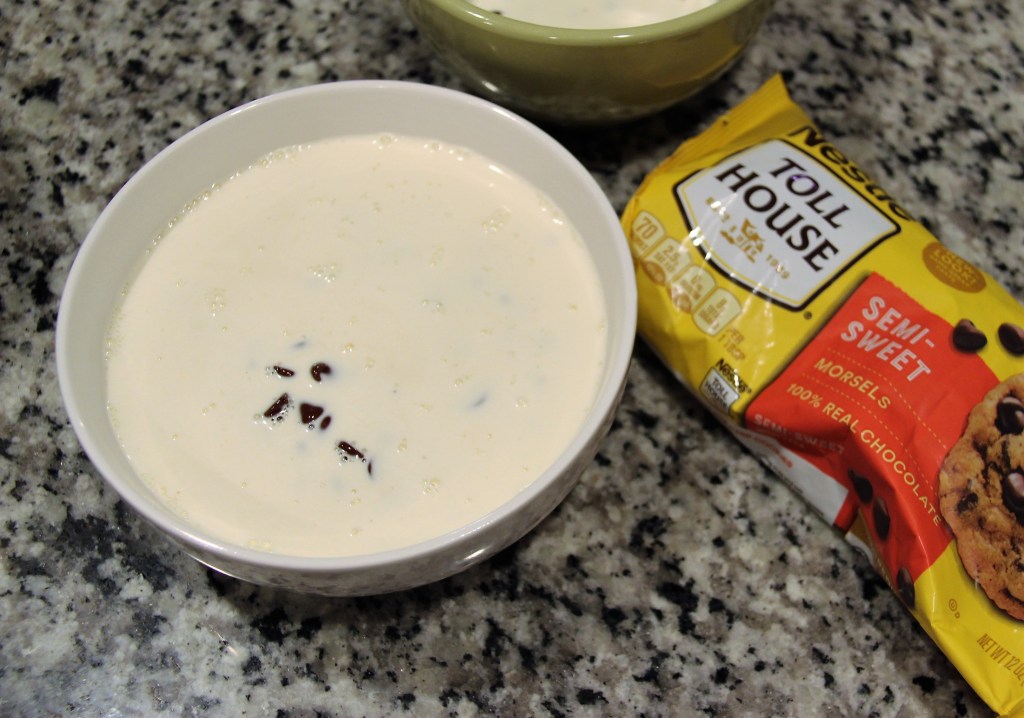
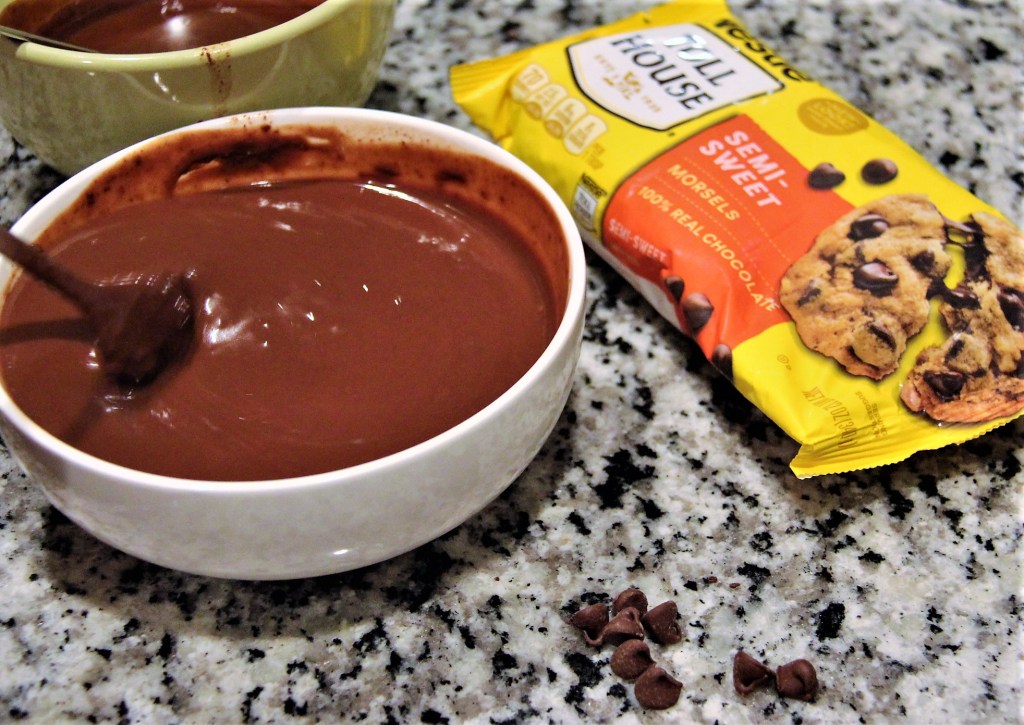
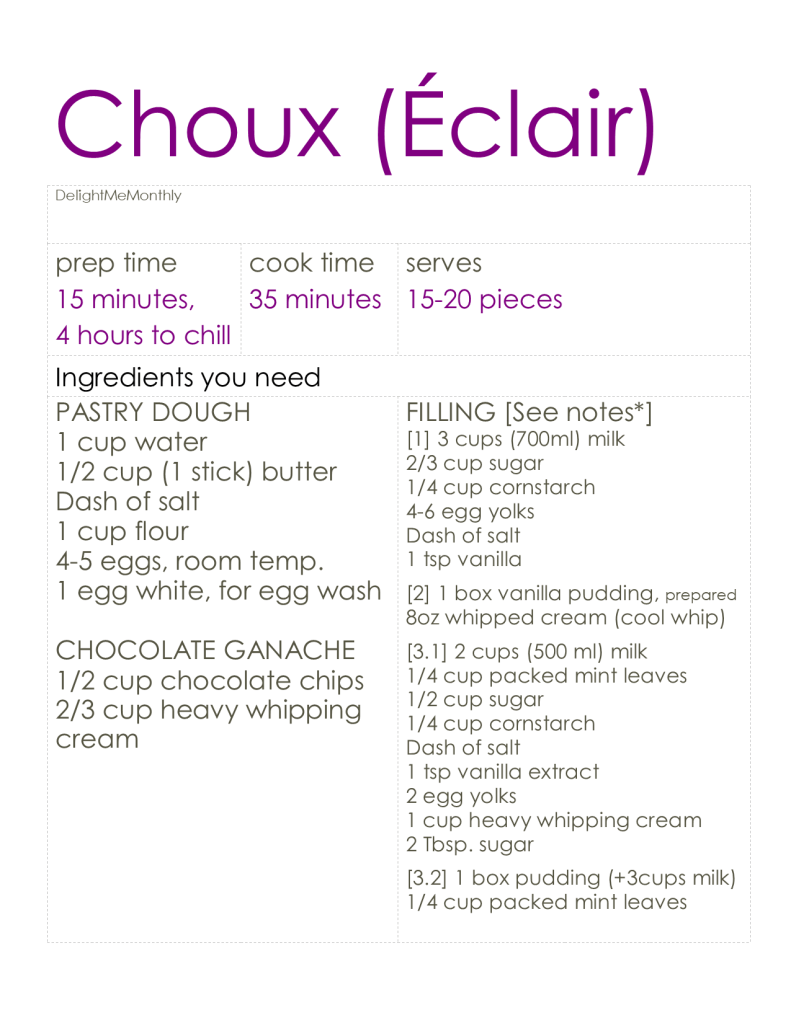
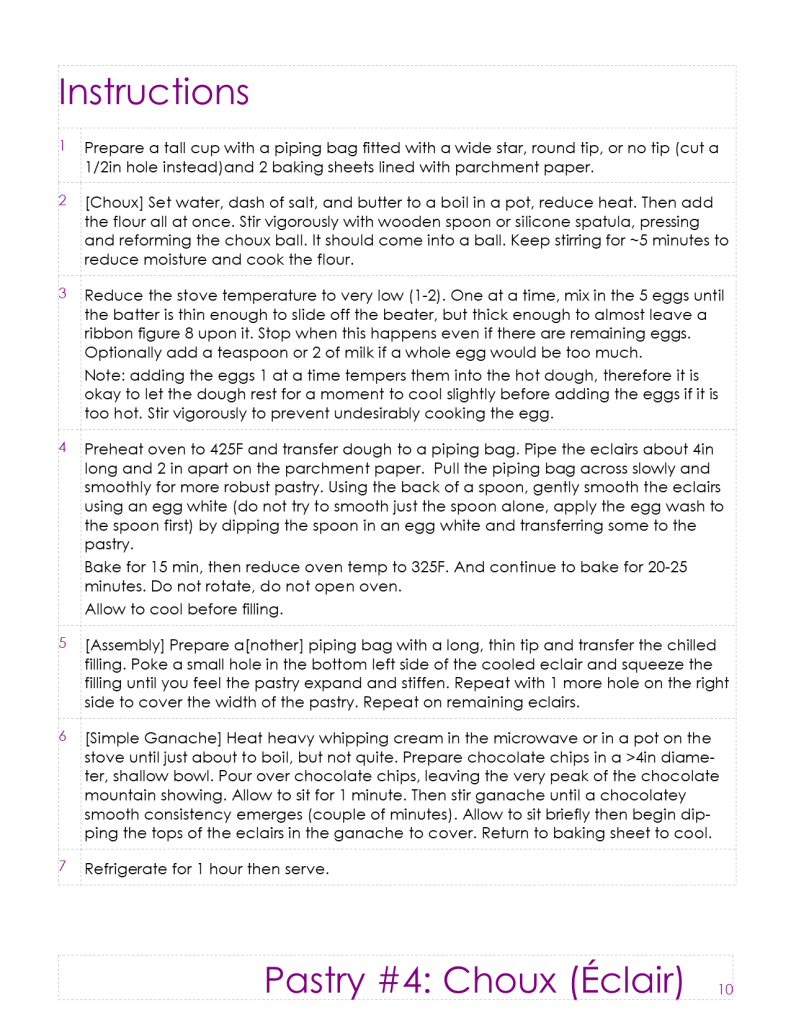
[Filling 1] Crème Légère (light custard) is made by folding crème chanilly (whipped cream) into crème pâtissière (typical pastry cream). For the crème pâtissière, heat 3 cups (700ml) of milk in a pot until small bubbles form, but does not boil (175-180F). Whisk 2/3 cup sugar, 1/4 cup cornstarch, 4-6 egg yolks and a dash of salt in a separate bowl. Drizzle the milk over the egg mixture, slowly, whisking vigorously to temper the eggs and combine the ingredients. It is not necessary to completely pour the hot milk into the eggs, just enough to temper (warm) the eggs without curdling them. If there is some curdling, it can be whisked or filtered out. Return all contents to the pot and continue to cook on a medium heat, stirring for about 2 minutes. Some bubbling or boiling is okay at this stage. Optionally you can add 1-2 tablespoons of butter here for taste, but I would not recommend for a piping consistency. Once it has been reheated, transfer crème pâtissière (custard) to a glass bowl, mix in the 1 tsp vanilla extract and cover with plastic wrap that touches the surface (don’t skip this) and allow to cool on the counter then refrigerate until chilled (4-8 hours).
[Filling 2] Whipped Box Pudding is exactly as it sounds and made by preparing box pudding according to the instructions then folding in whipped cream. Chill thoroughly before pipping.
[Filling 3] [Option 1] Fresh Mint Whip is prepared from scratch by making a crème pâtissière via heating 2 cups of milk almost to a boil, but not quite (about 175F), then removing the milk from the heat and adding in at least a packed 1/4 cup fresh mint leaves. Allow to steep for 15-30 minutes, depending how intense you want the flavor (more leaves and more time leads to a stronger flavor). When the steep is done whisk 1/2 cup sugar, 1/4 cup cornstarch, dash of salt, and 1 tsp vanilla extract in a separate bowl. Then strain the milk through a sieve back into the pot adding the sugar mixture and whisking thoroughly and immediately return to heat and continue to mix as it thickens. Separate and beat 2 egg yolks in the separate (previously used as the) sugar bowl then slowly add them, while whisking constantly, to the milk mixture. Once homogeneous remove from heat, cover with plastic wrap, touching the top of the cream to prevent the crusty film from forming and allow to cool. Move to the fridge after initial cooling to speed up the process. Optional to add dissolved gelatin for a thicker pudding. Make the whipped cream when the custard has cooled completely. In the summertime, place a metal bowl and the cream in the freezer 15 minutes before whipping to ensure it stays cold. Whip 1 cup of heavy cream (double cream), sprinkling sugar, 1 tablespoon at a time (2 total) until soft to medium peaks form. Fold the whipped cream into the Creme Patissiere until a thick, but light Crème Légère is formed. [Option 2]Alternatively, prepare using a box of cook and serve pudding. Heat the milk according to the box, but then remove from heat and allow fresh mint leave (or peppermint extract) to steep in the milk, off the heat for 15-30 minutes. Strain out the leaves, return to heat, and prepare according to pudding box instructions. Add green food dye to the custard before it cools, if desired.
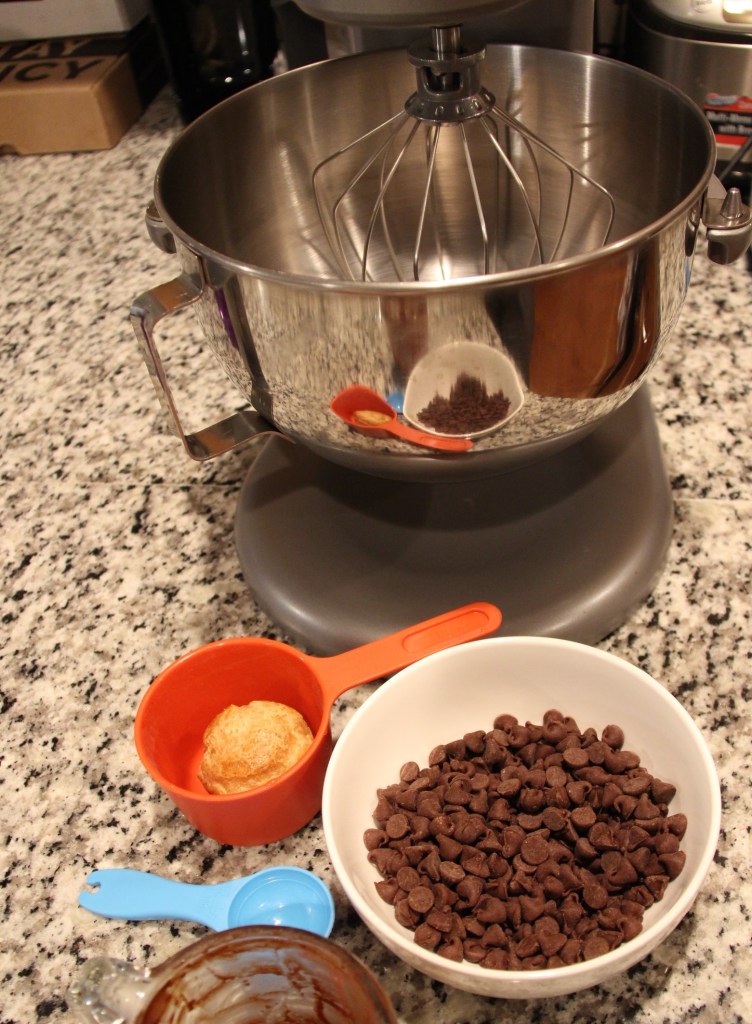
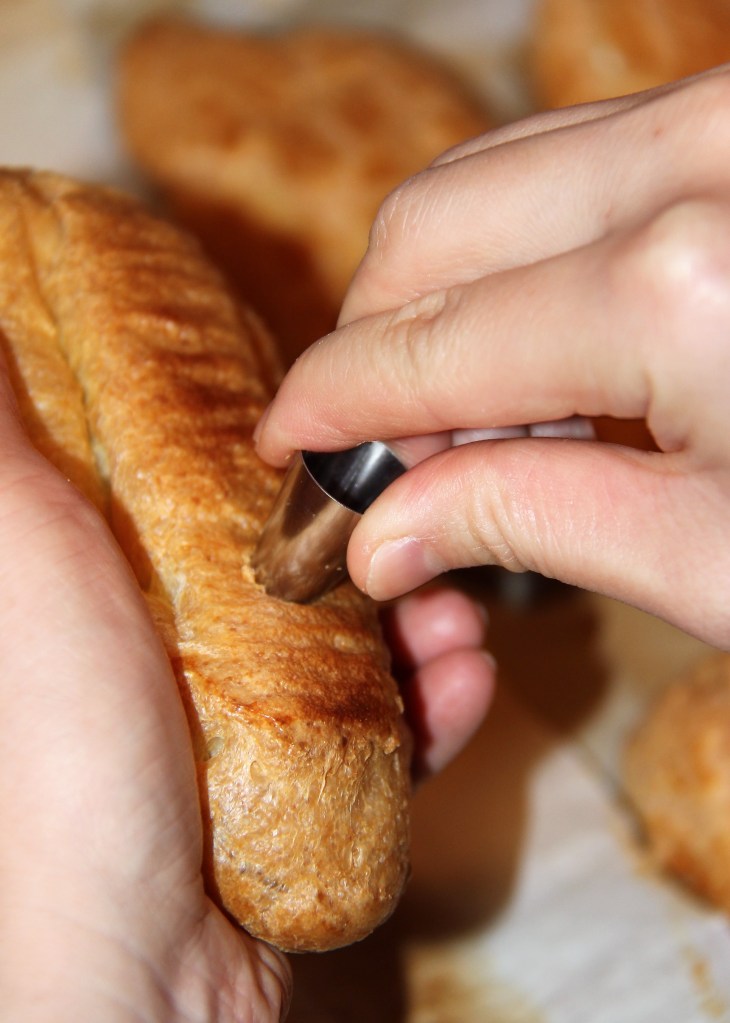
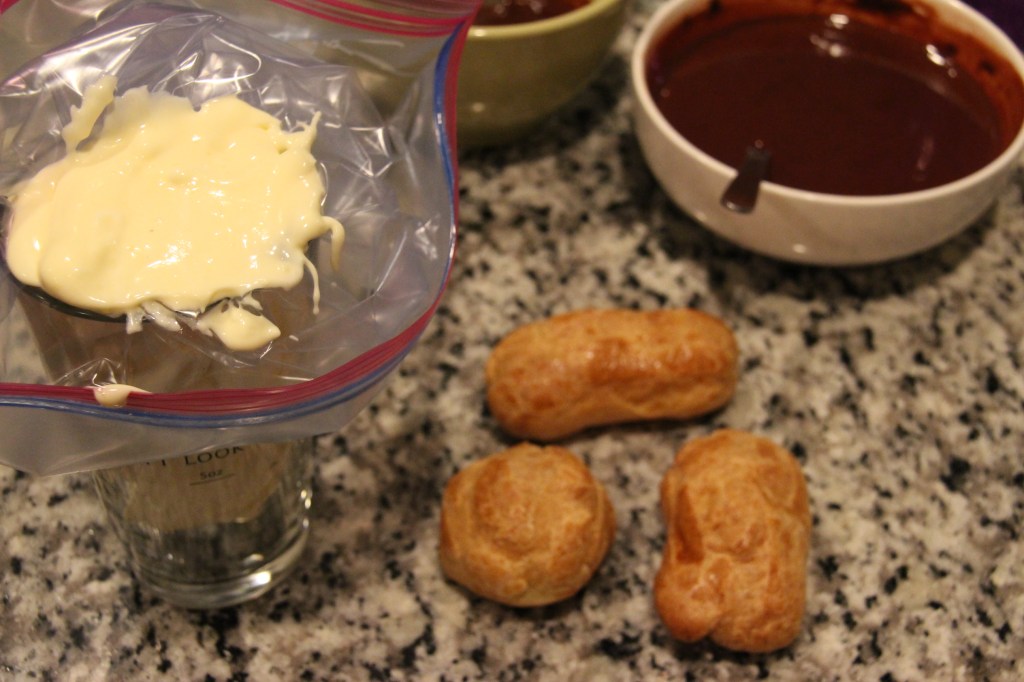
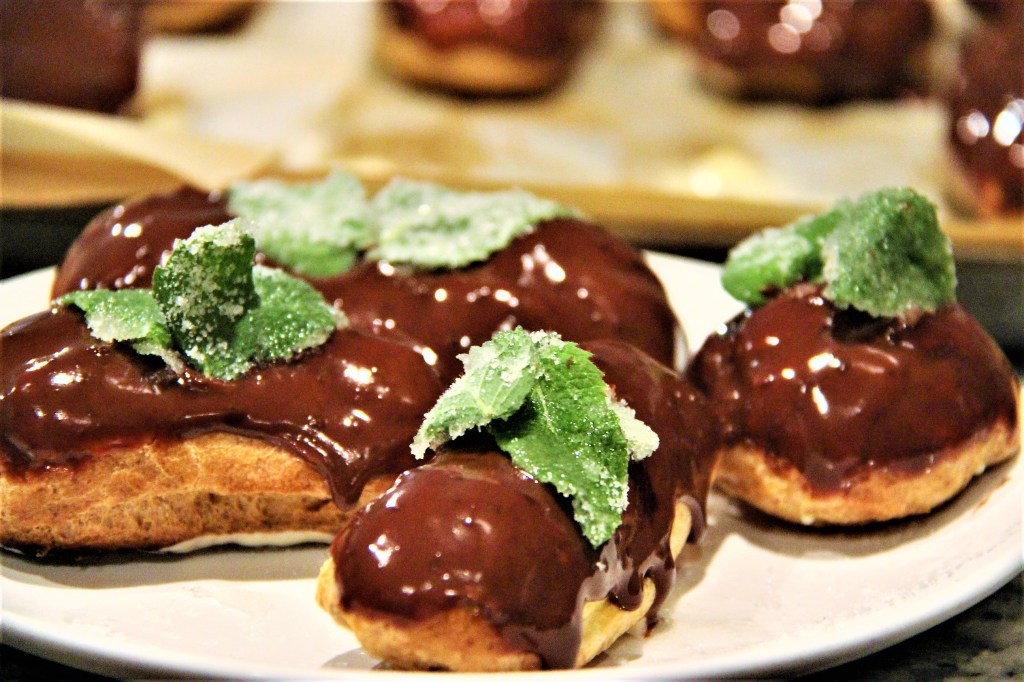
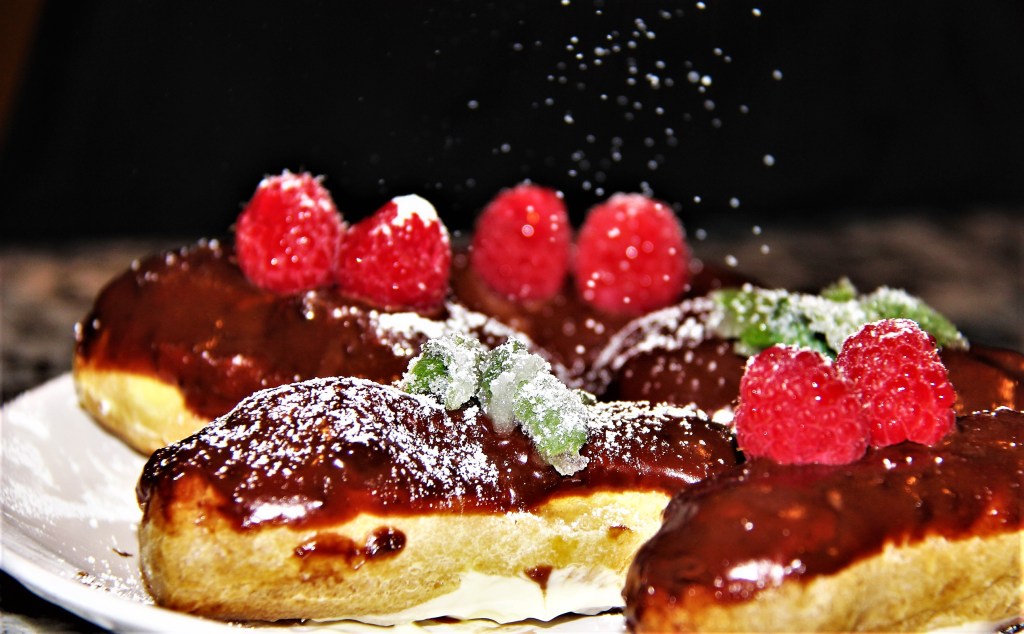
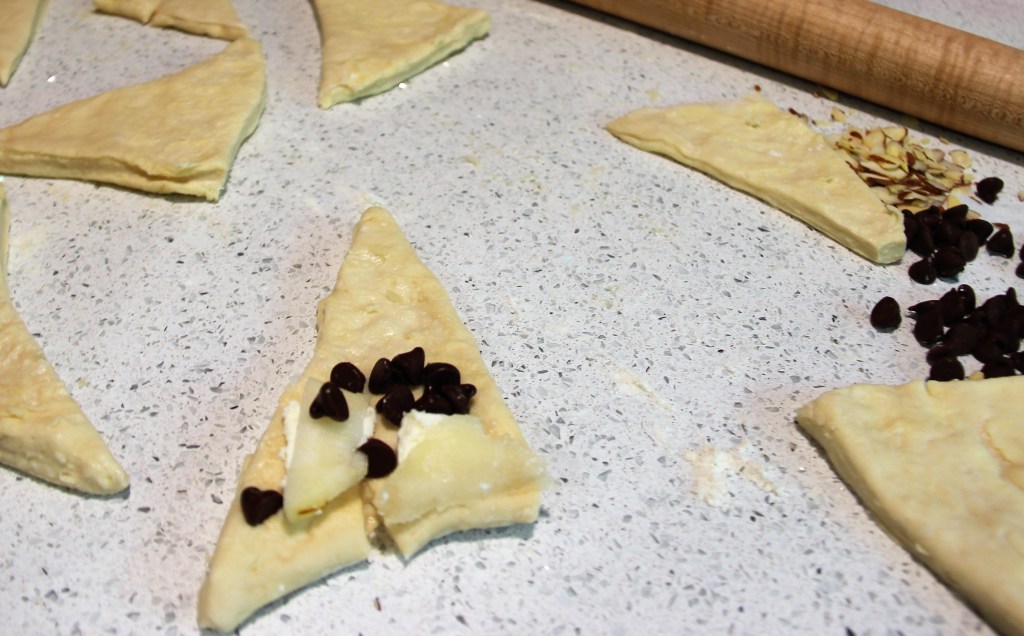
Take-Home Tips: Although a piping tip is not required to pipe the choux, I do recommend using one to manage the cream into the pastry. If you do not have one, you could cut the eclair in half lengthwise and pipe in cream then put the halves back together. Any flavor of cream or pudding will work for the inside. If you experiment with non-vanilla flavors, let me know your favorites! (I thought about crushing Oreo’s to make a cookies and cream filling.) Adding the raspberries on top really stepped up the beauty and flavor of the eclair. Smoothing the tops of the pastry helps with the external texture, but take care not to press down and flatten the shape.
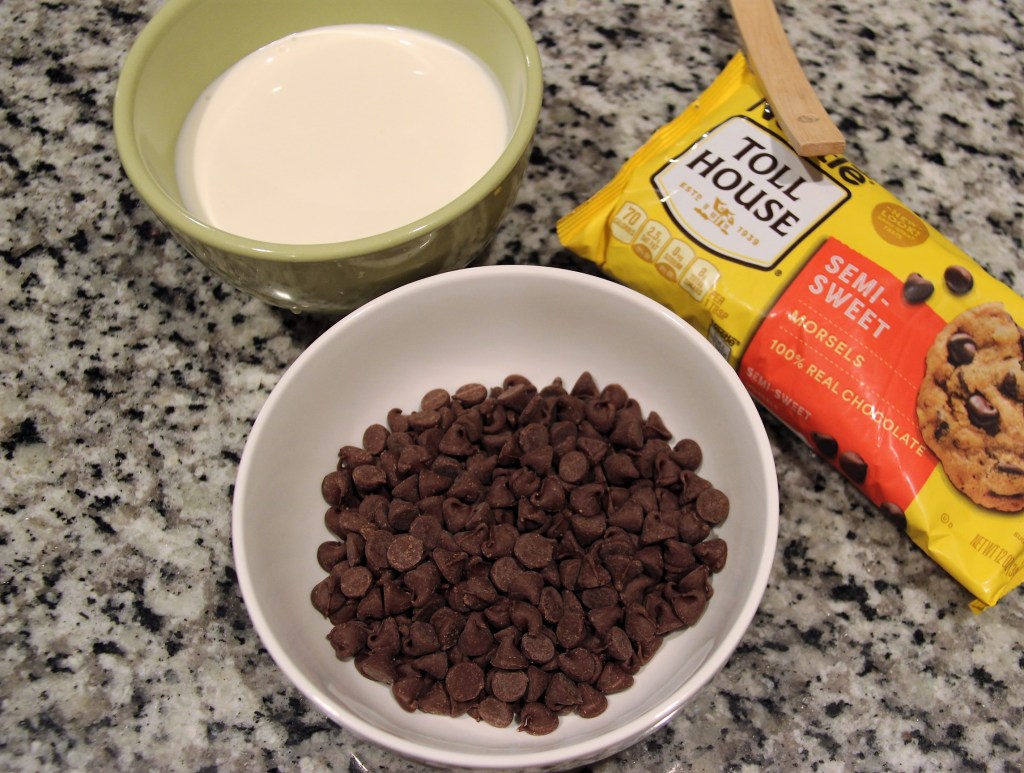
Scoring: 10 of 10. This recipe is incredibly easy to prepare, tastes amazing (that cream!), has numerable variations for the filling and topping, could be used for a savory recipe, is light and great for a summer treat. It is not a heavy dessert, but gives the ideal combination of cool sweet cream, a light coating of simple ganache, and the slight crunch from the choux. We were all blown away by how little time these took to make for how fancy we felt eating them. An ideal party dessert for any occasion.
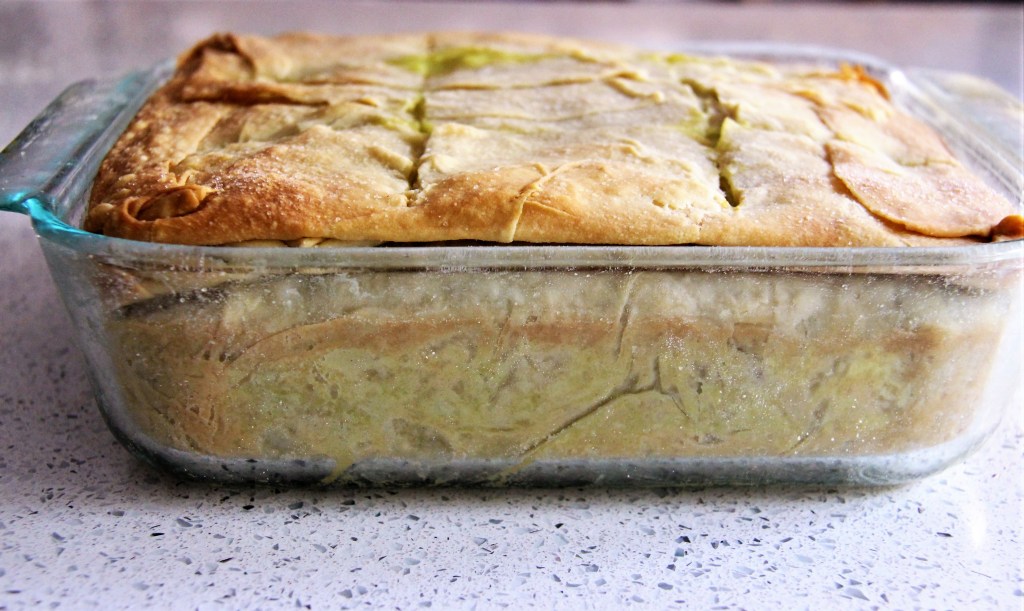
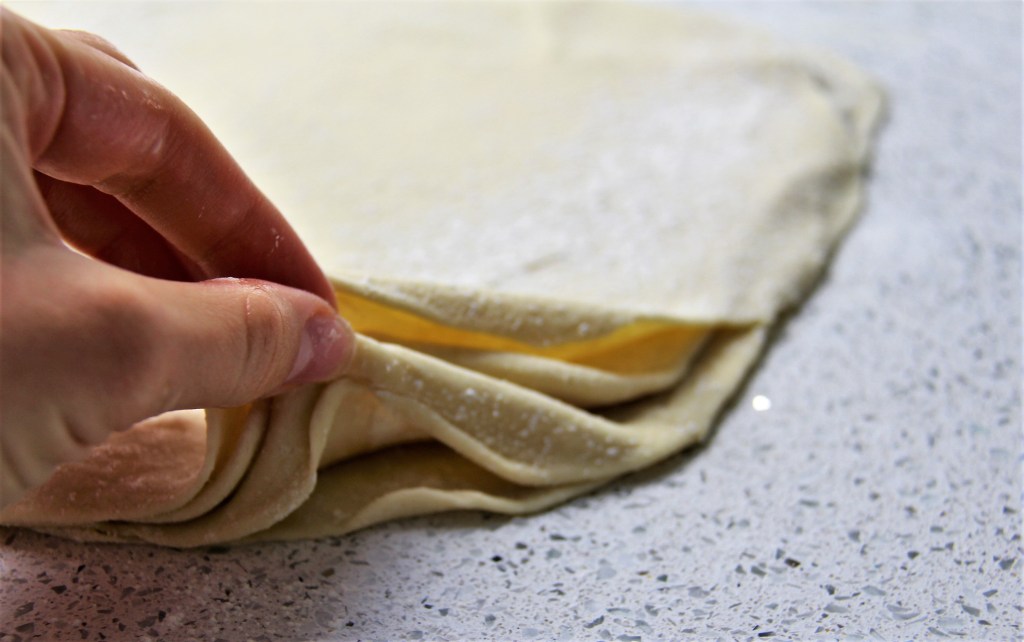
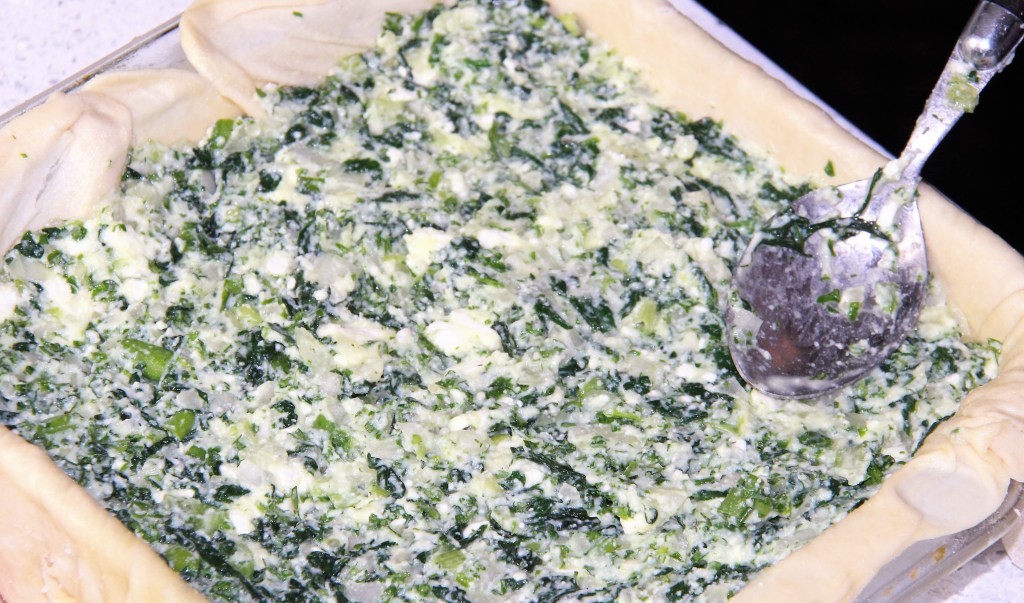
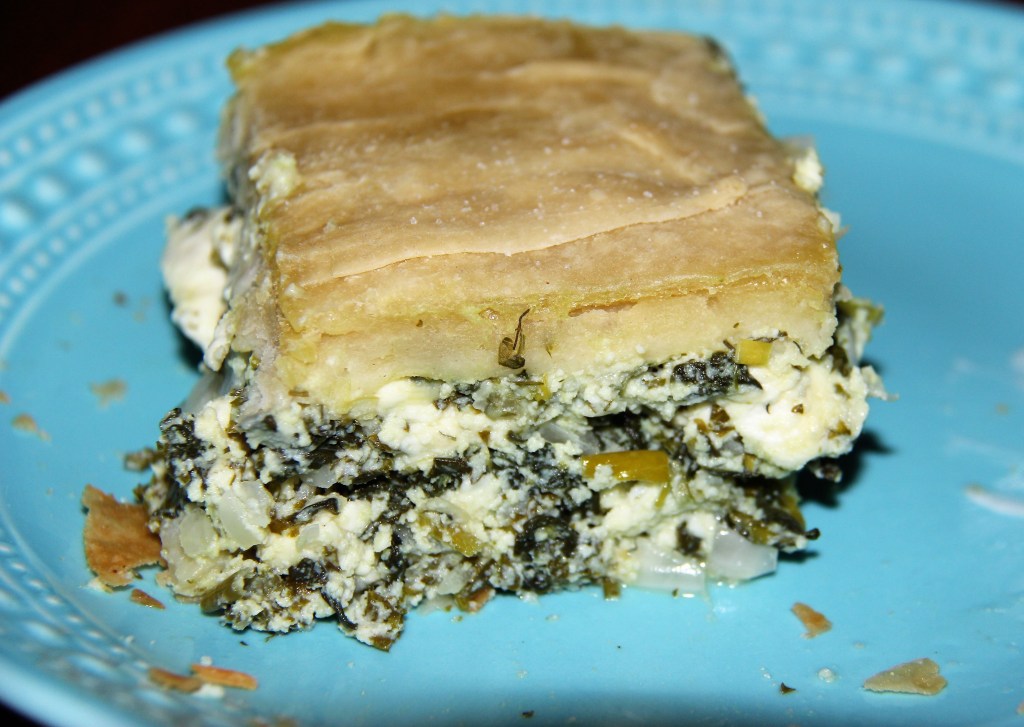
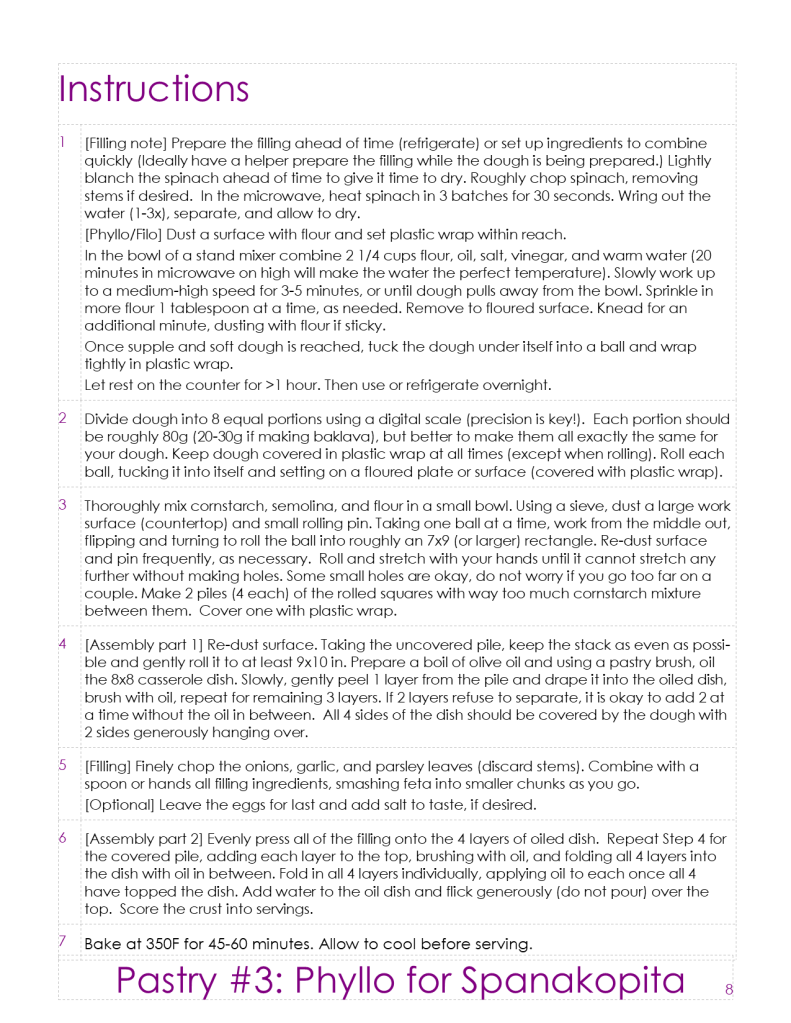
The moment I mentioned filo pastry to my husband, he insisted I had to make spanakopita. To him it was a fact as clear as the big E at the eye doctor. The spinach pie was a gateway for my leap into the Greek food world as a young person and we were all surprised that I favored it immensely. If you are ever in Savannah, Georgia, there is a Mediterranean restaurant (Olympia Cafe) on the end of River Street that I recommend to any visitors. When I get the opportunity to pop down there, I make that a must-stop. I always get the spanakotiropita and can never get enough of it.
Finally, my husband pushed me to use pastry month to make it at home. I am not disappointing and am considering making more and freezing it for future cravings. Technically this recipe is for spanakotiropita as it includes lots of cheese.
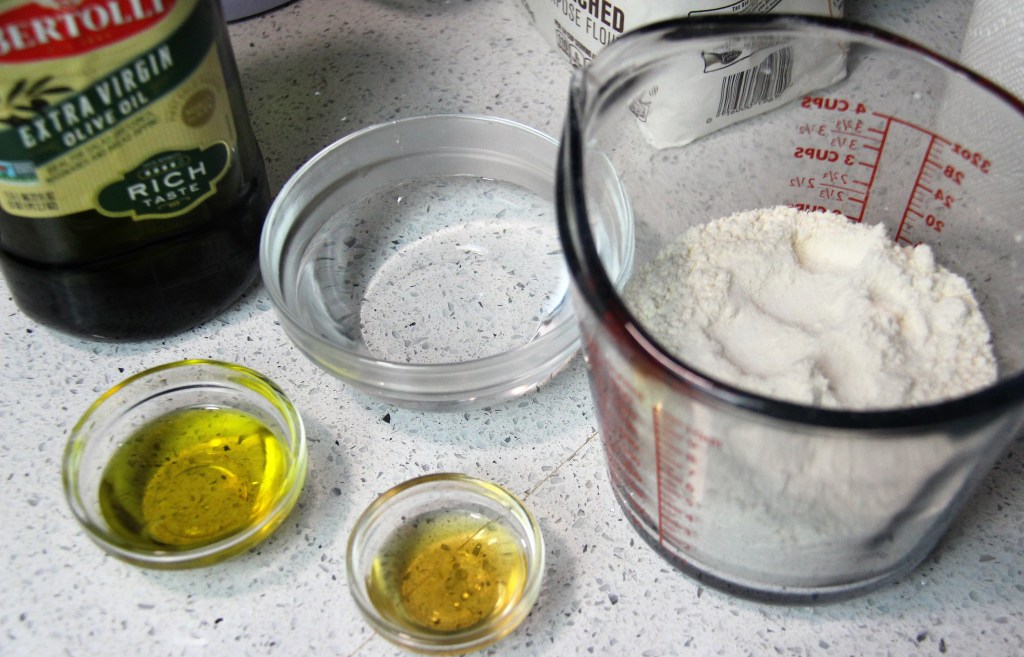
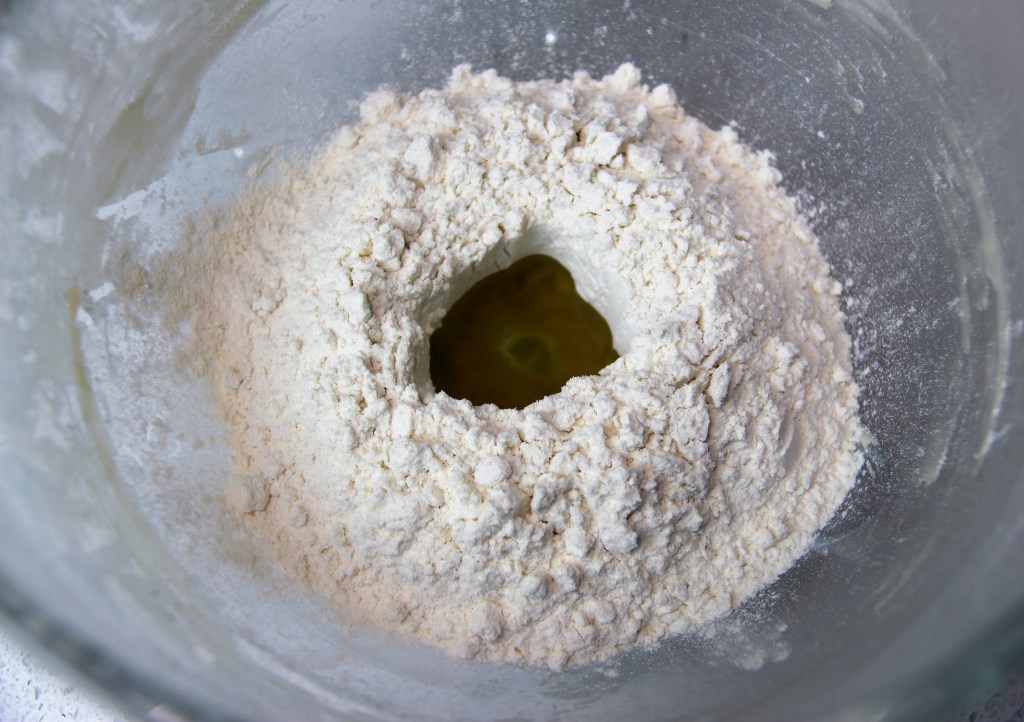
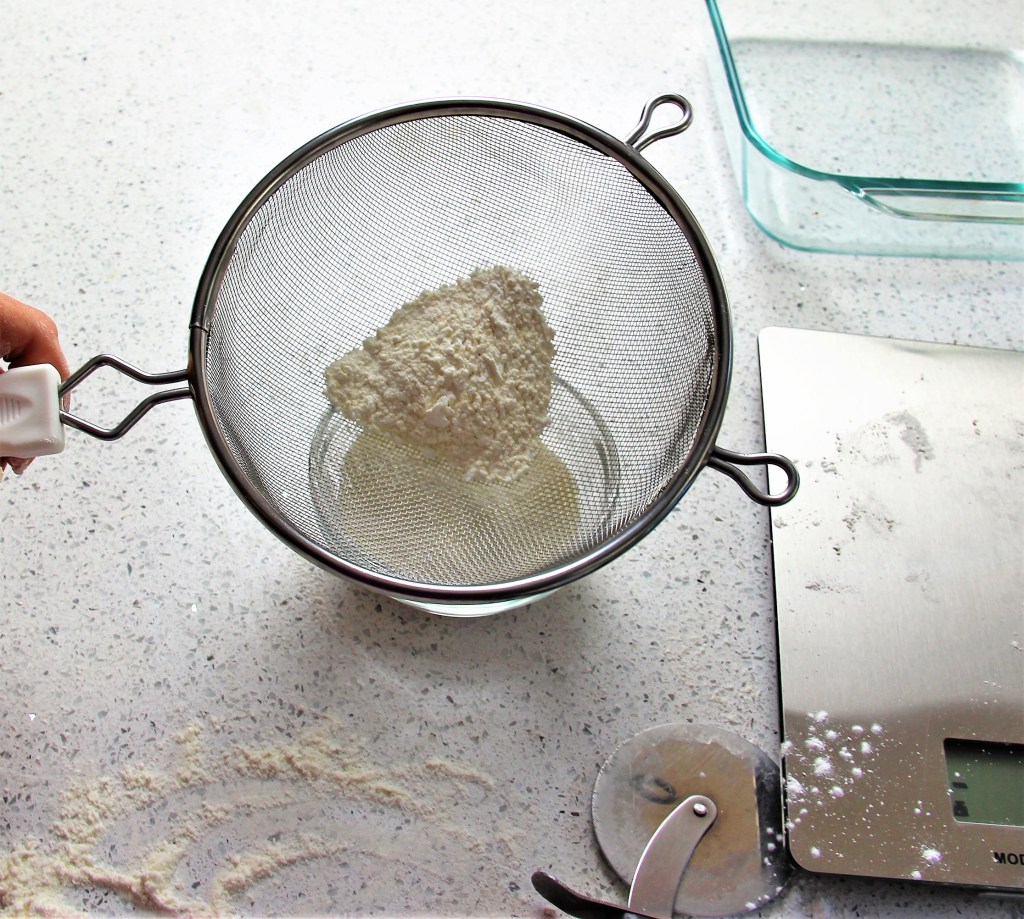
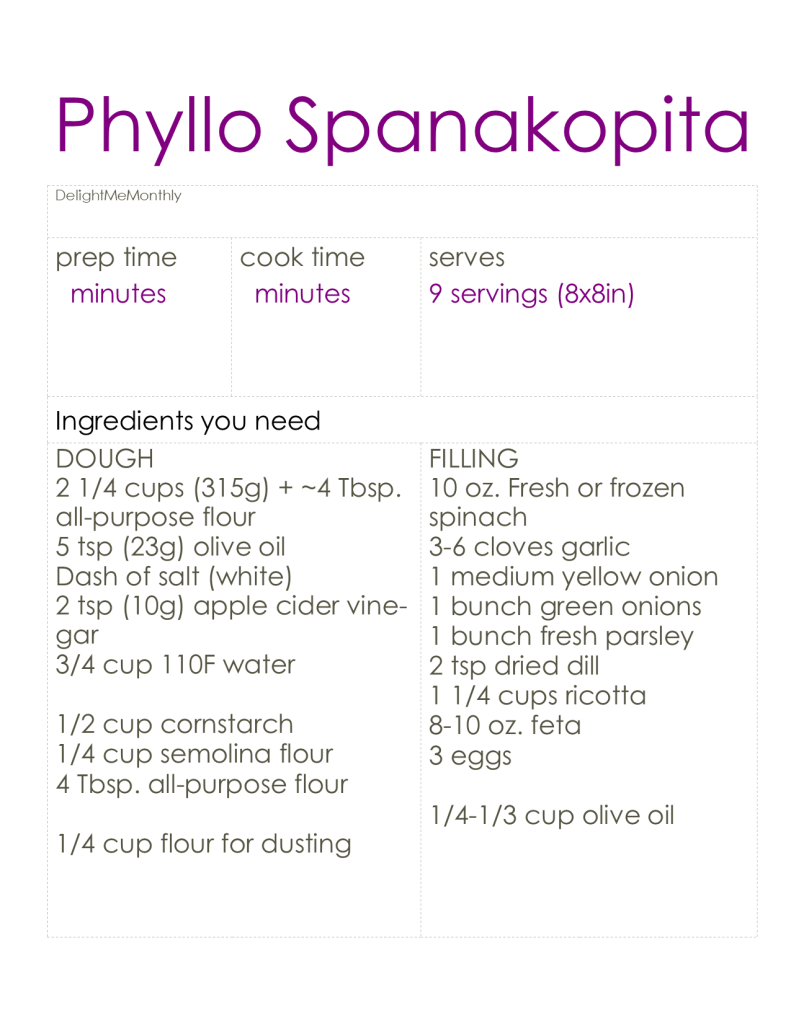
It was such a challenge to find a recipe online that included making the dough from scratch too. After hours of searching, I resolved to write my own as I taught myself how to make it. Thankfully restaurants write their ingredient lists under their spinach pie titles and I added very little else in the way of spice. Feel free to ad in all your favorite Greek spices to the filling (marjoram might be good too)! If your goal is quick and easy, sure, go ahead and purchase the frozen filo dough to layer. I do not like the taste or texture of the frozen filo and opted to prepare my own.
Cornstarch mxture
Thin enough to see through
4 layers
Layer pile
There is a stigma that because the layers are extremely thin that filo dough is challenging to a point where it is not worth trying to make. I have never found this to be the case. The layers do need to be rolled out to a see-through thinness, but that is not as difficult as it may appear. Do not be afraid based on what you have heard.
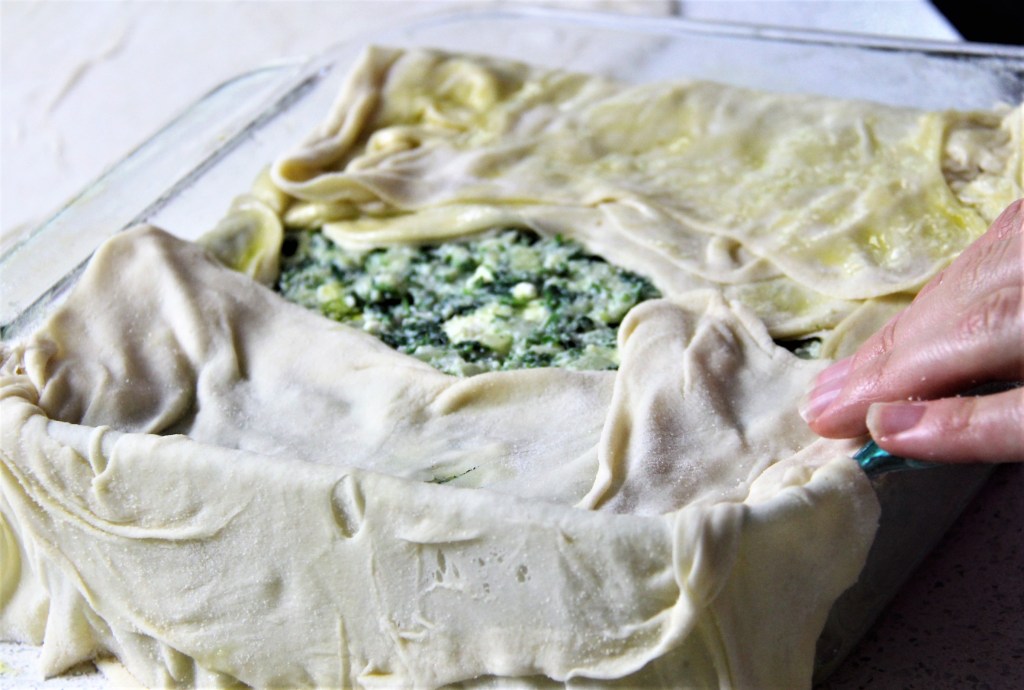
A fantastic way to try making filo for the first time is to use it for spanakopita! When making filo for a Greek dish, I think it is only right to call it phyllo as filo is British. No other differences. Great, now that we have switched languages, I will point out that even if there are holes in a couple of layers that is alright because there are enough layers to support and retain the filling. With other dough and pastries, when a leak is sprung, then there is a visible hole. This is not the case with phyllo. When there are back ups to the shell, it is more difficult to notice holes and for contents to seep out.
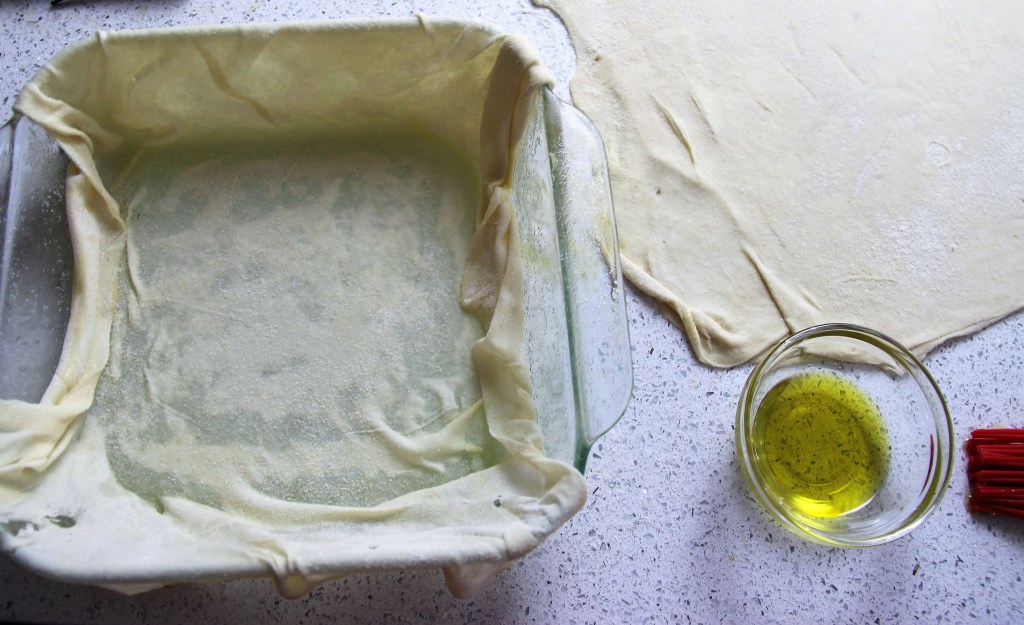
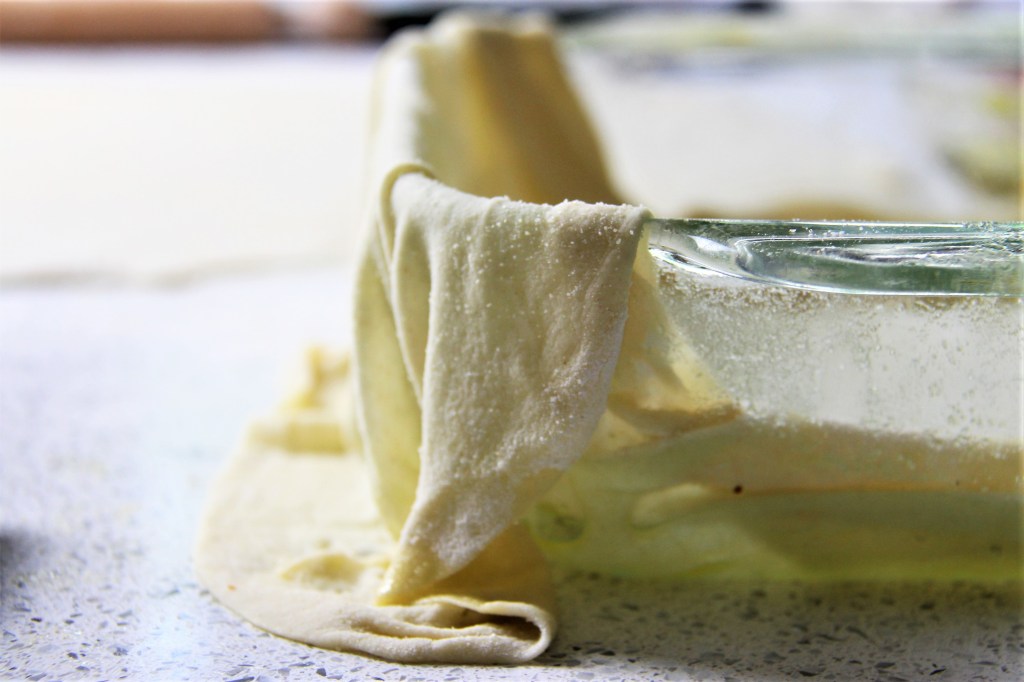
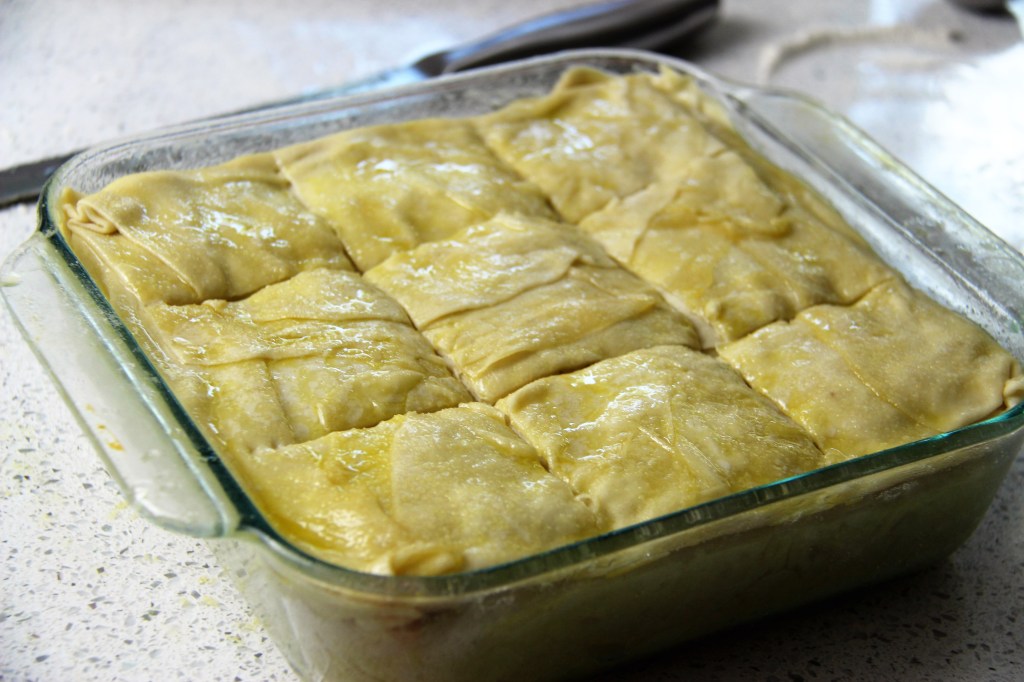
Now that you are brave enough to give it a go you can take the phyllo recipe below and use it for your other phyllo or filo needs. The dish you want to prepare will determine the size of your dough balls. I note in the recipe that for baklava specifically, the dough should be weighed to a lighter amount. The size of the dish dictates the weight of the dough. Many people make spanakopita to feed a whole family and need a 13×9 or baking dish size for a large batch. Increase the amount of dough and bake the full 60 minutes if you need to prepare for any larger baking dishes.
Apply all the oil to every layer
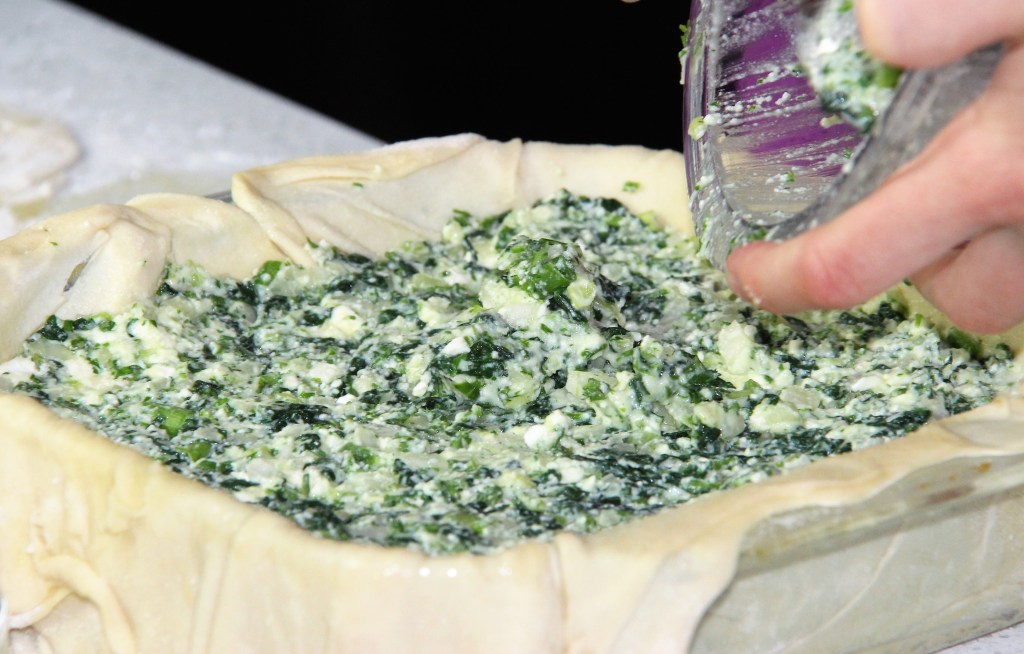
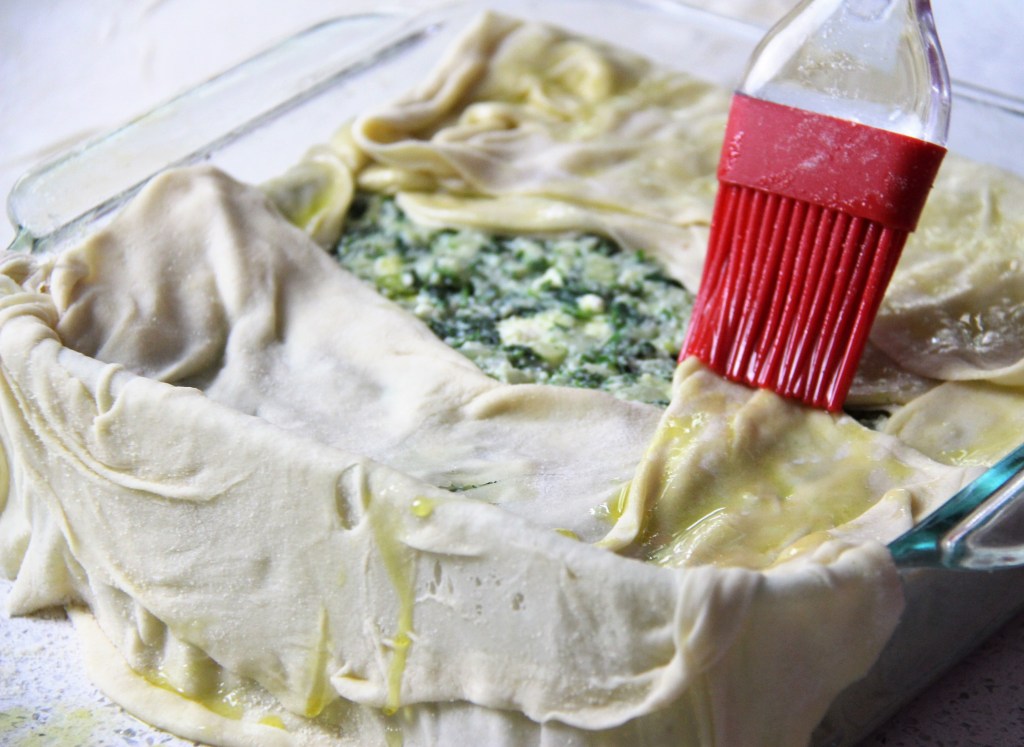
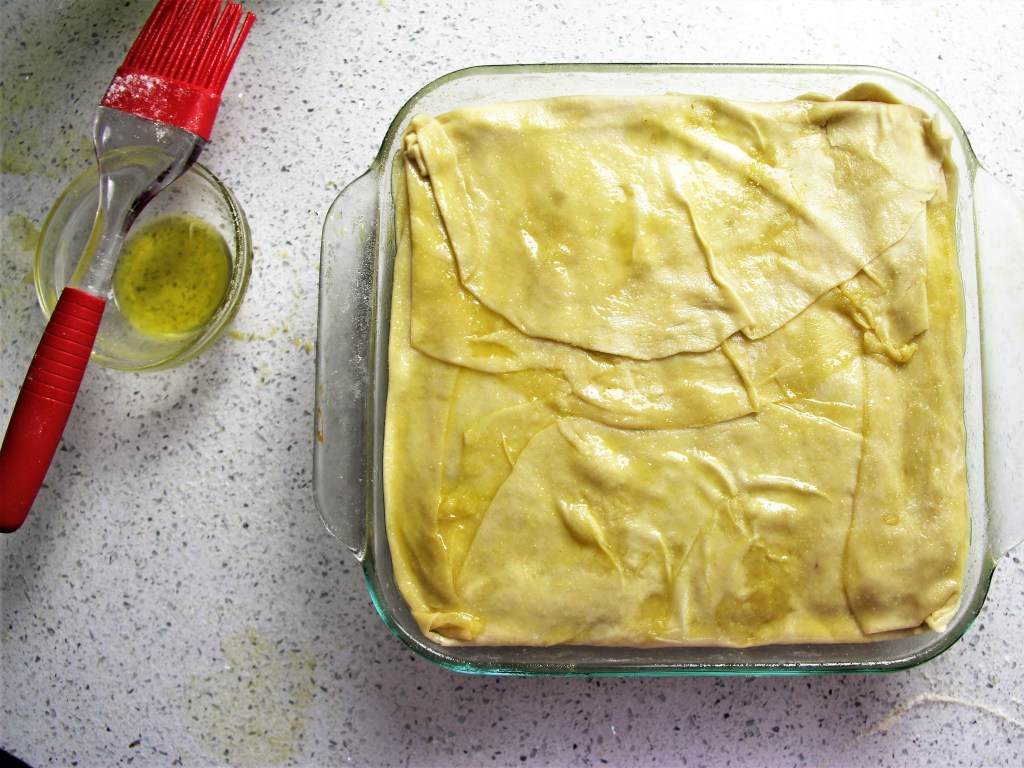
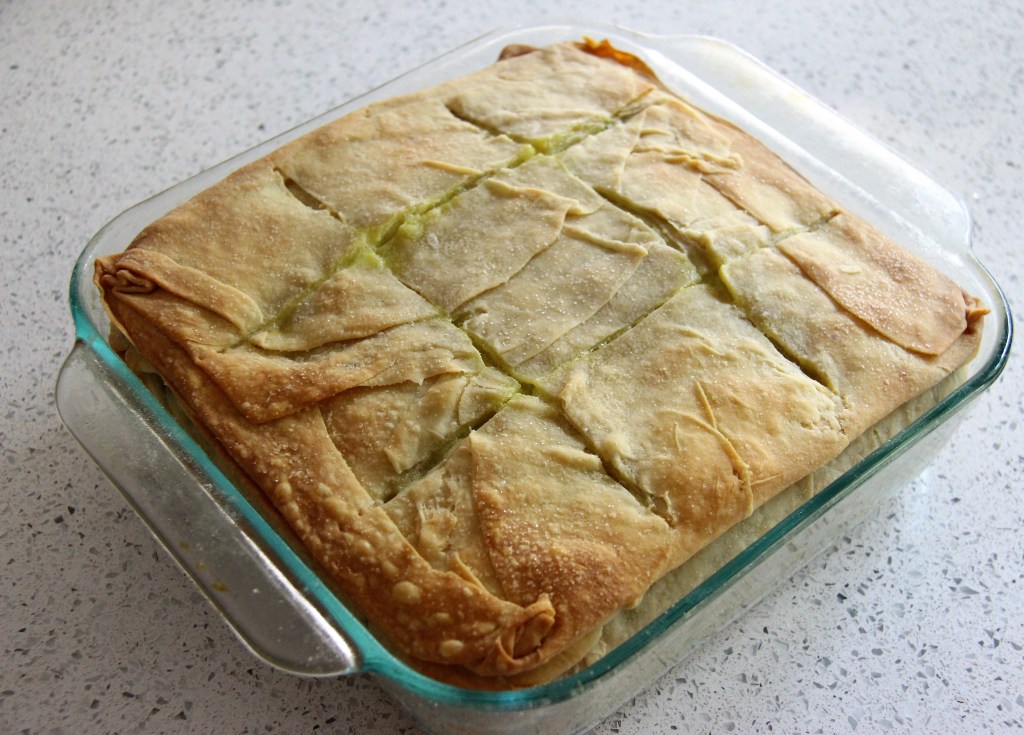
Take-Home Tips: The white vinegar (apple cider or white wine vinegar) break down the gluten in the dough and tenderize or soften it. It is optional, but I would recommend. This is the softest, most lovely dough I have ever made. Of course, the amount of flour you need may be different depending on your location, conditions (humidity), and brand of flour. The cornstarch mixture does not have a pleasant texture (similar to Styrofoam or chalk) and I used a tablespoon to transfer it to the sieve. This way I learned it takes roughly 2 scoops (tablespoons) to dust the dough. If converting the recipe for a larger dish, modify the length of the dough to be 2 in longer than the width of the vessel. To remove some of the cornstarch mixture from the layers, gently brush them over a damp cloth before adding to the dish. If you run out of dough (for whatever reason) and are short a layer or 2, make sure the bottom layers are not skimped as they are the structure of the spanakopita. To keep the bottom layers from becoming soggy, perform several rounds of squeezing the spinach and letting it dry. The onion is also wet and will add moisture. I avoid adding olive oil to the filling to prevent any further moisture and it was never dry. Try adding 1 more egg if you find it dry rather than adding more liquid. The water and oil topping prevents the phyllo from rising during the bake. The scoring of the top layer is for tradition, style, and to prevent flaking apart when serving.
Pre-bake
Baked!
Scoring: Are-We-Eating-This-Whole-Thing-Tonight out of 10. (Just kidding, but probably a 9 of 10). The onion and parsley are strong flavors and if you do not like the taste of raw onion, it might be overwhelming. The onions could be lightly sauted before baking. It tasted like spanakopita, and the phyllo was perfect with the layers able to be separated and eaten one at a time. While baking, I was surprised to notice that the spinach pie smell did not penetrate the house like the croissants or cookies might. As soon as it was out of the oven, we could smell it, but again not as strongly as it tasted. We reheated leftovers in the toaster oven and the microwave to see if it stood up and there was not a noticeable difference. We did 1 minute for 2 pieces in the microwave and it was plenty or 12 minutes on reheat in the toaster oven.
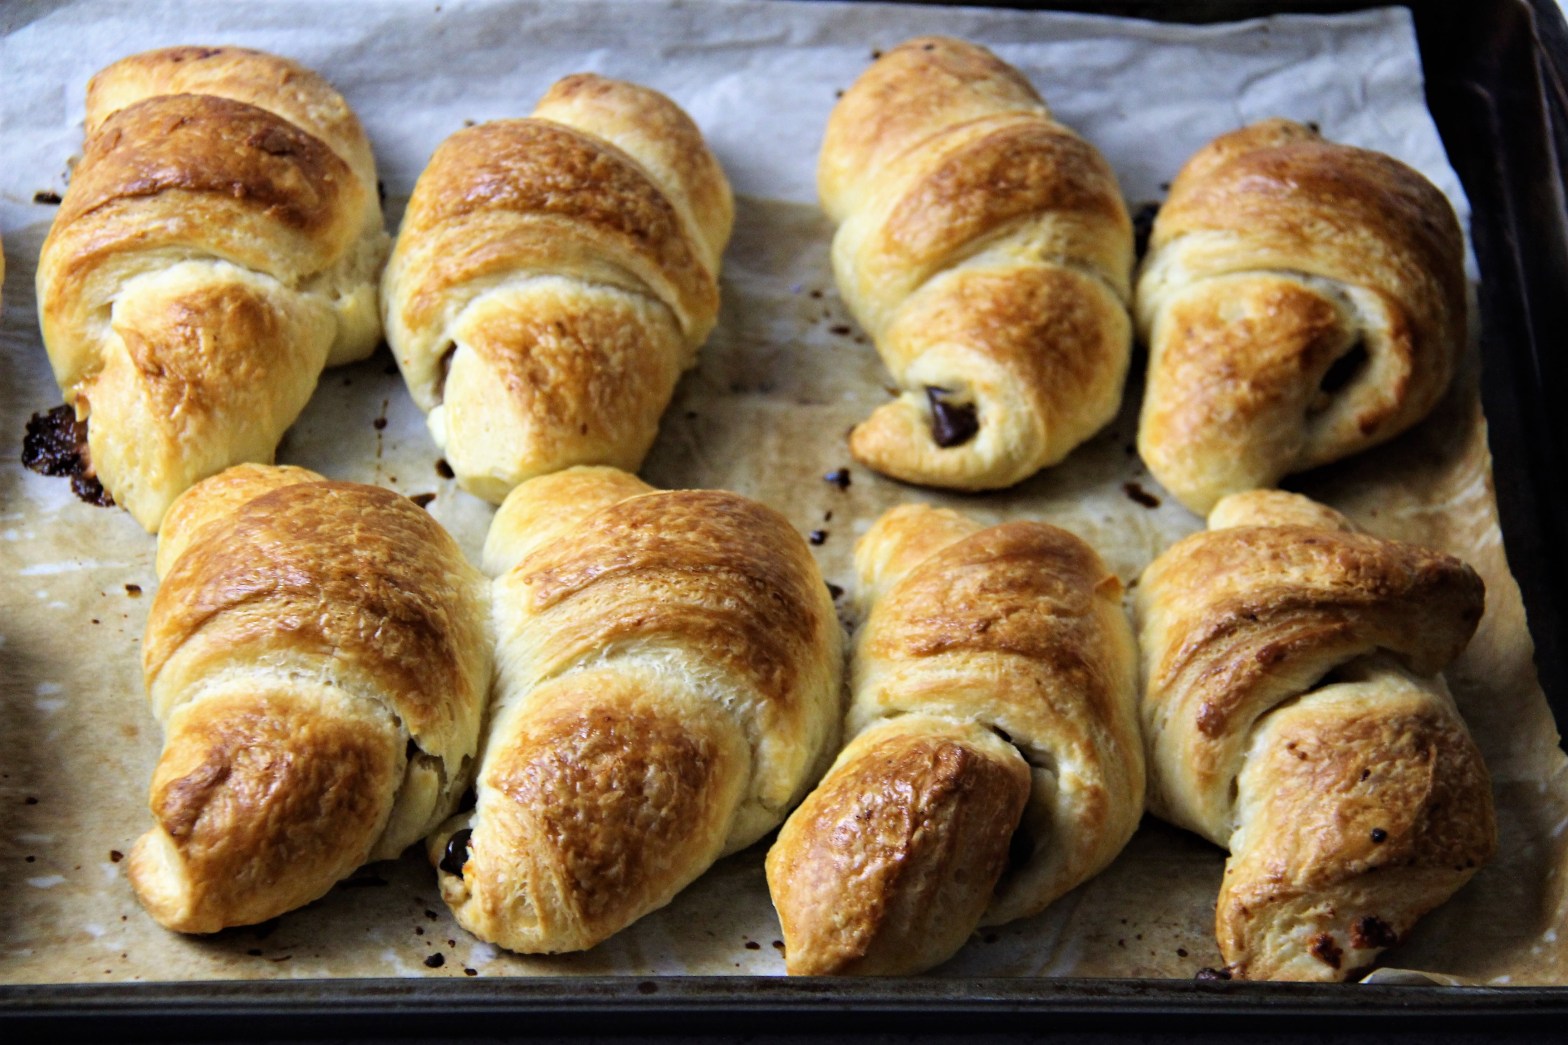
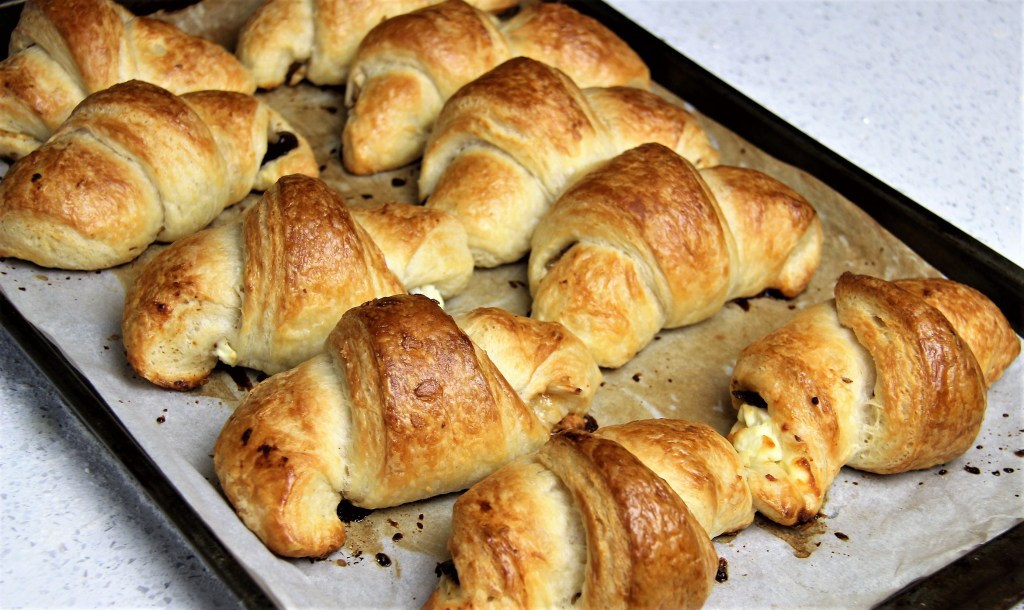
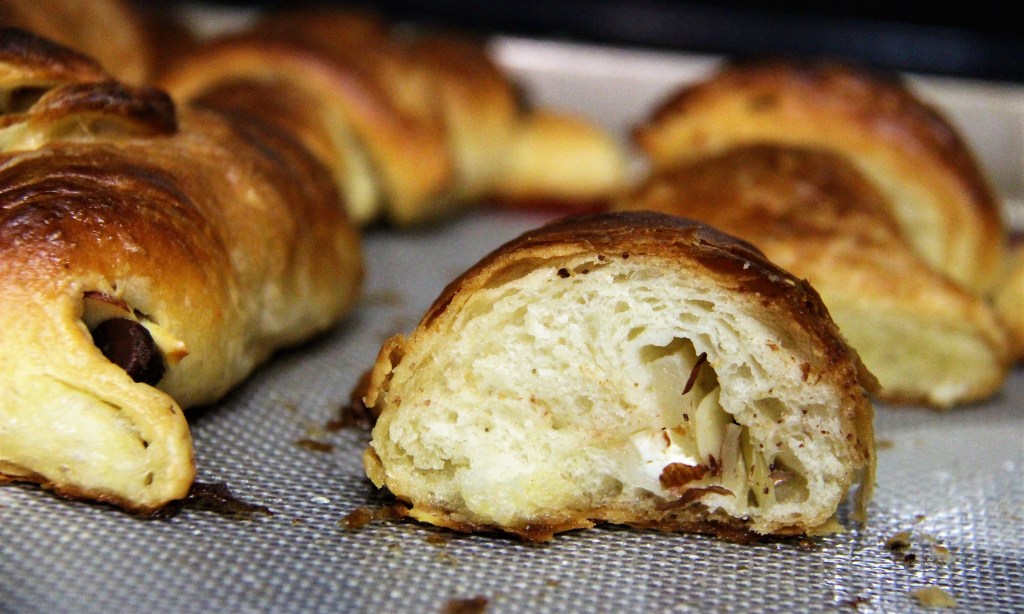
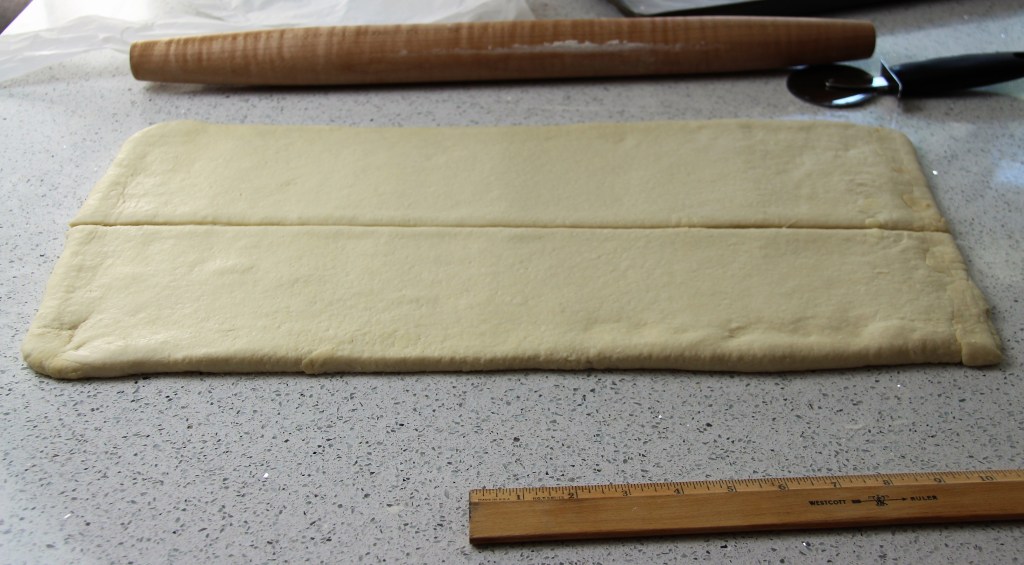
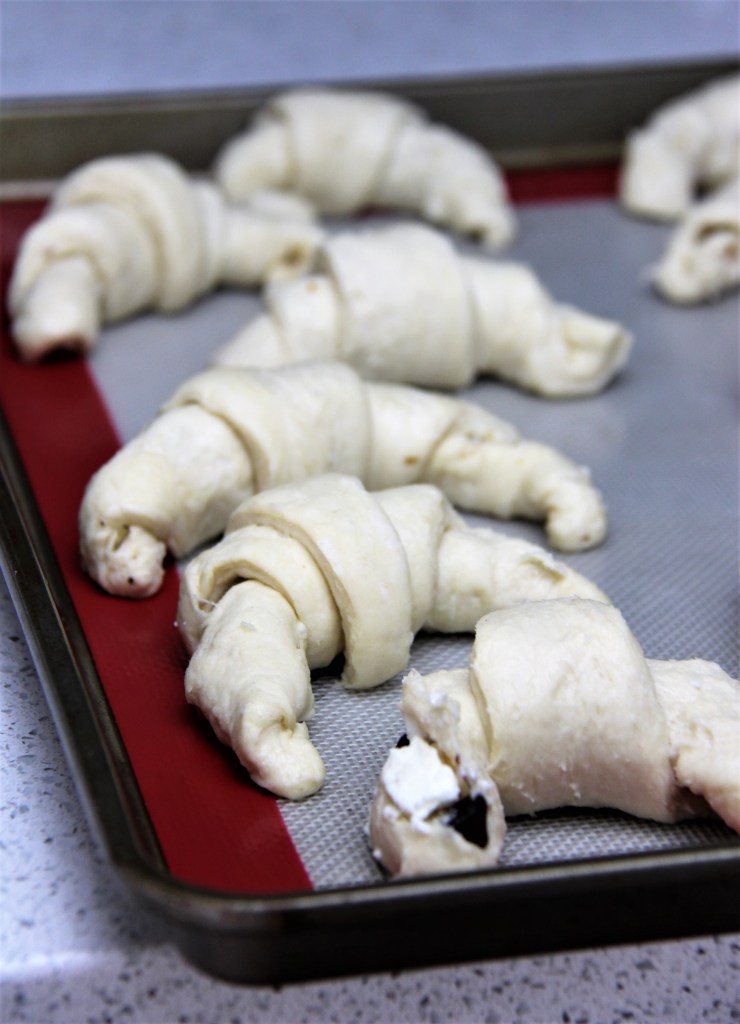
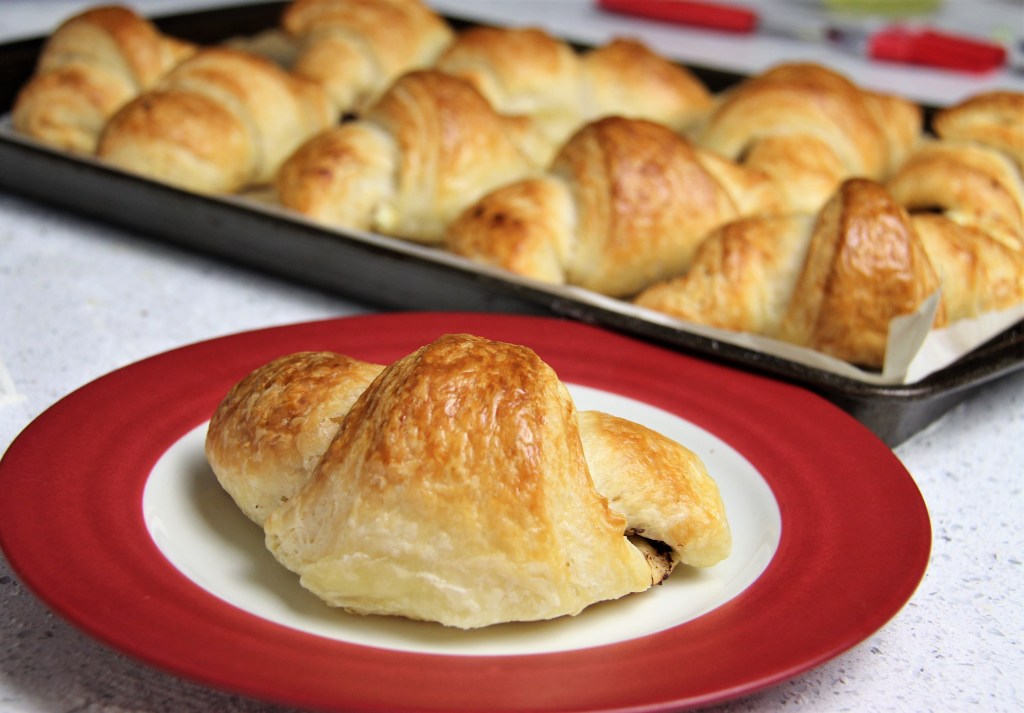
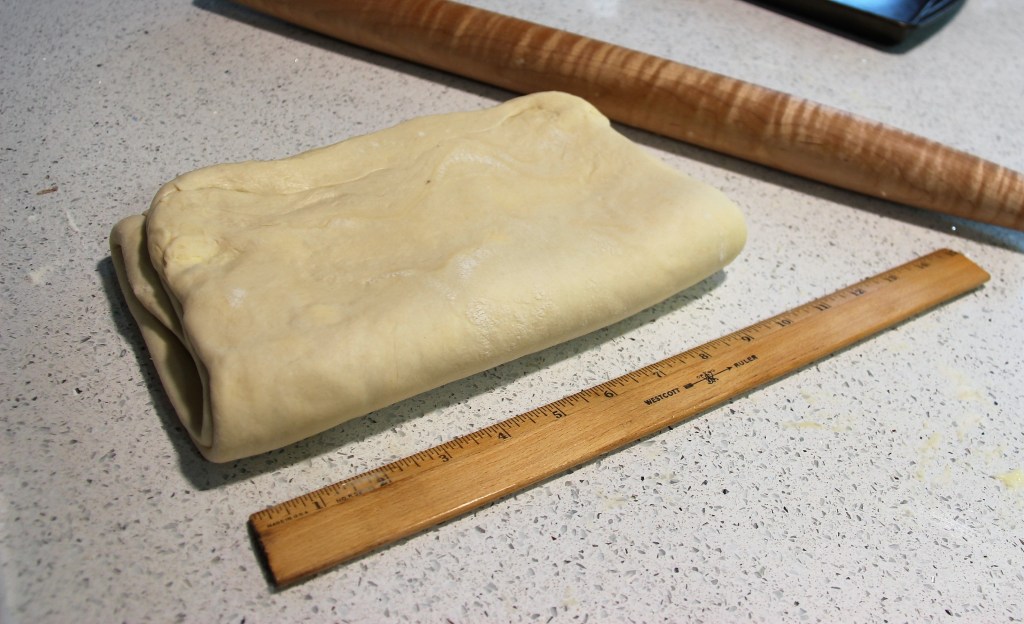
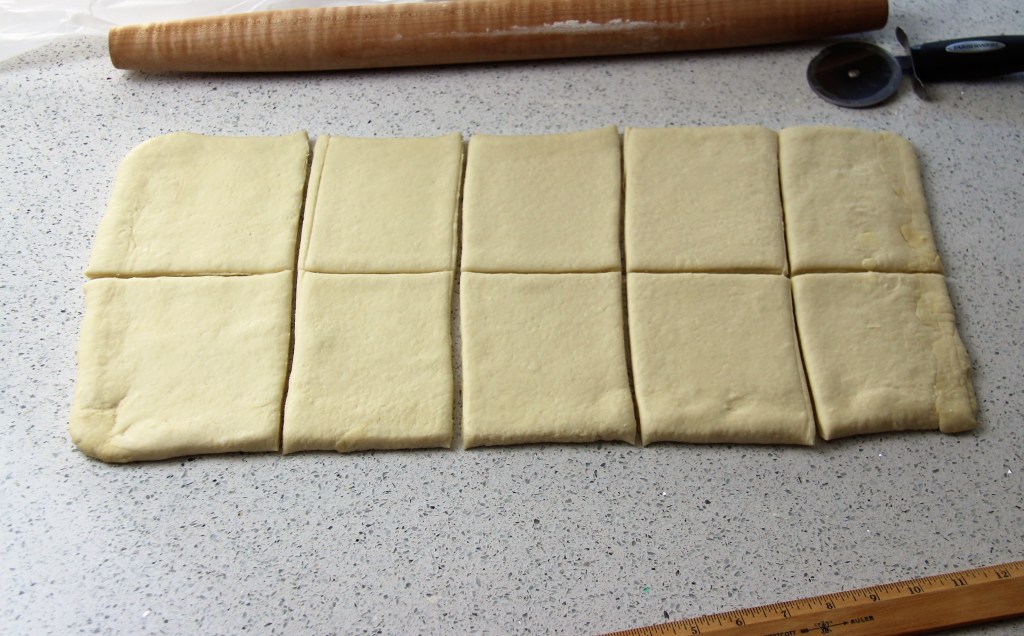
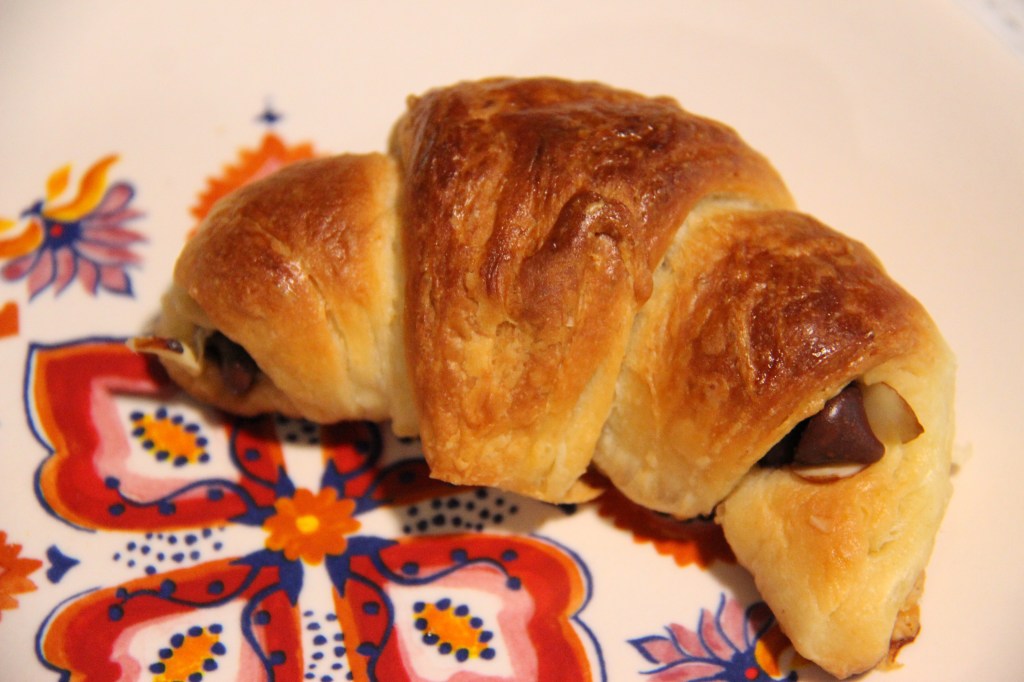
There is a reason even famous bakers purchase puff pastry, or opt for the quicker and more simple rough puff pastry. Puff pastry, although honestly not difficult, is extremely time consuming. I spent a total of 22 hours making the half batch of croissants (and another 22 for the whole batch). This is definitely a recipe for the experience, flavor, and fun of filling the croissants with your favorite fillings. Give this recipe the time it needs, be patient, and dedicate a couple of days to the processes. You will only be actively involved for about 1 of the 22 hours. Mostly the puff pastry just wants to chill in the refrigerator. I am curious if preparing the puff pastry in a walk-in freezer, on a marble surface, would speed the process up tremendously. If you have access to this environment and want to try it out, I would love to hear about the results!
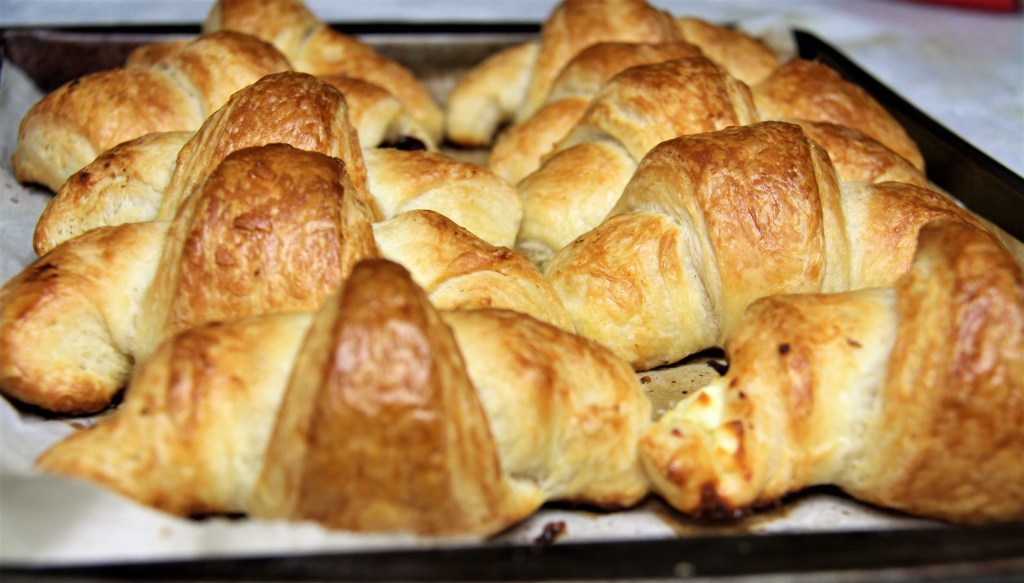
Overall, I could not be happier with the croissants! They were so worth the time to make. Keep in mind the actual labor was only about an hour of my time, broken up over 2-3 days (2 per batch). I thoroughly enjoyed making them, and did not become frustrated or irritated with the process (success!). Then, I was able to devour way too many of these pastries with my favorite fillings! This is what I will be doing in Heaven (hopefully).
half batch
Pre-proof
Post-1st proof
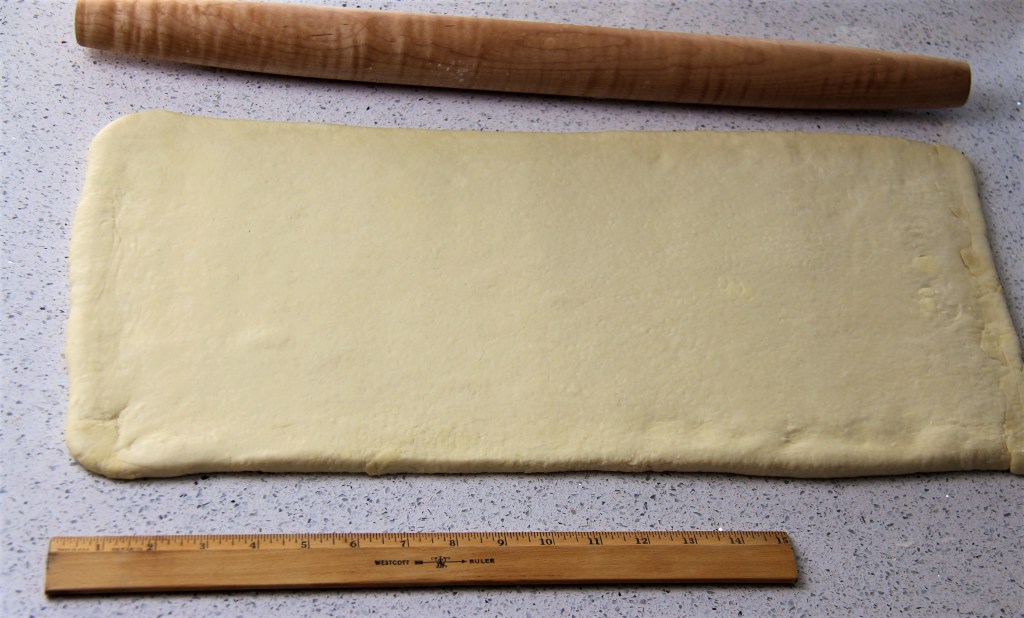
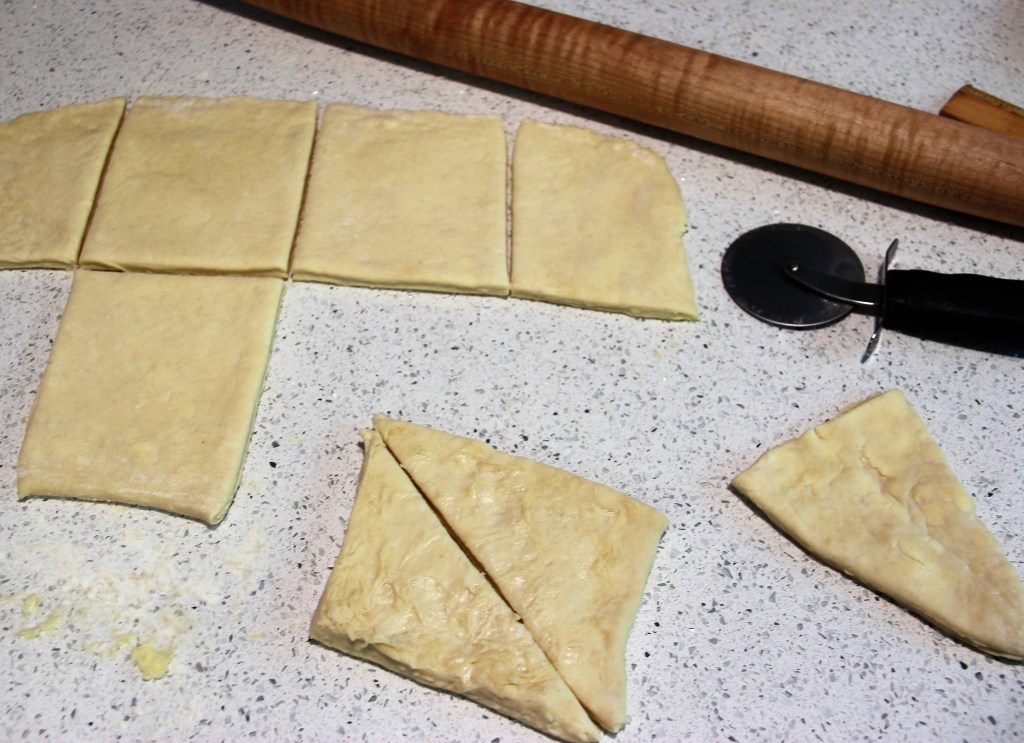
half = 6×7, full = 10×14
full batch
post-overnight chill
20×10
As I made 2 batches, I did end up freezing some and taking them on a road trip to my grandparent’s house to share with my family. No one guessed that they had been frozen, and with a little butter on top and <10 seconds in the microwave, we were back to day 2 with these pastries. They held up well, but I do admit, everything is just a bit better fresh out of the oven. These are no exception. Eat them while they are warm from the oven.
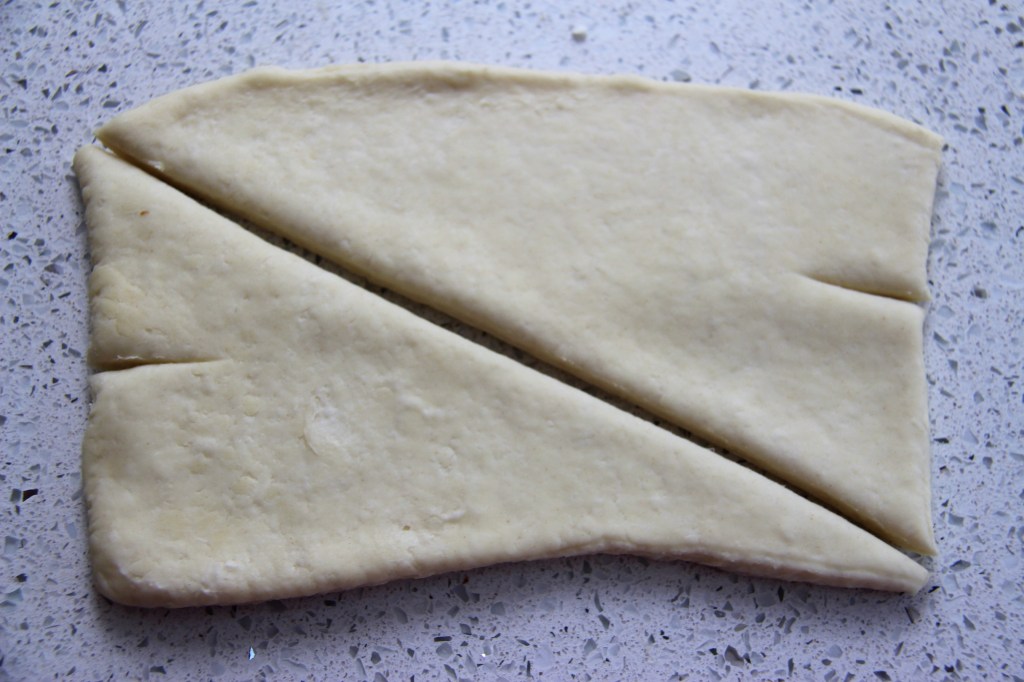
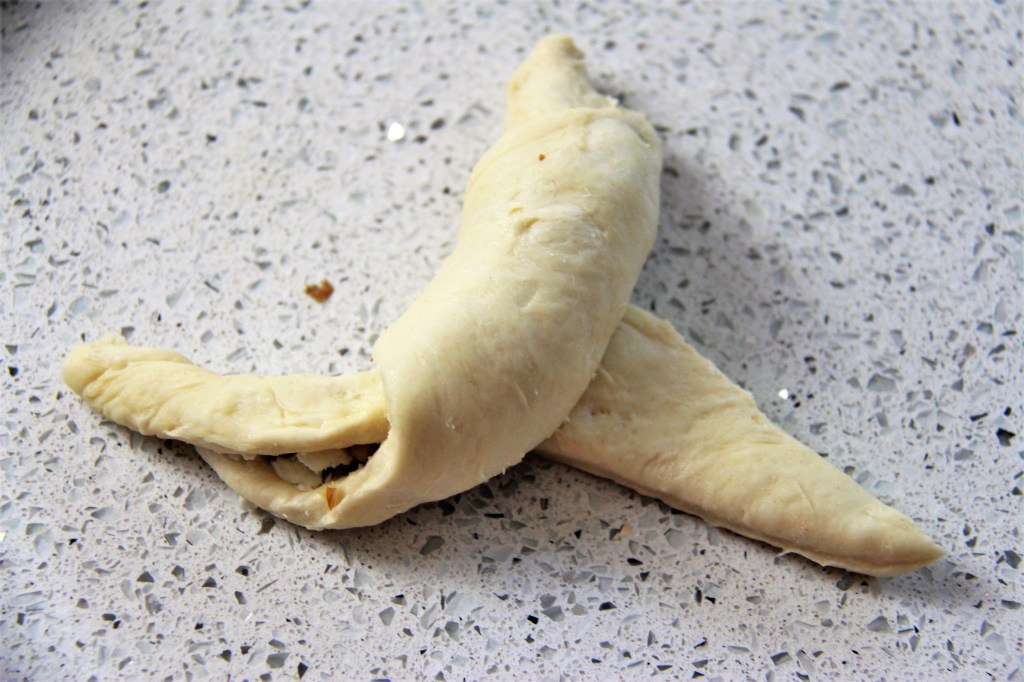
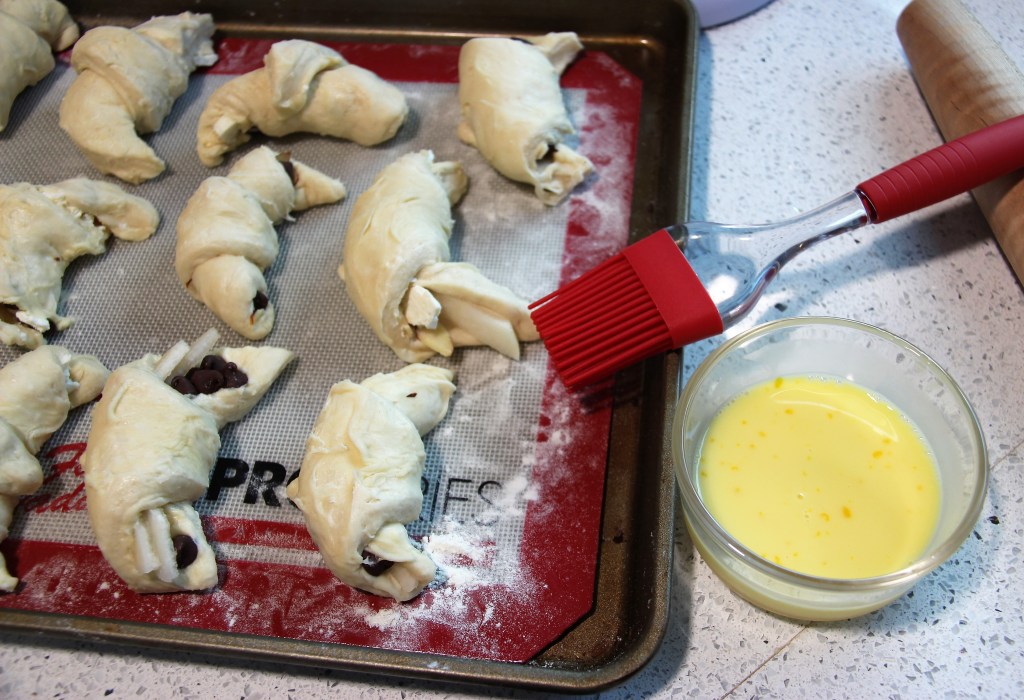
how to roll
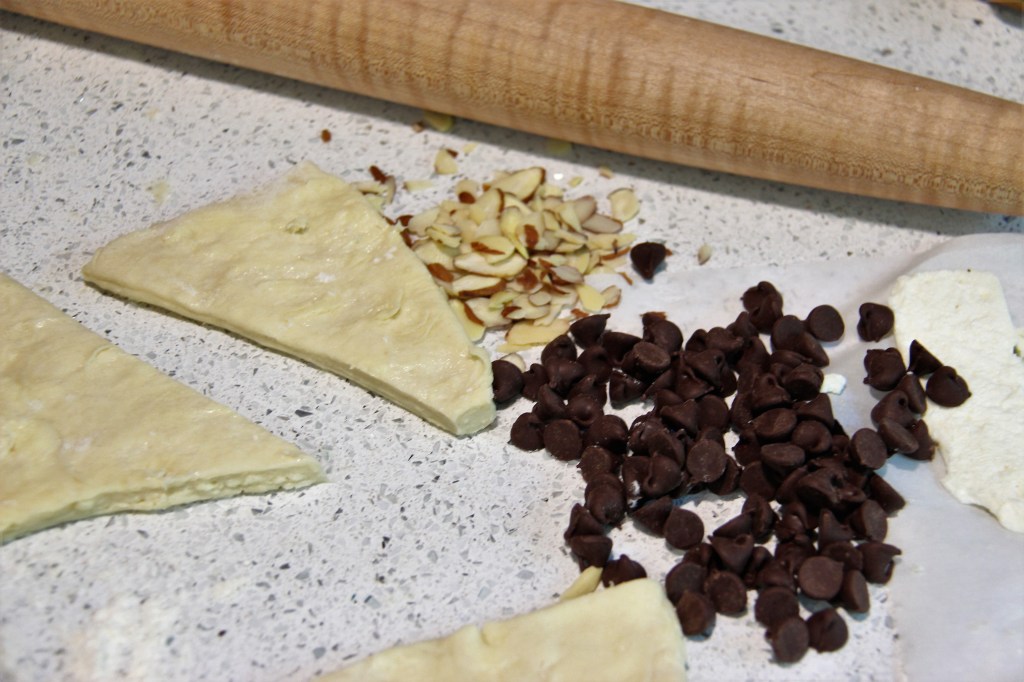
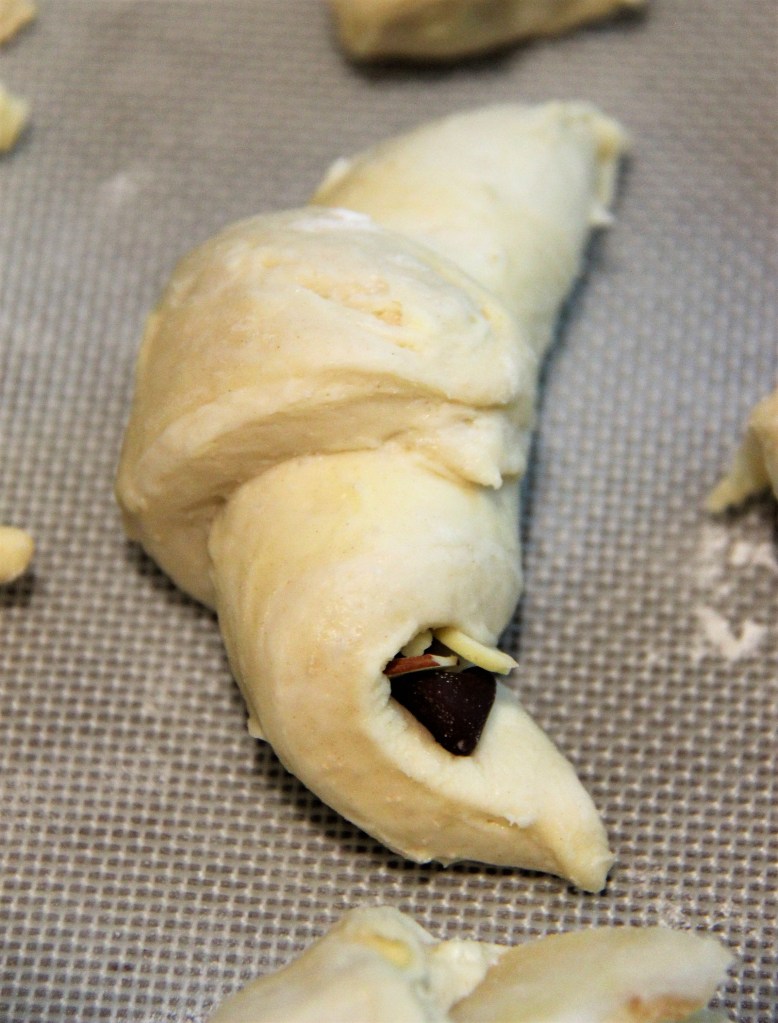
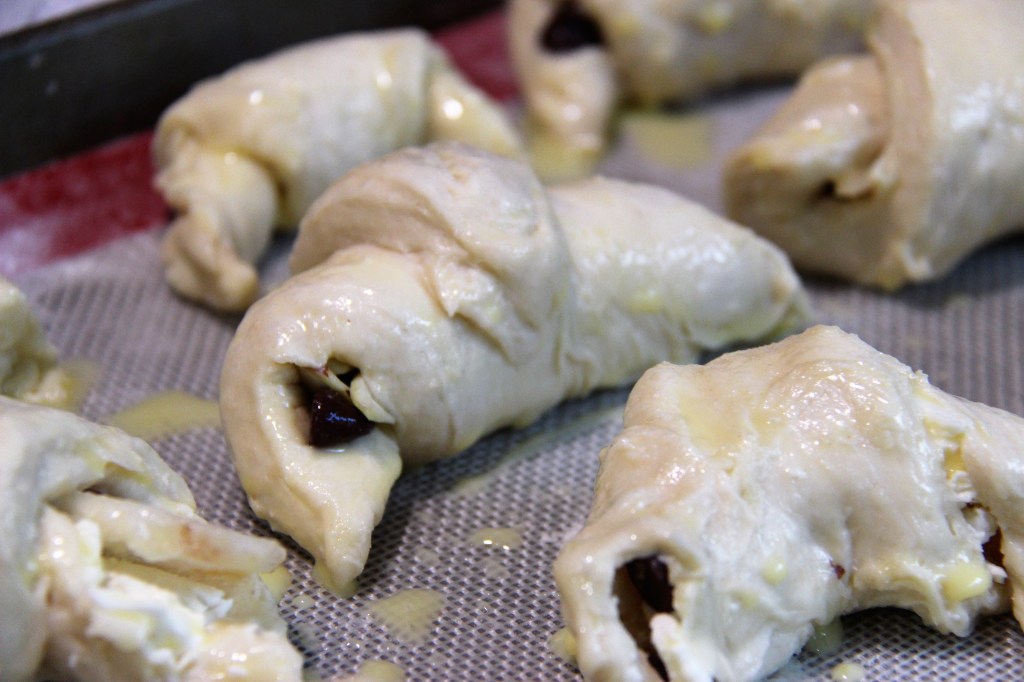
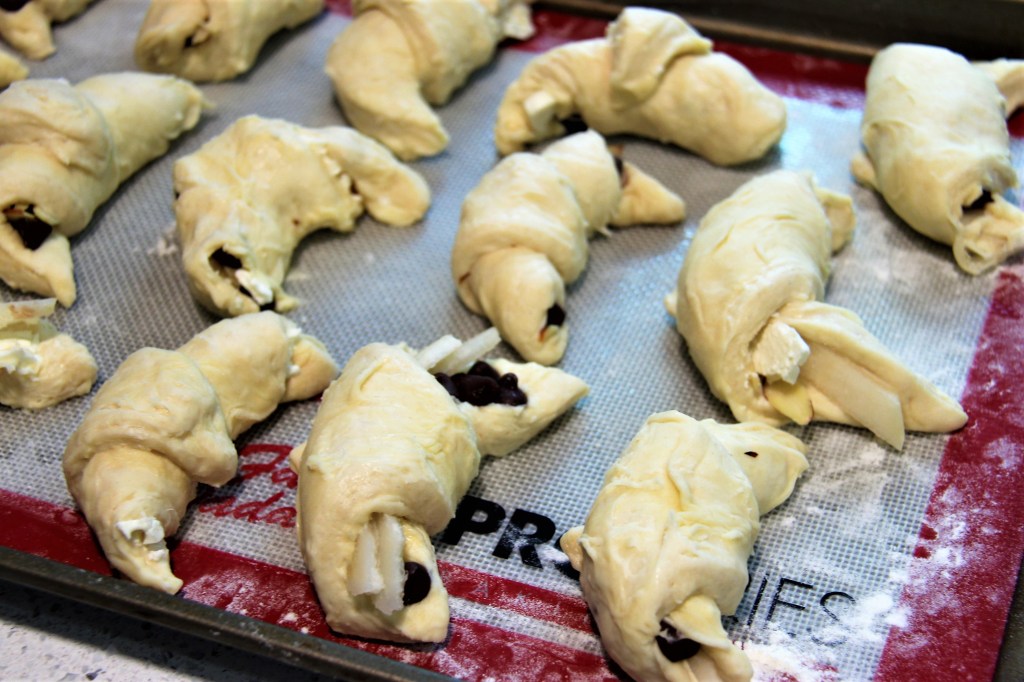
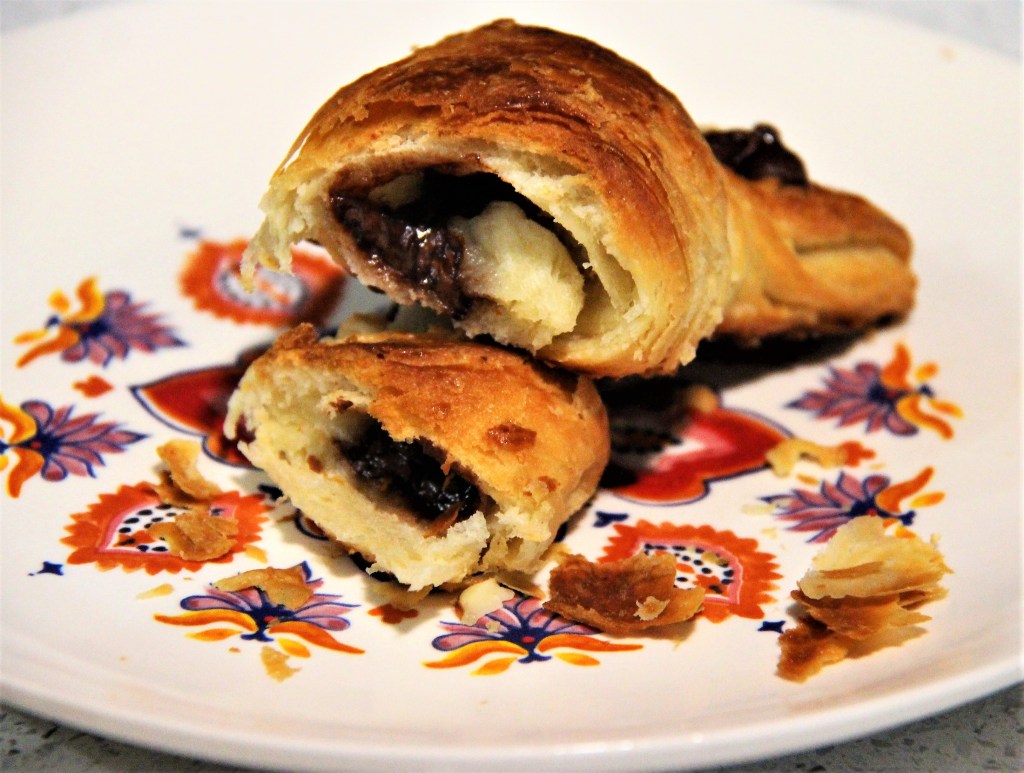
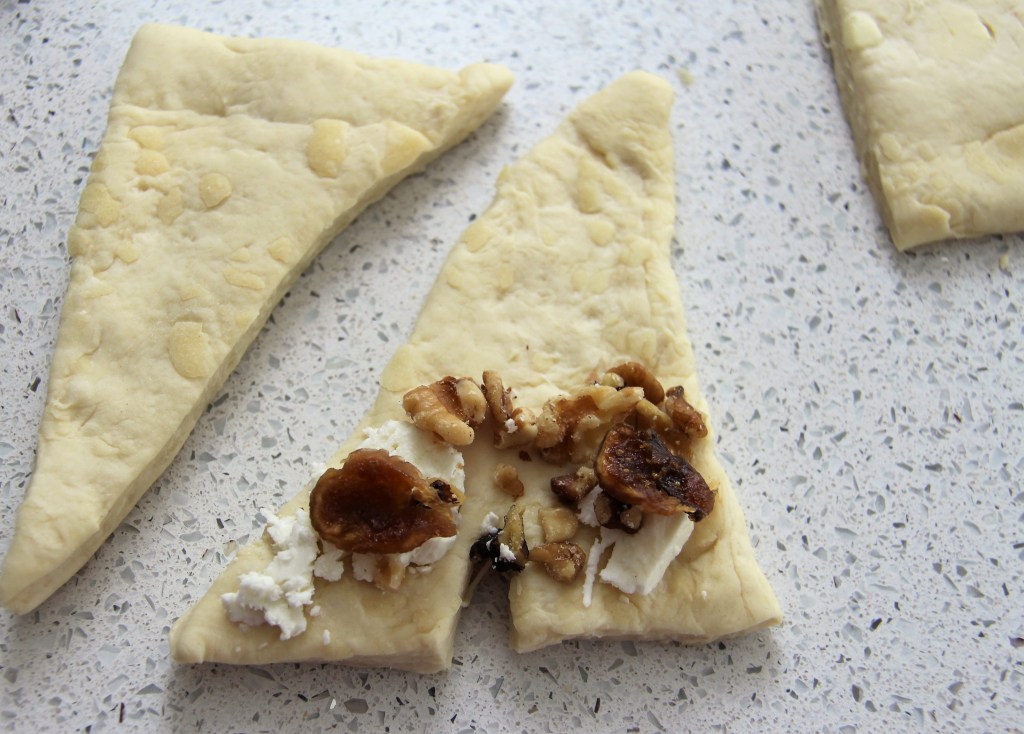
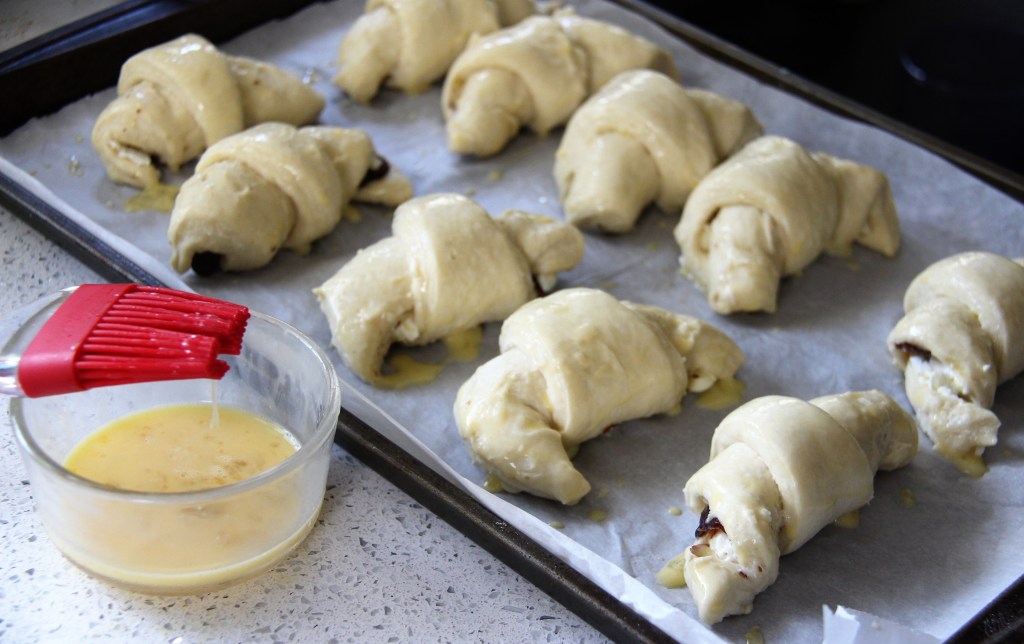
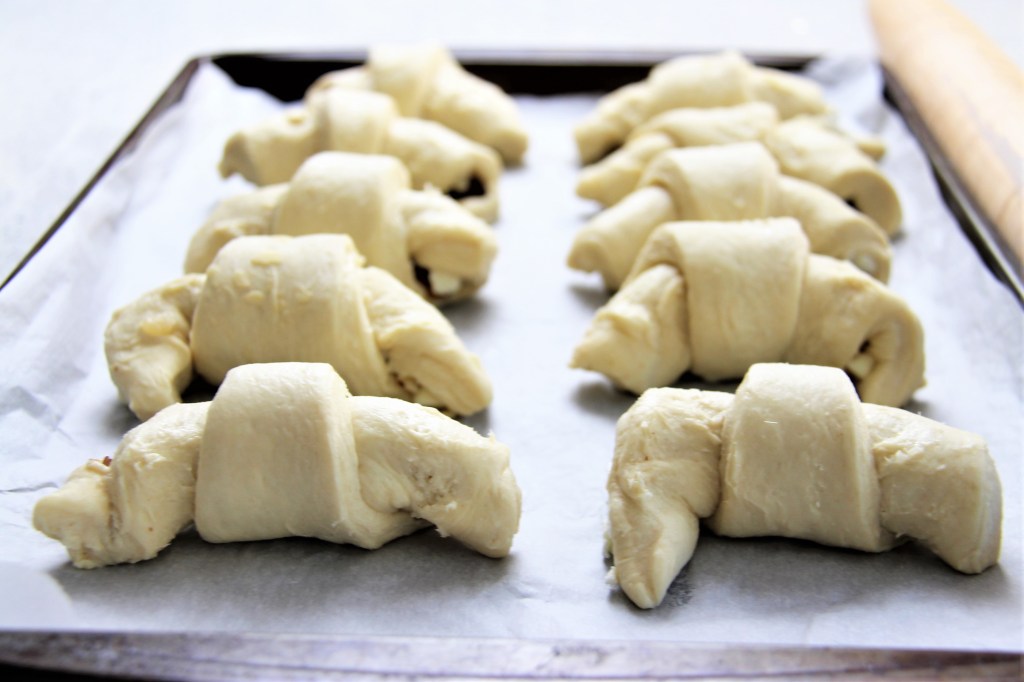
Take-Home Tips:There are so many filling options! Sweet or savory. We tried varieties of: feta, pear, date, fig, walnut, almond, chocolate (dark, white, milk), and butter. You really cannot go wrong with any combination – follow your heart tongue. Read through the recipe a couple of times and count the folding in your head and you will be alright. Attempt to add in the total folds, but if you miss one or add in another, you will still enjoy layers and layers of pastry. Although there is technically a minimum suggested, possibly required by definition, for the total layer count (calculated using a simple formula) if you are making these for non-professional use then I doubt anyone will challenge you.
Scoring: 9 of 10. The end result was perfect in every way, and they are receptive to different stuffings. However, puff pastry cannot be rushed or whipped up for a surprise occasion. They also do get noticeably softer if stored in a container on the counter. Best to refrigerate and warm in a toaster oven to reheat. I would definitely make these again!
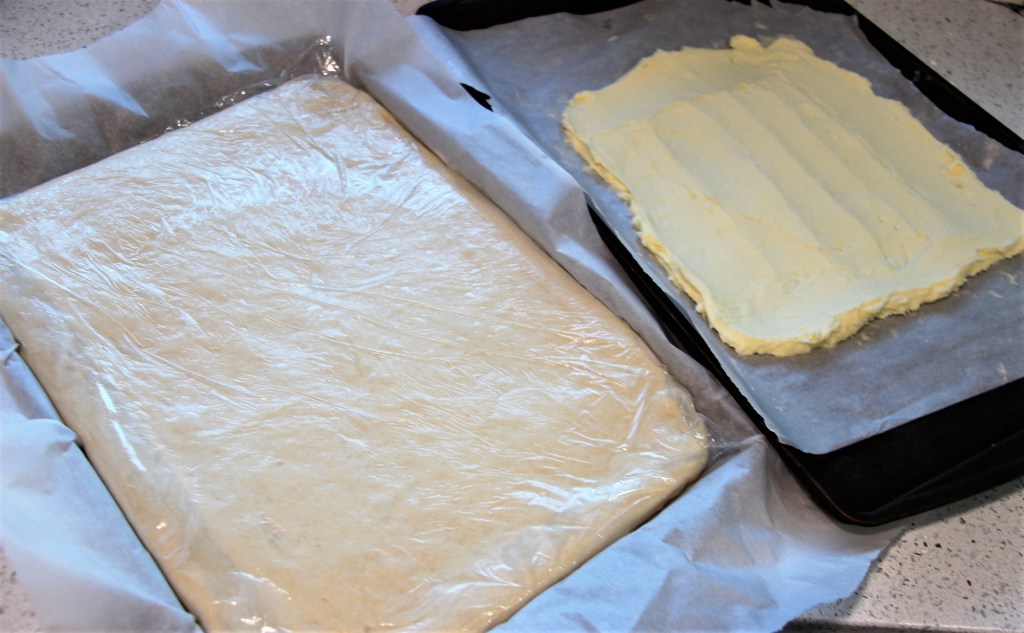
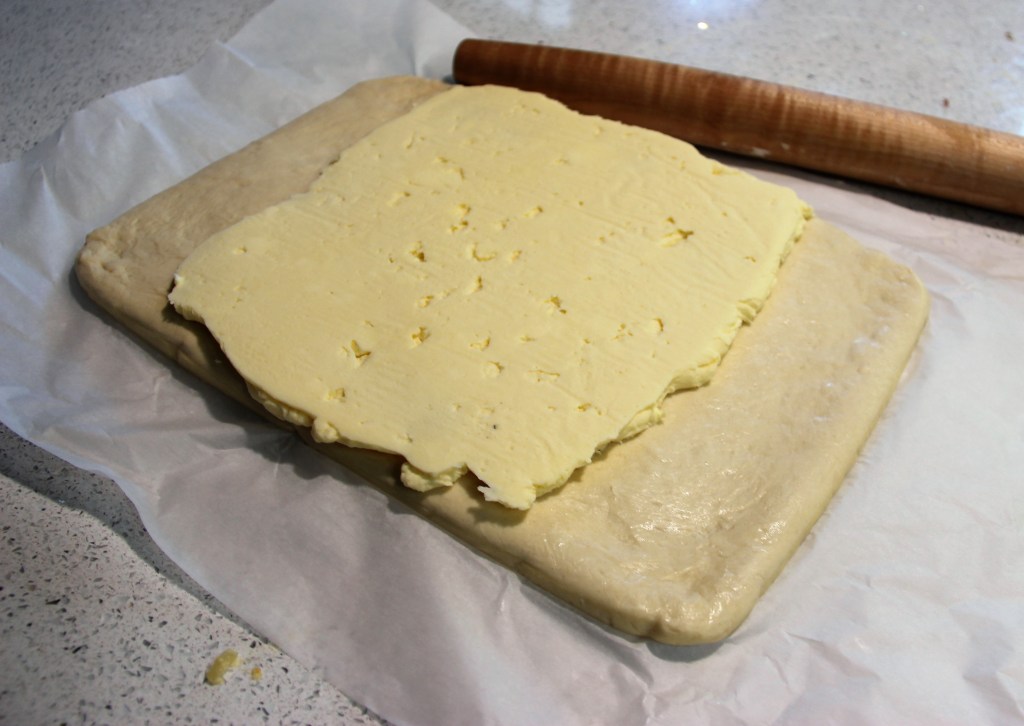
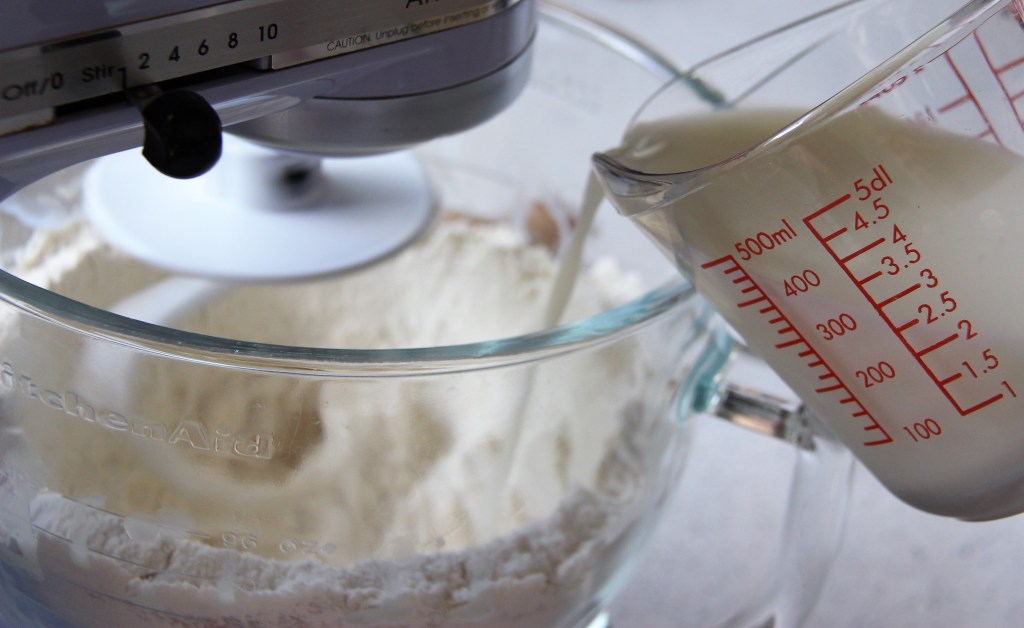
Make dough
Shape butter / chill
Proof / chill / shape dough / chill
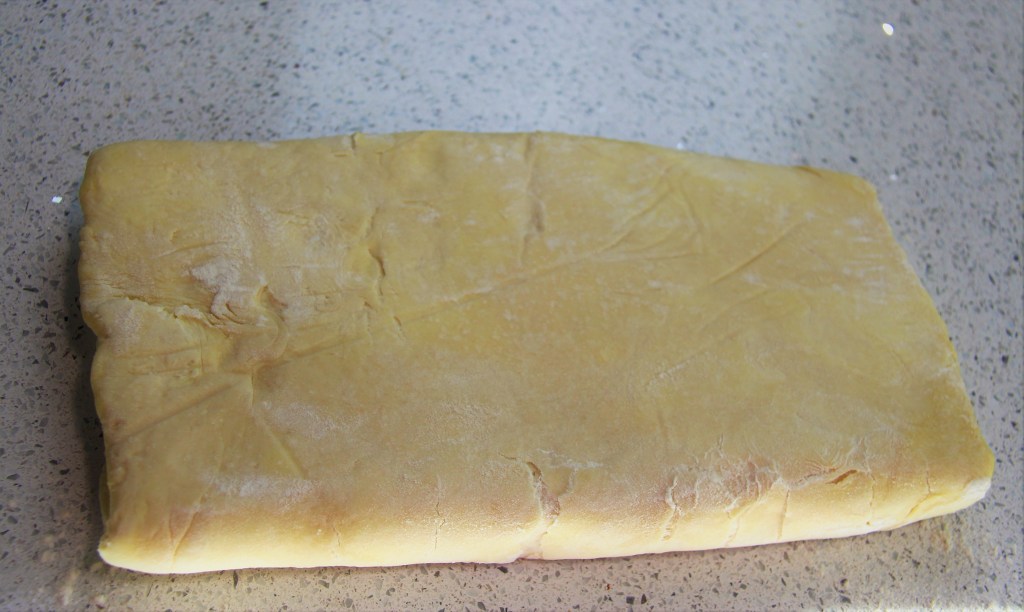
Add butter / fold / roll / fold / roll / fold / chill overnight
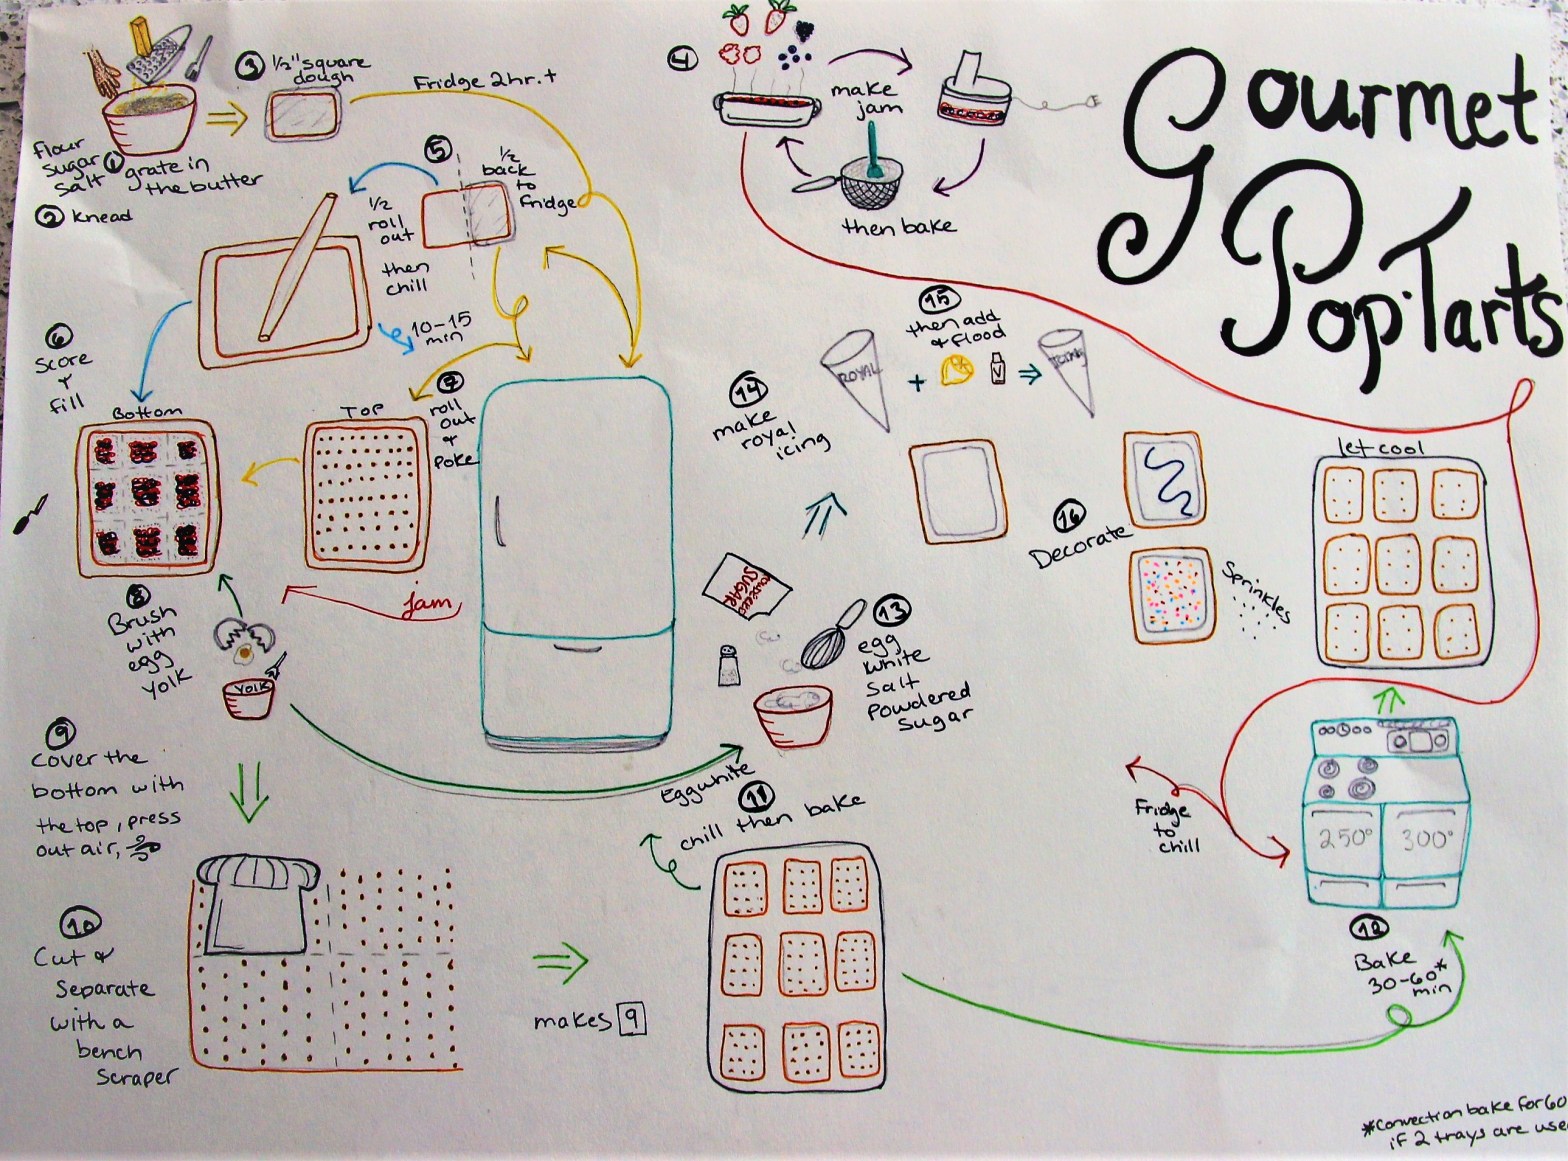
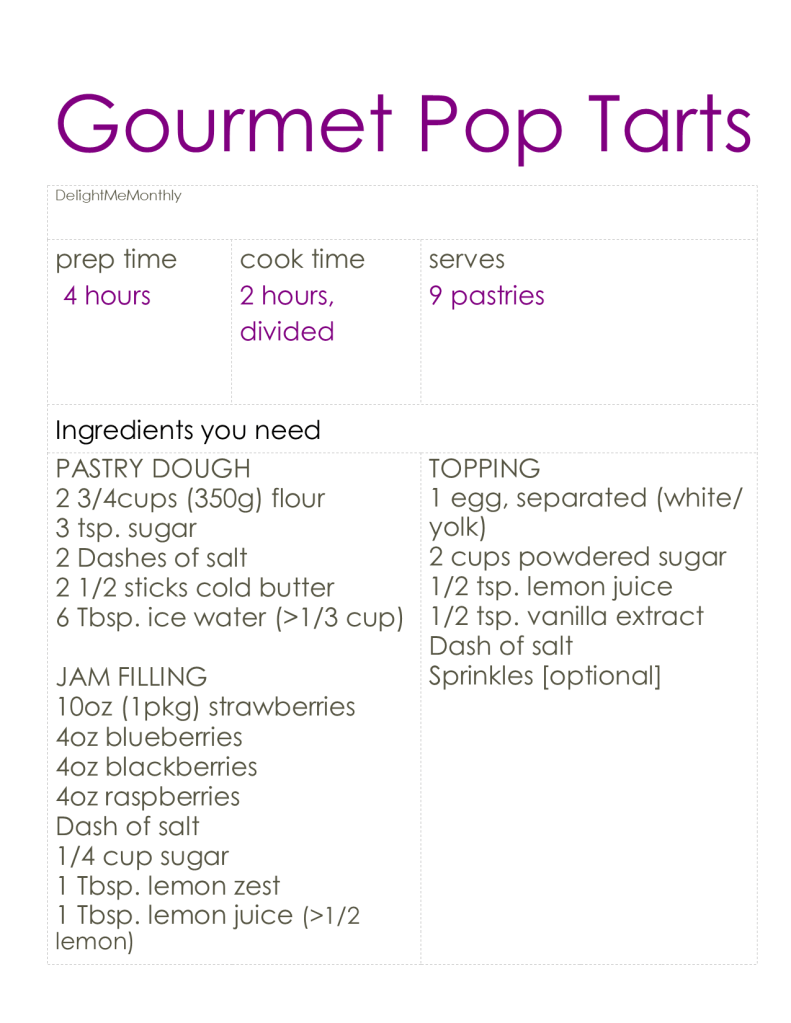
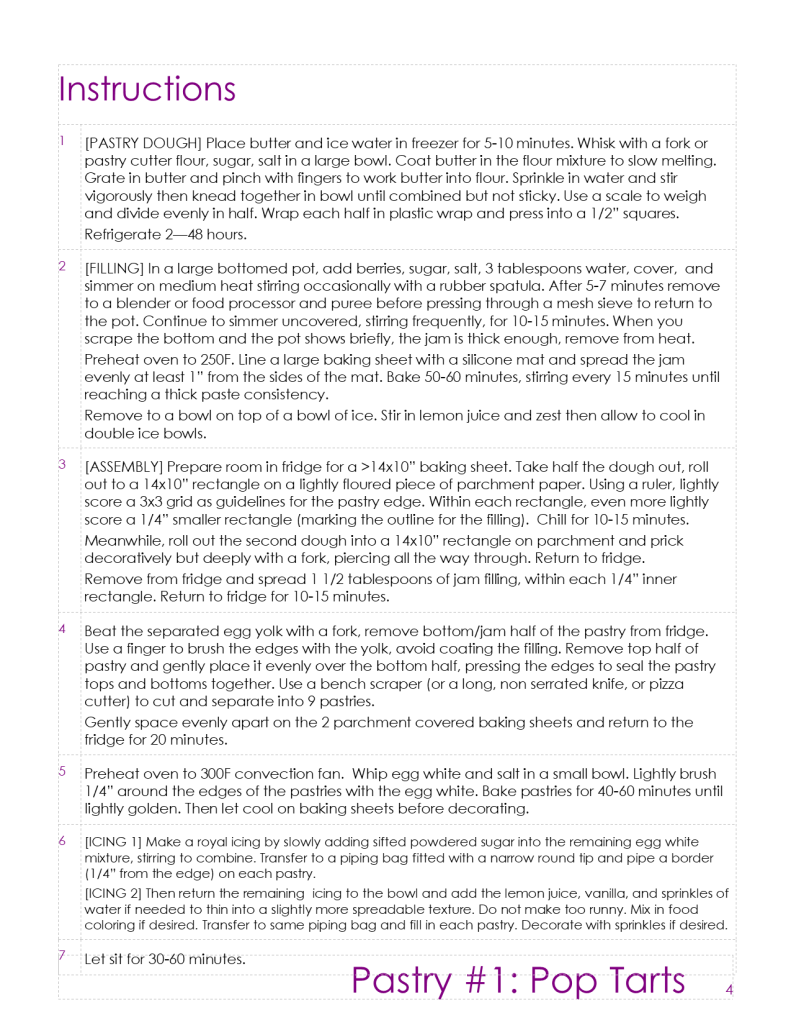
The first time we made poptarts ourselves it took about 7 hours for 9 pastries. If you consider this as just another type of pastry rather than a cheap and high-calorie snack, then maybe it could be justified. However, a majority of the population, many of whom firmly support eating out for every meal, would laugh at the level of effort.
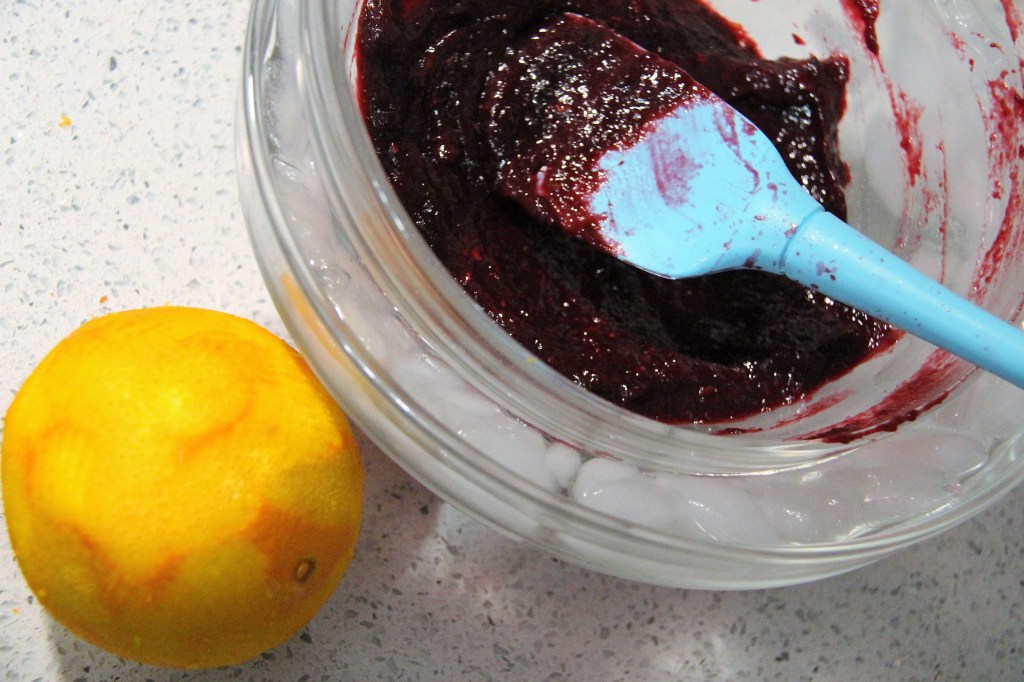
Lemon or orange zest
Personally, I have wanted to make these for such a long time that I did not care how much my feet and neck would hurt afterwards. If you know what you’re doing, go in aware of next steps, and possibly purchase rather than make some of the ingredients, it could be accomplished in a couple of easy hours. There just happens to be a ton of waiting around for the ingredients to chill and time in the oven. You could easily get your workout and laundry checked off the list simultaneously (I did!).
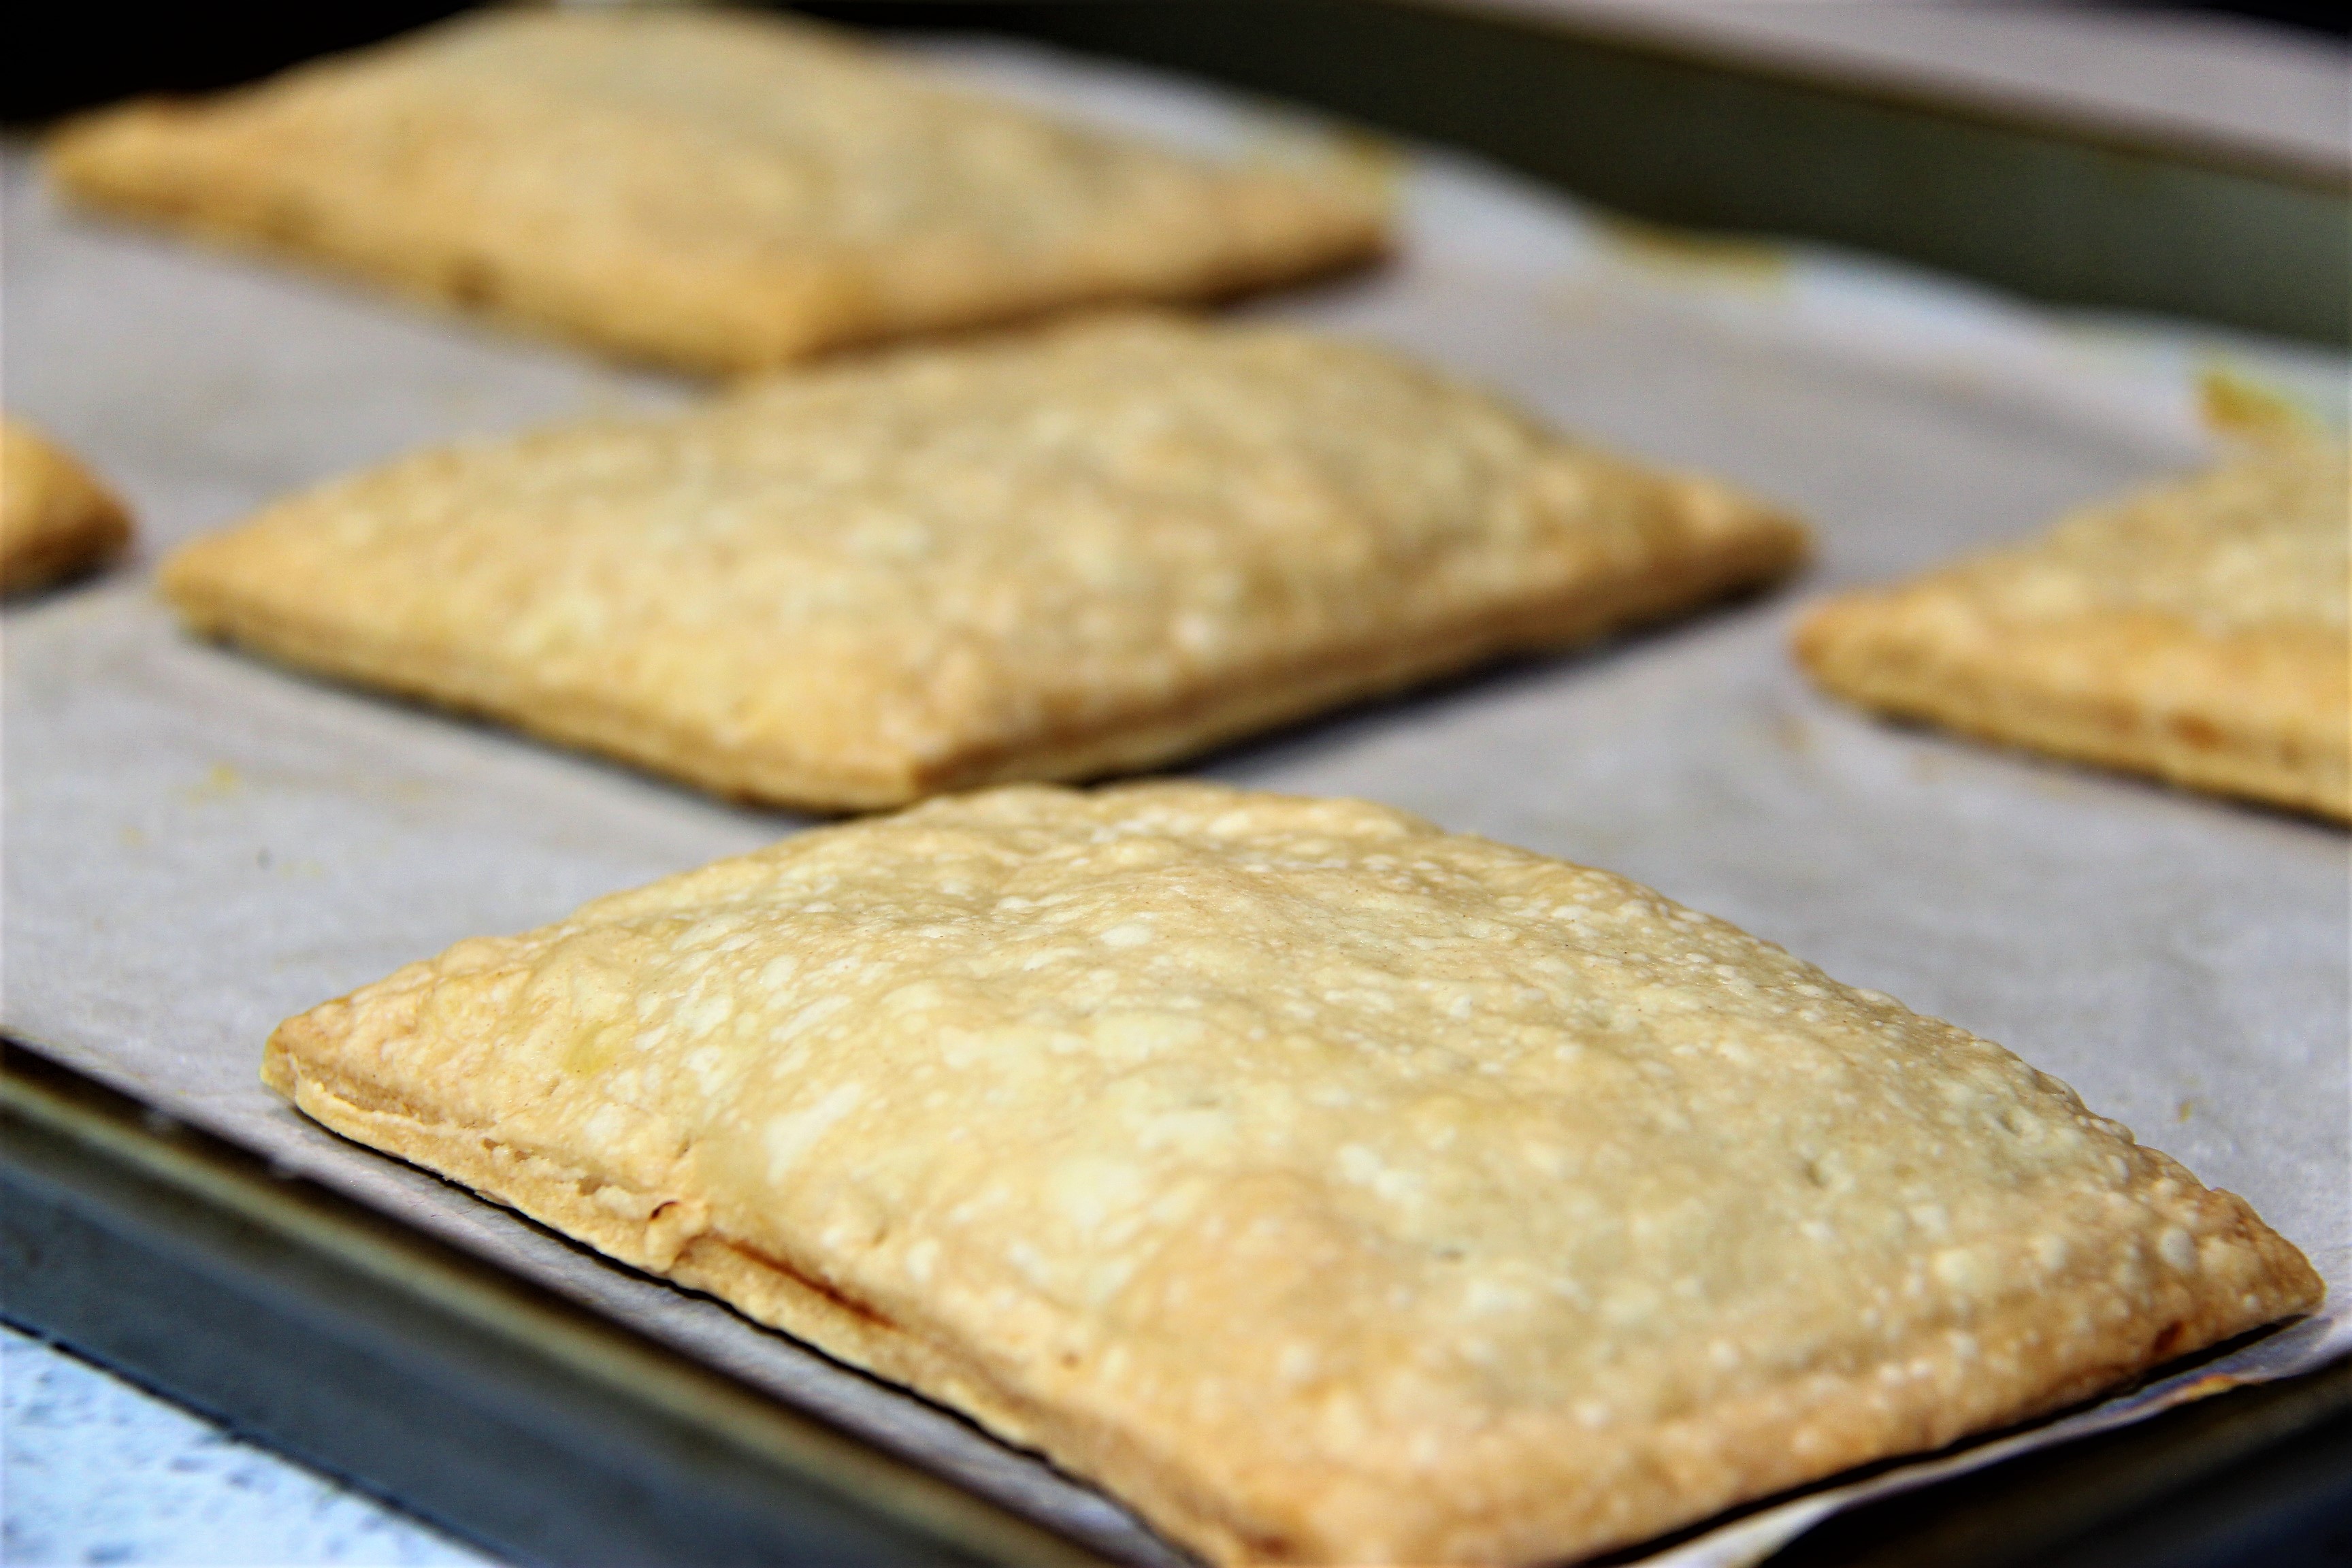
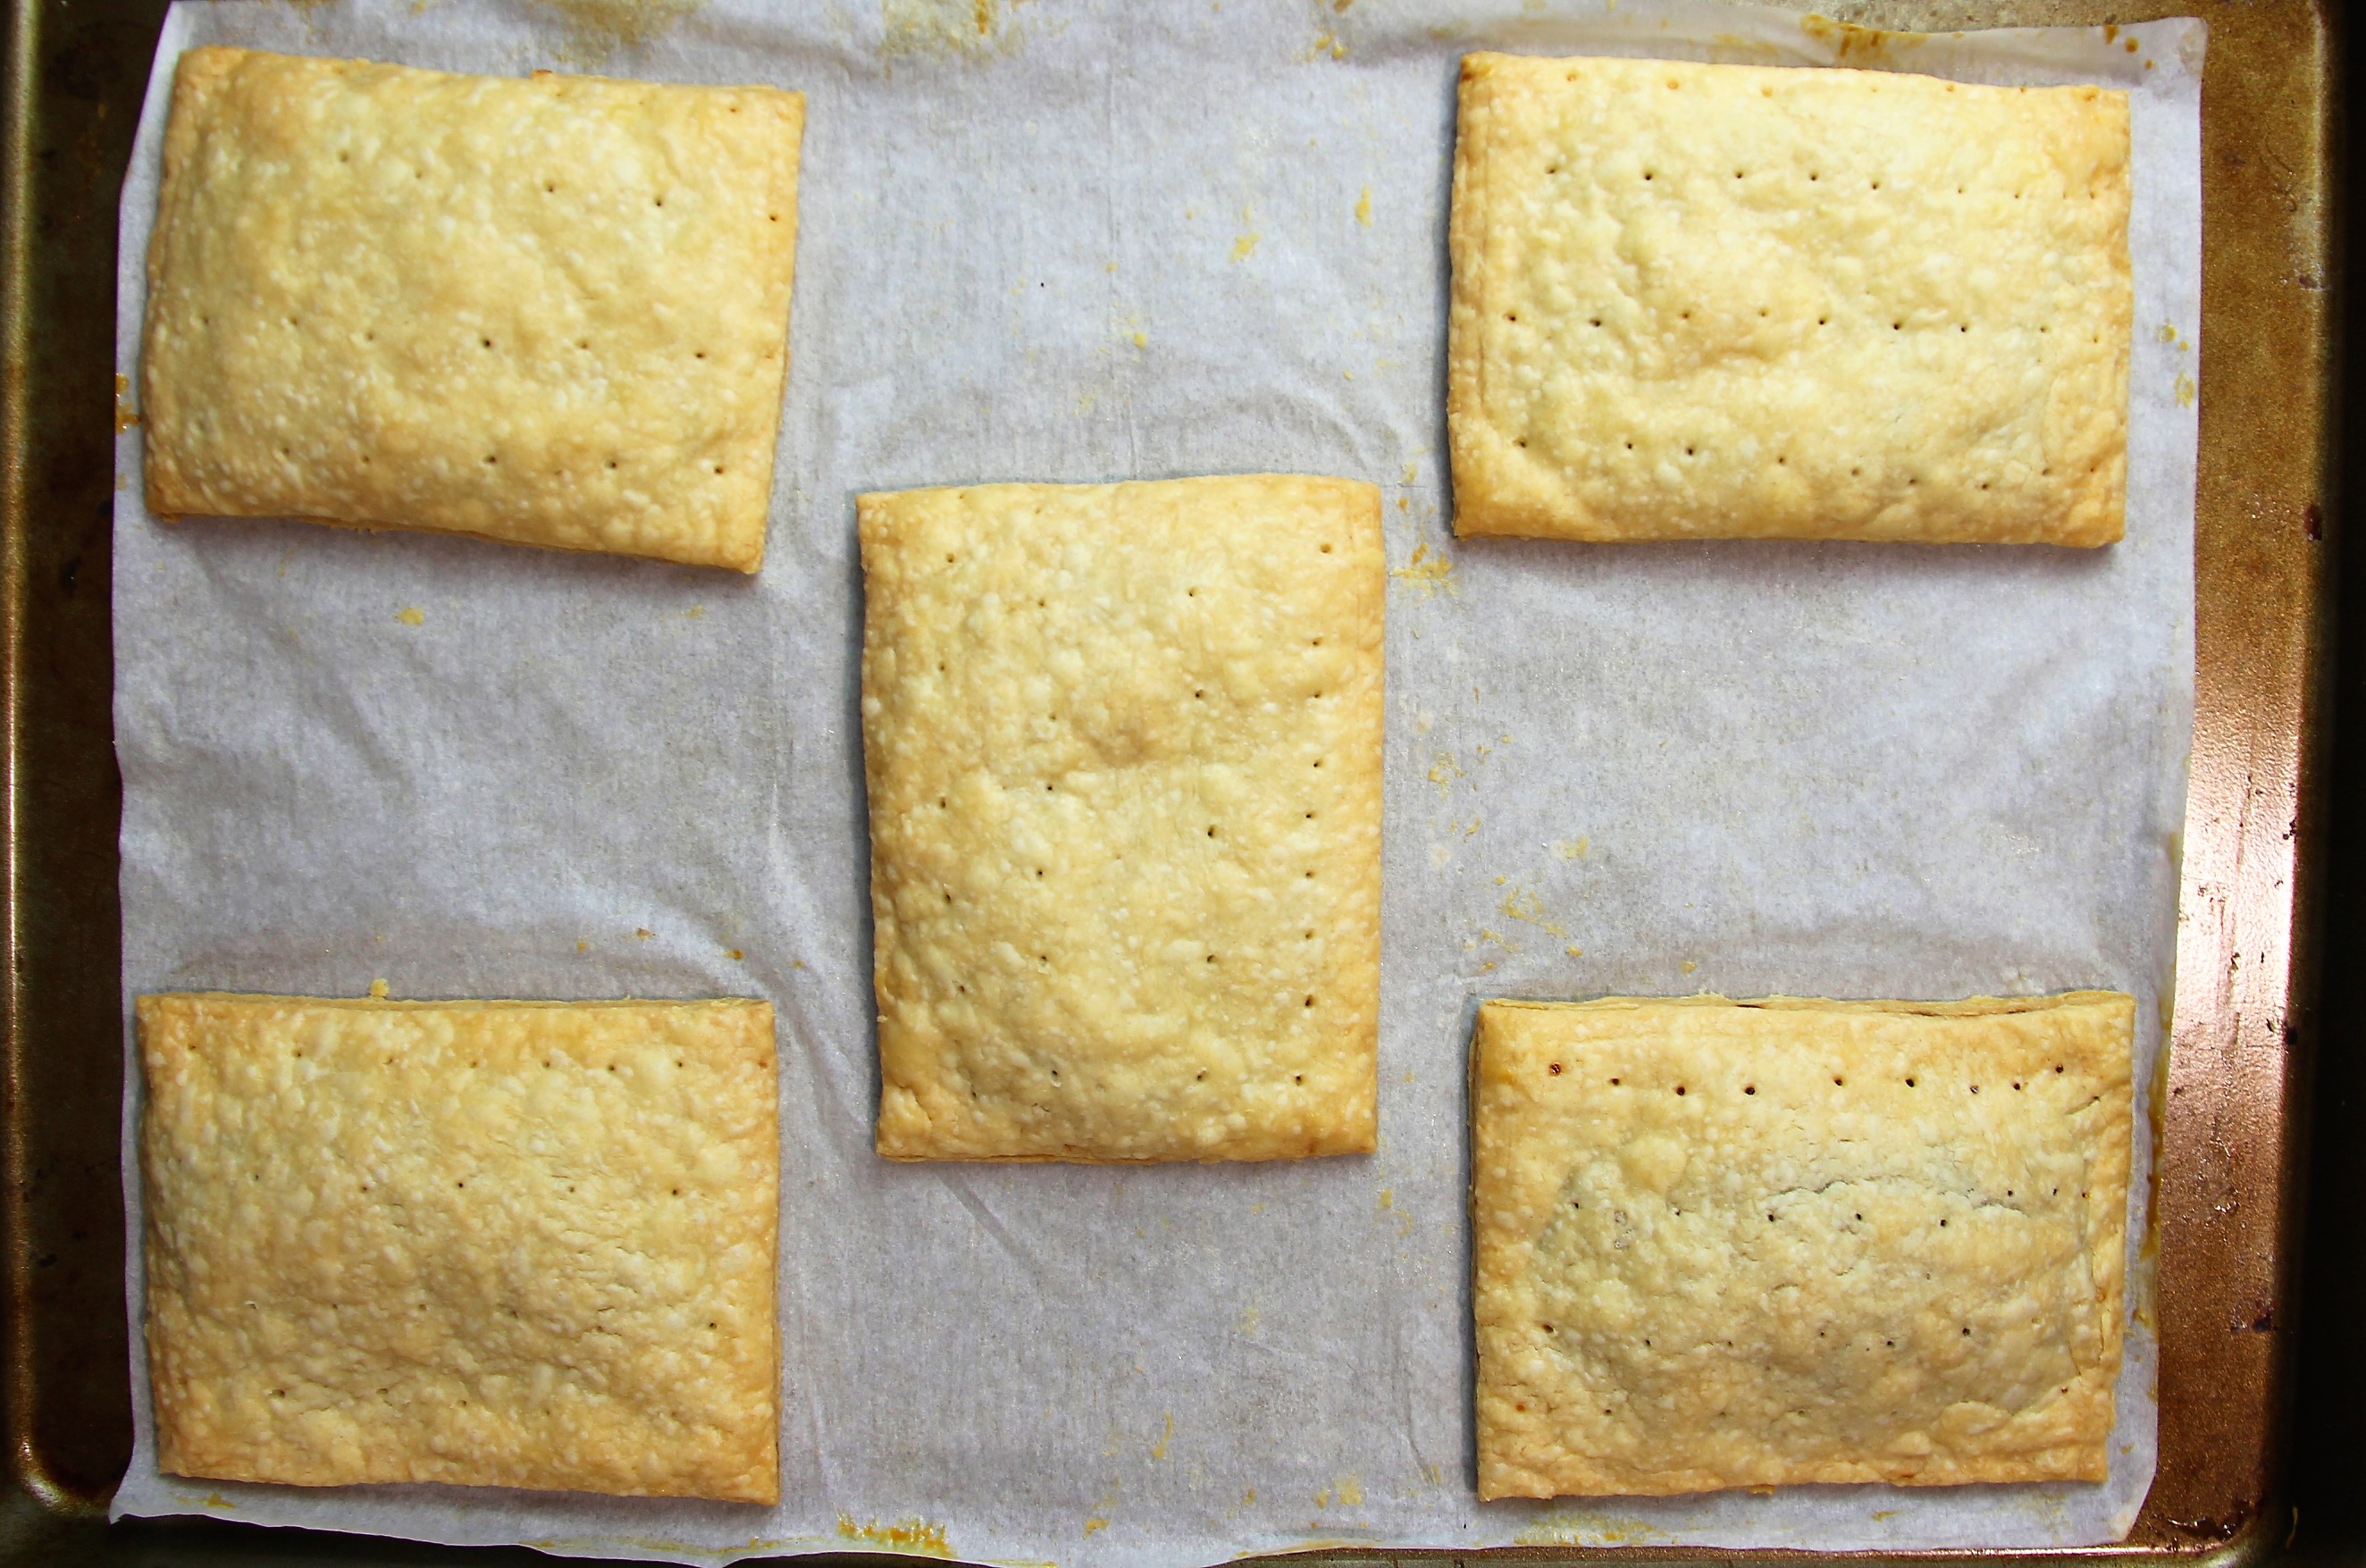
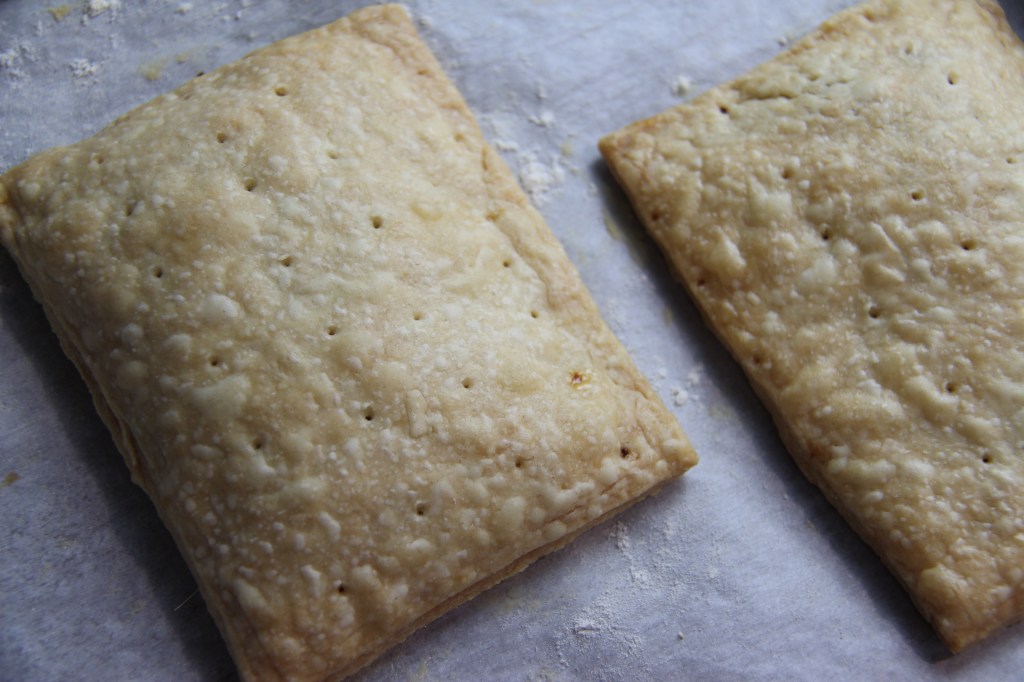
There are many types of pastry, but the goal with a toaster pastry, is for it to be successfully reheated in a toaster. The pastry needs to be firm, sturdy, and not melt when vertically toasting between the steal bars. This recipe provides the perfect balance to reach that tender bite of flaky pastry.
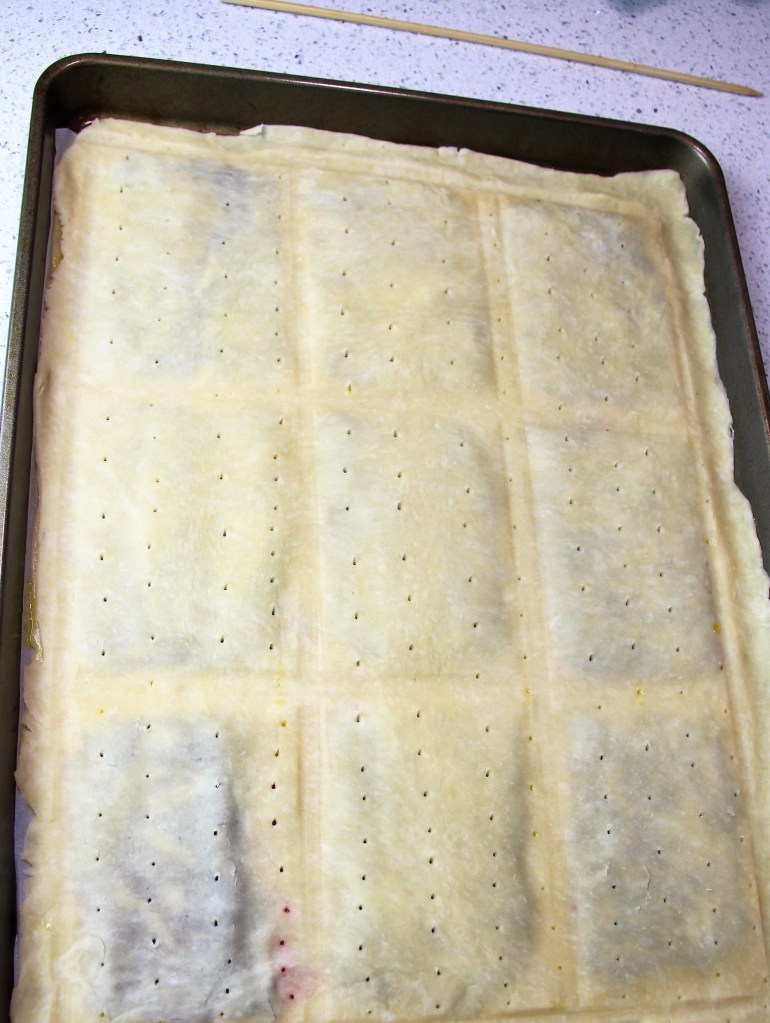
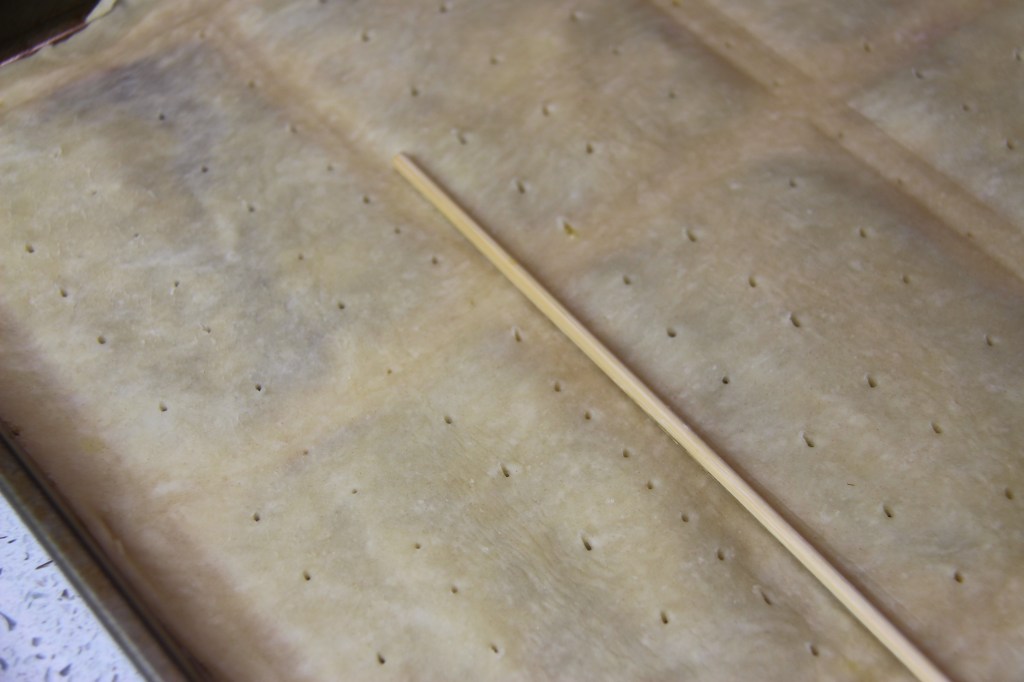
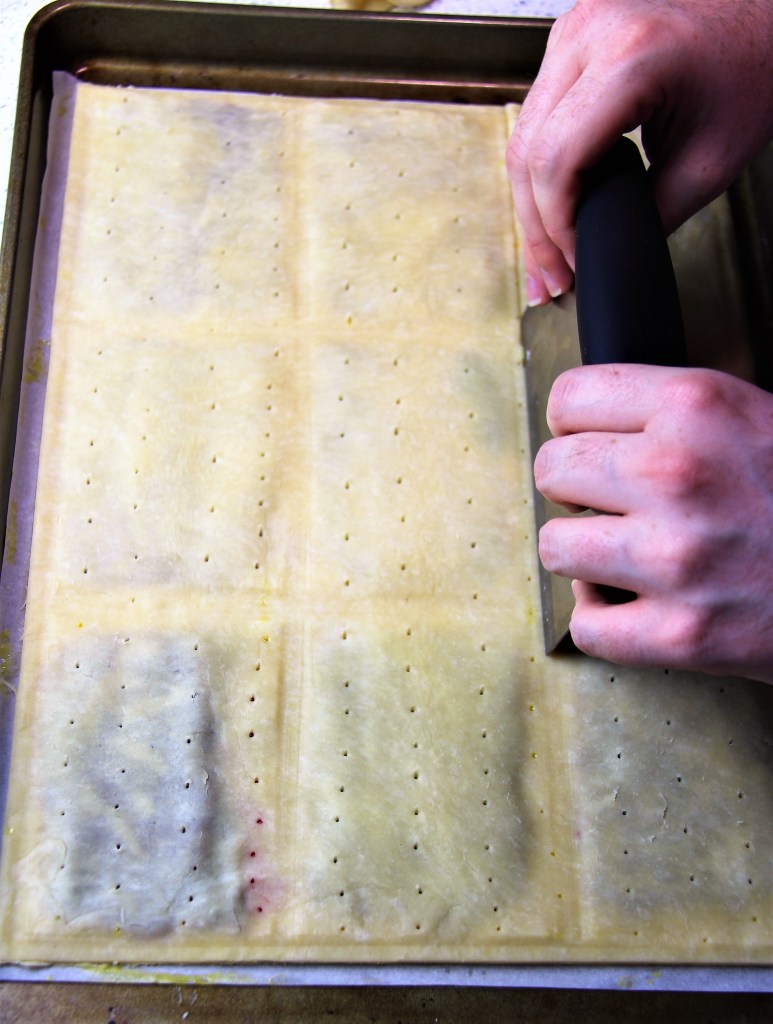
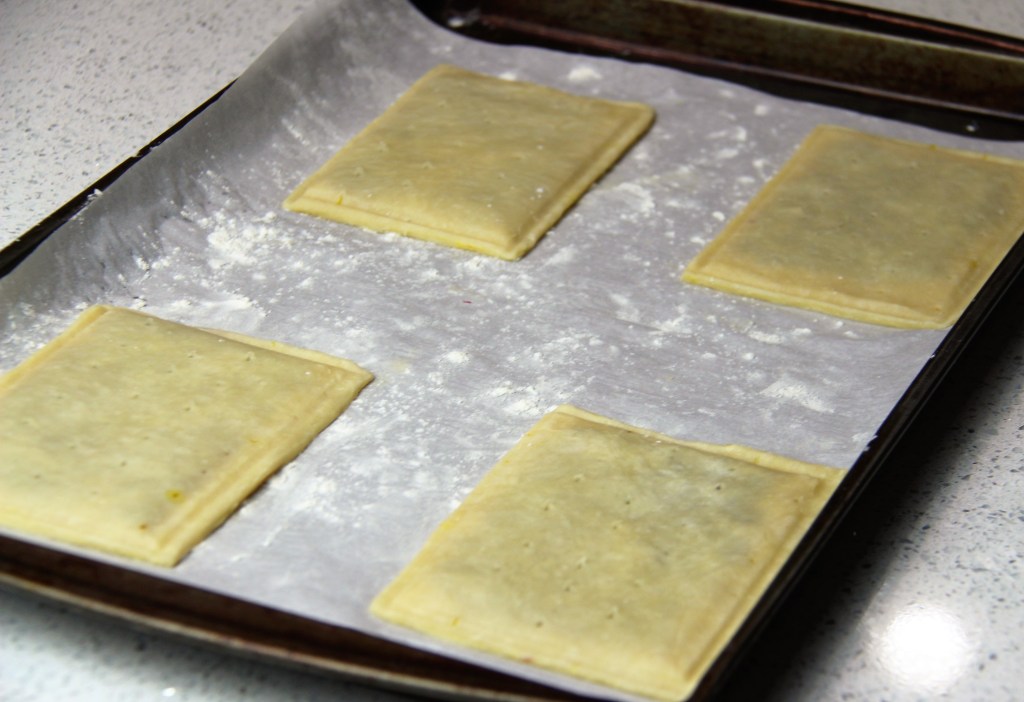
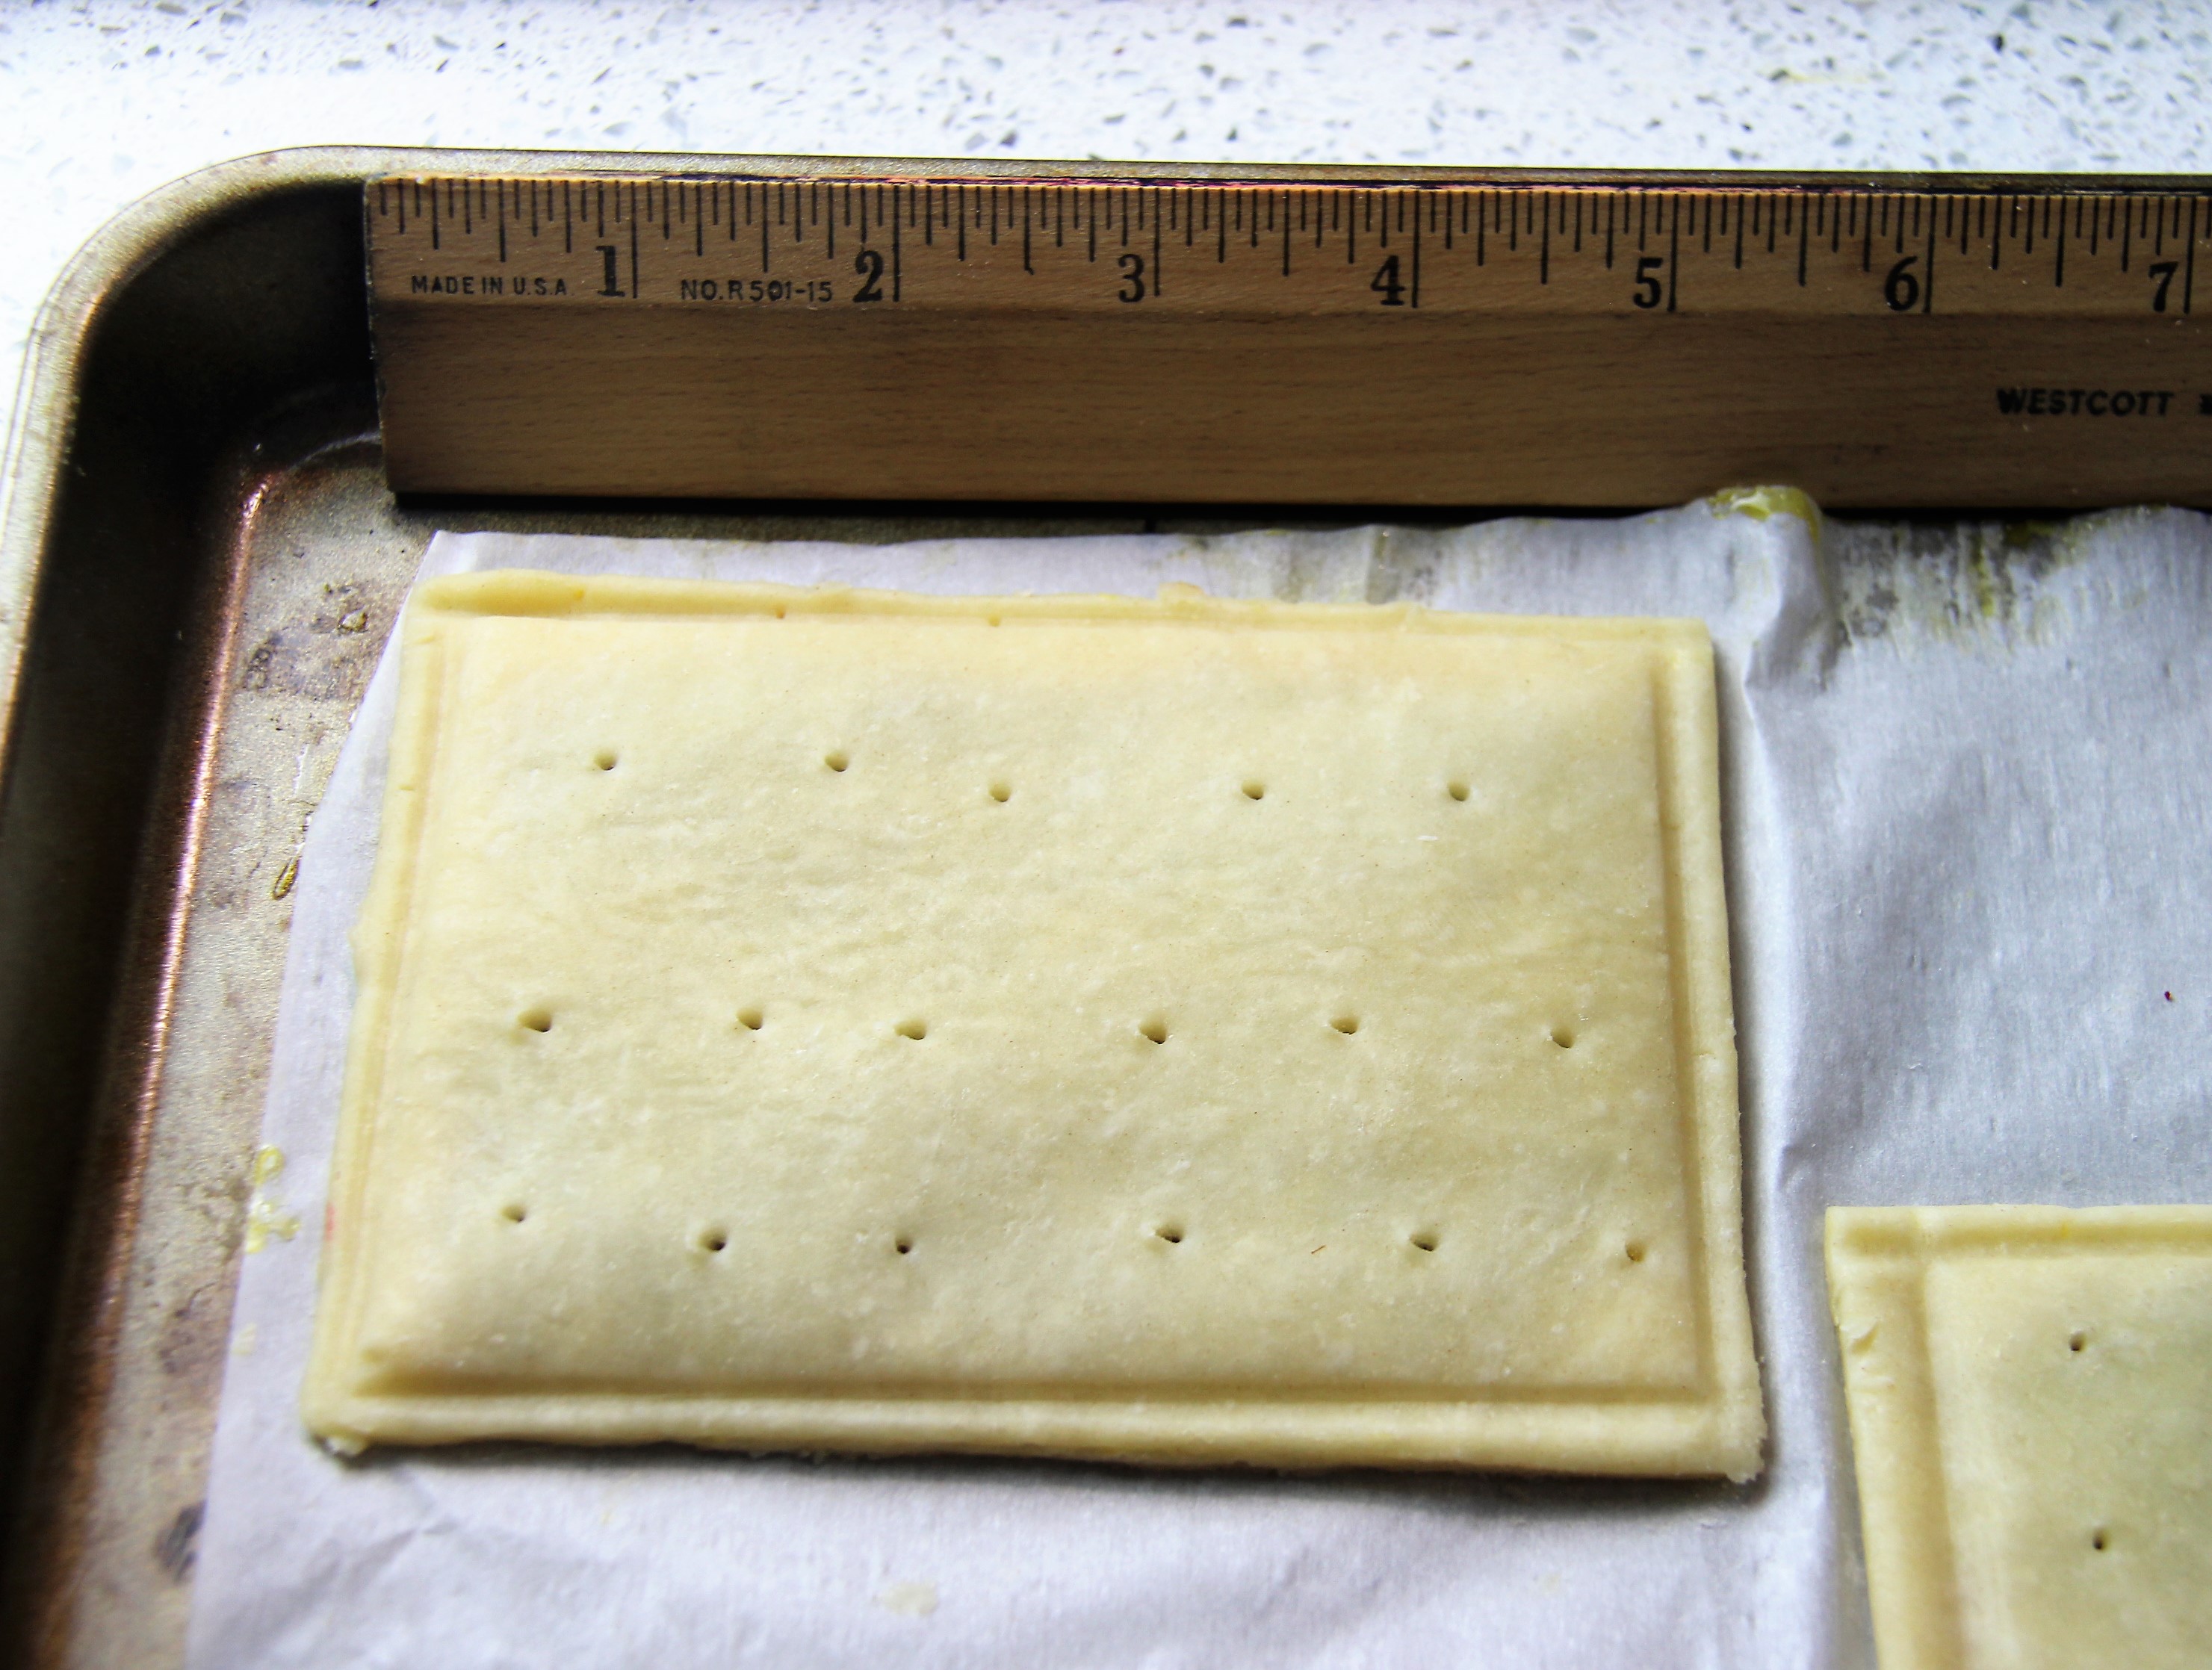
Press to seal with the skewer
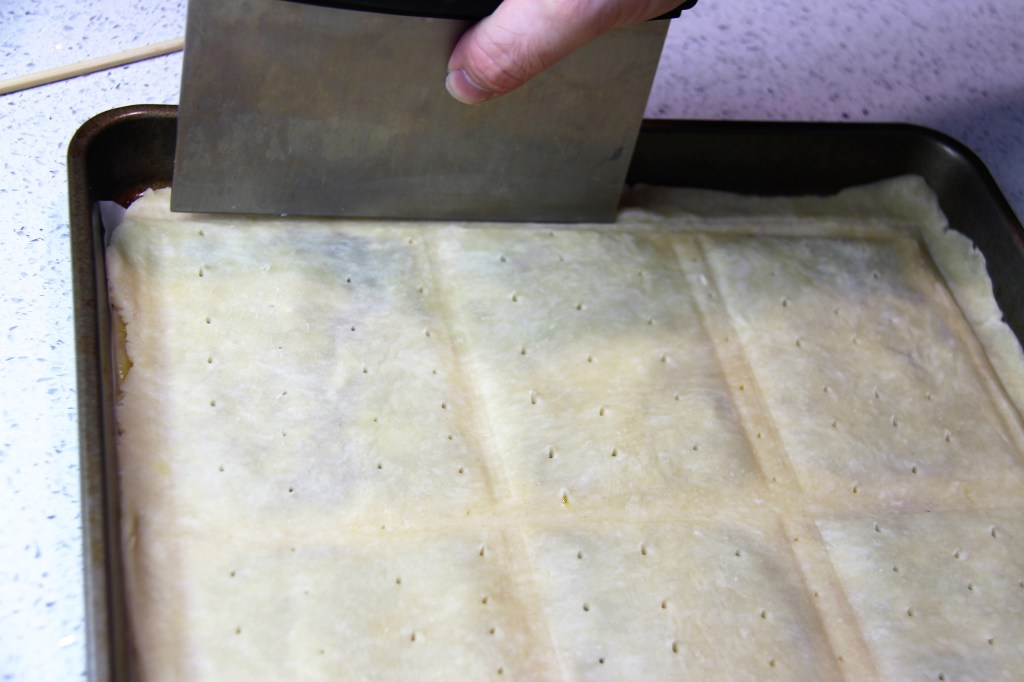
Trim the pastry
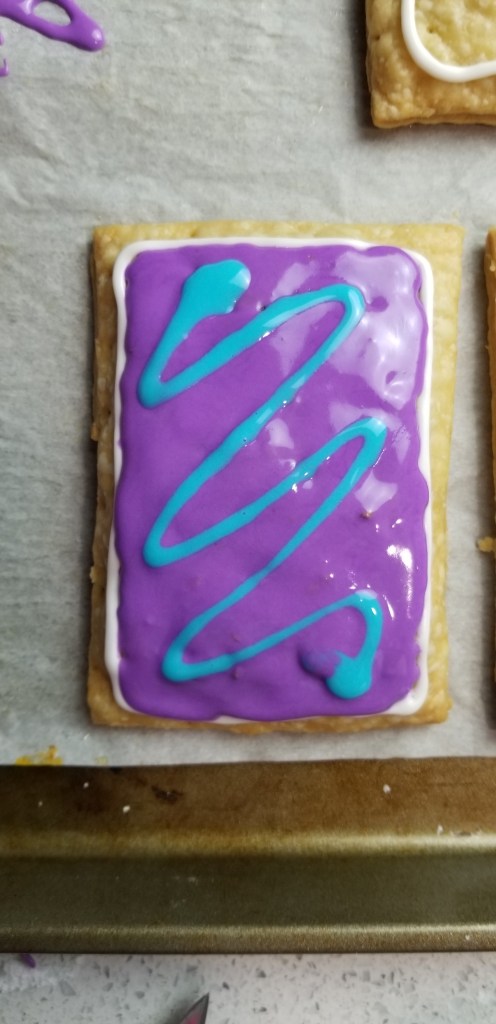
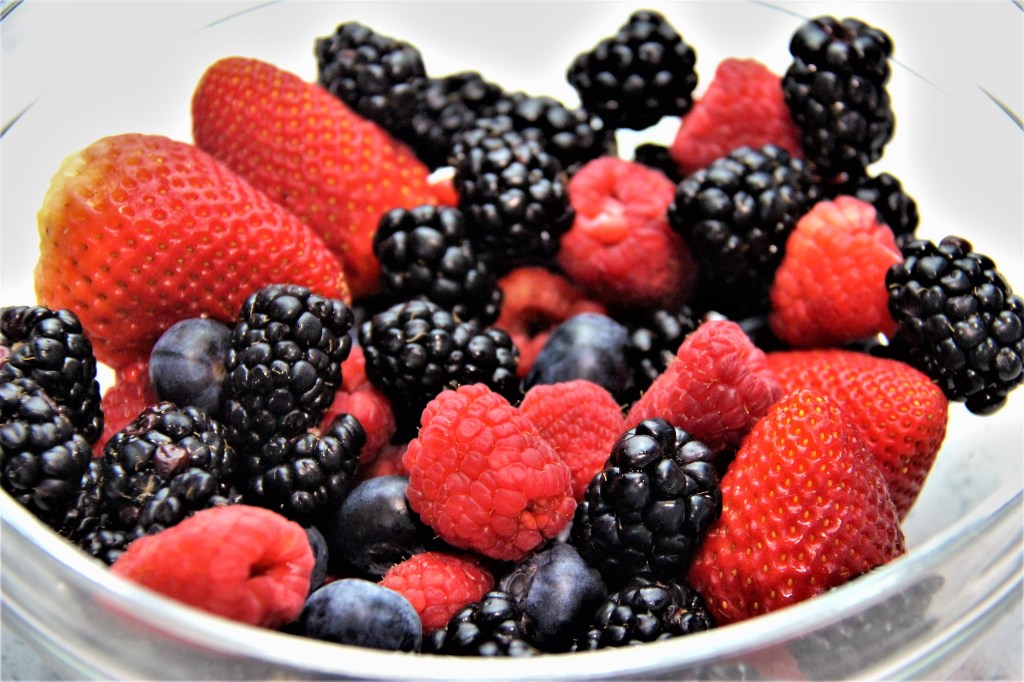
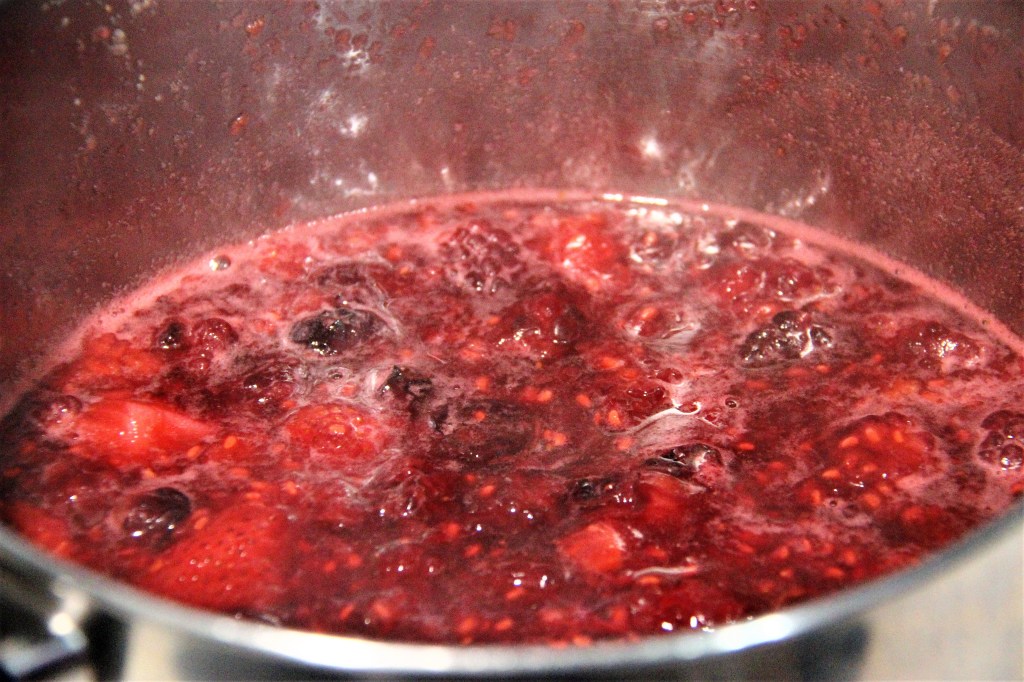
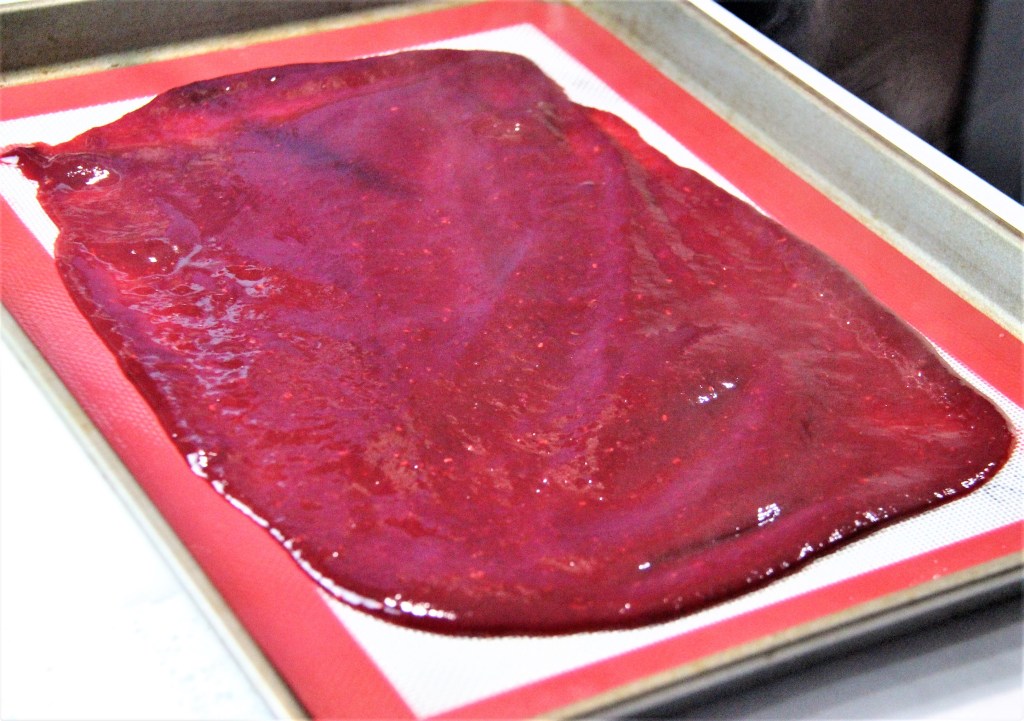
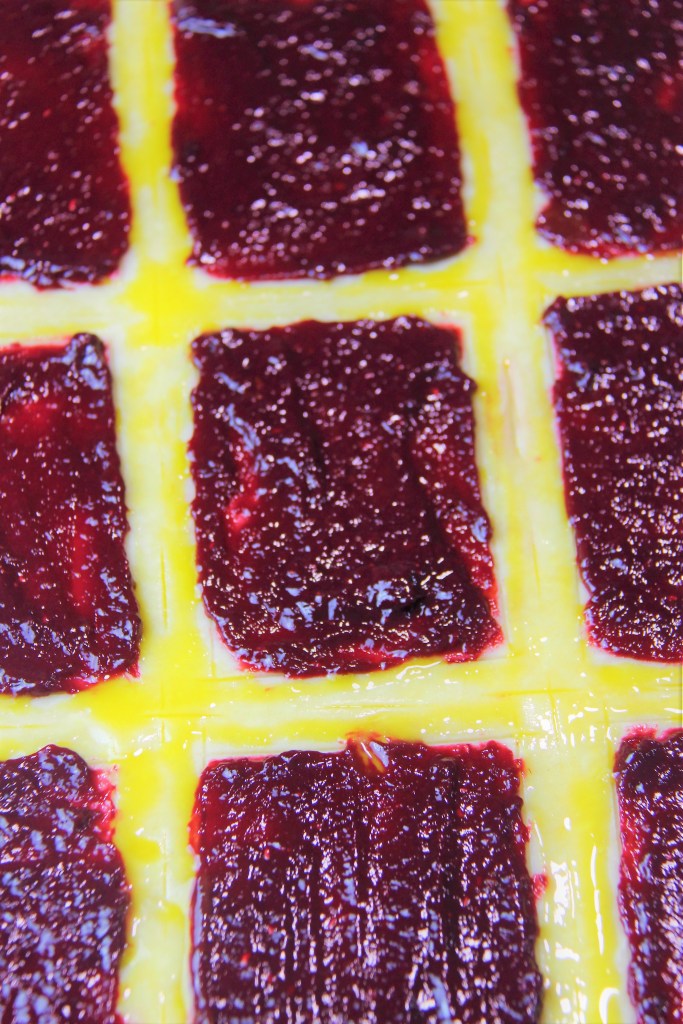
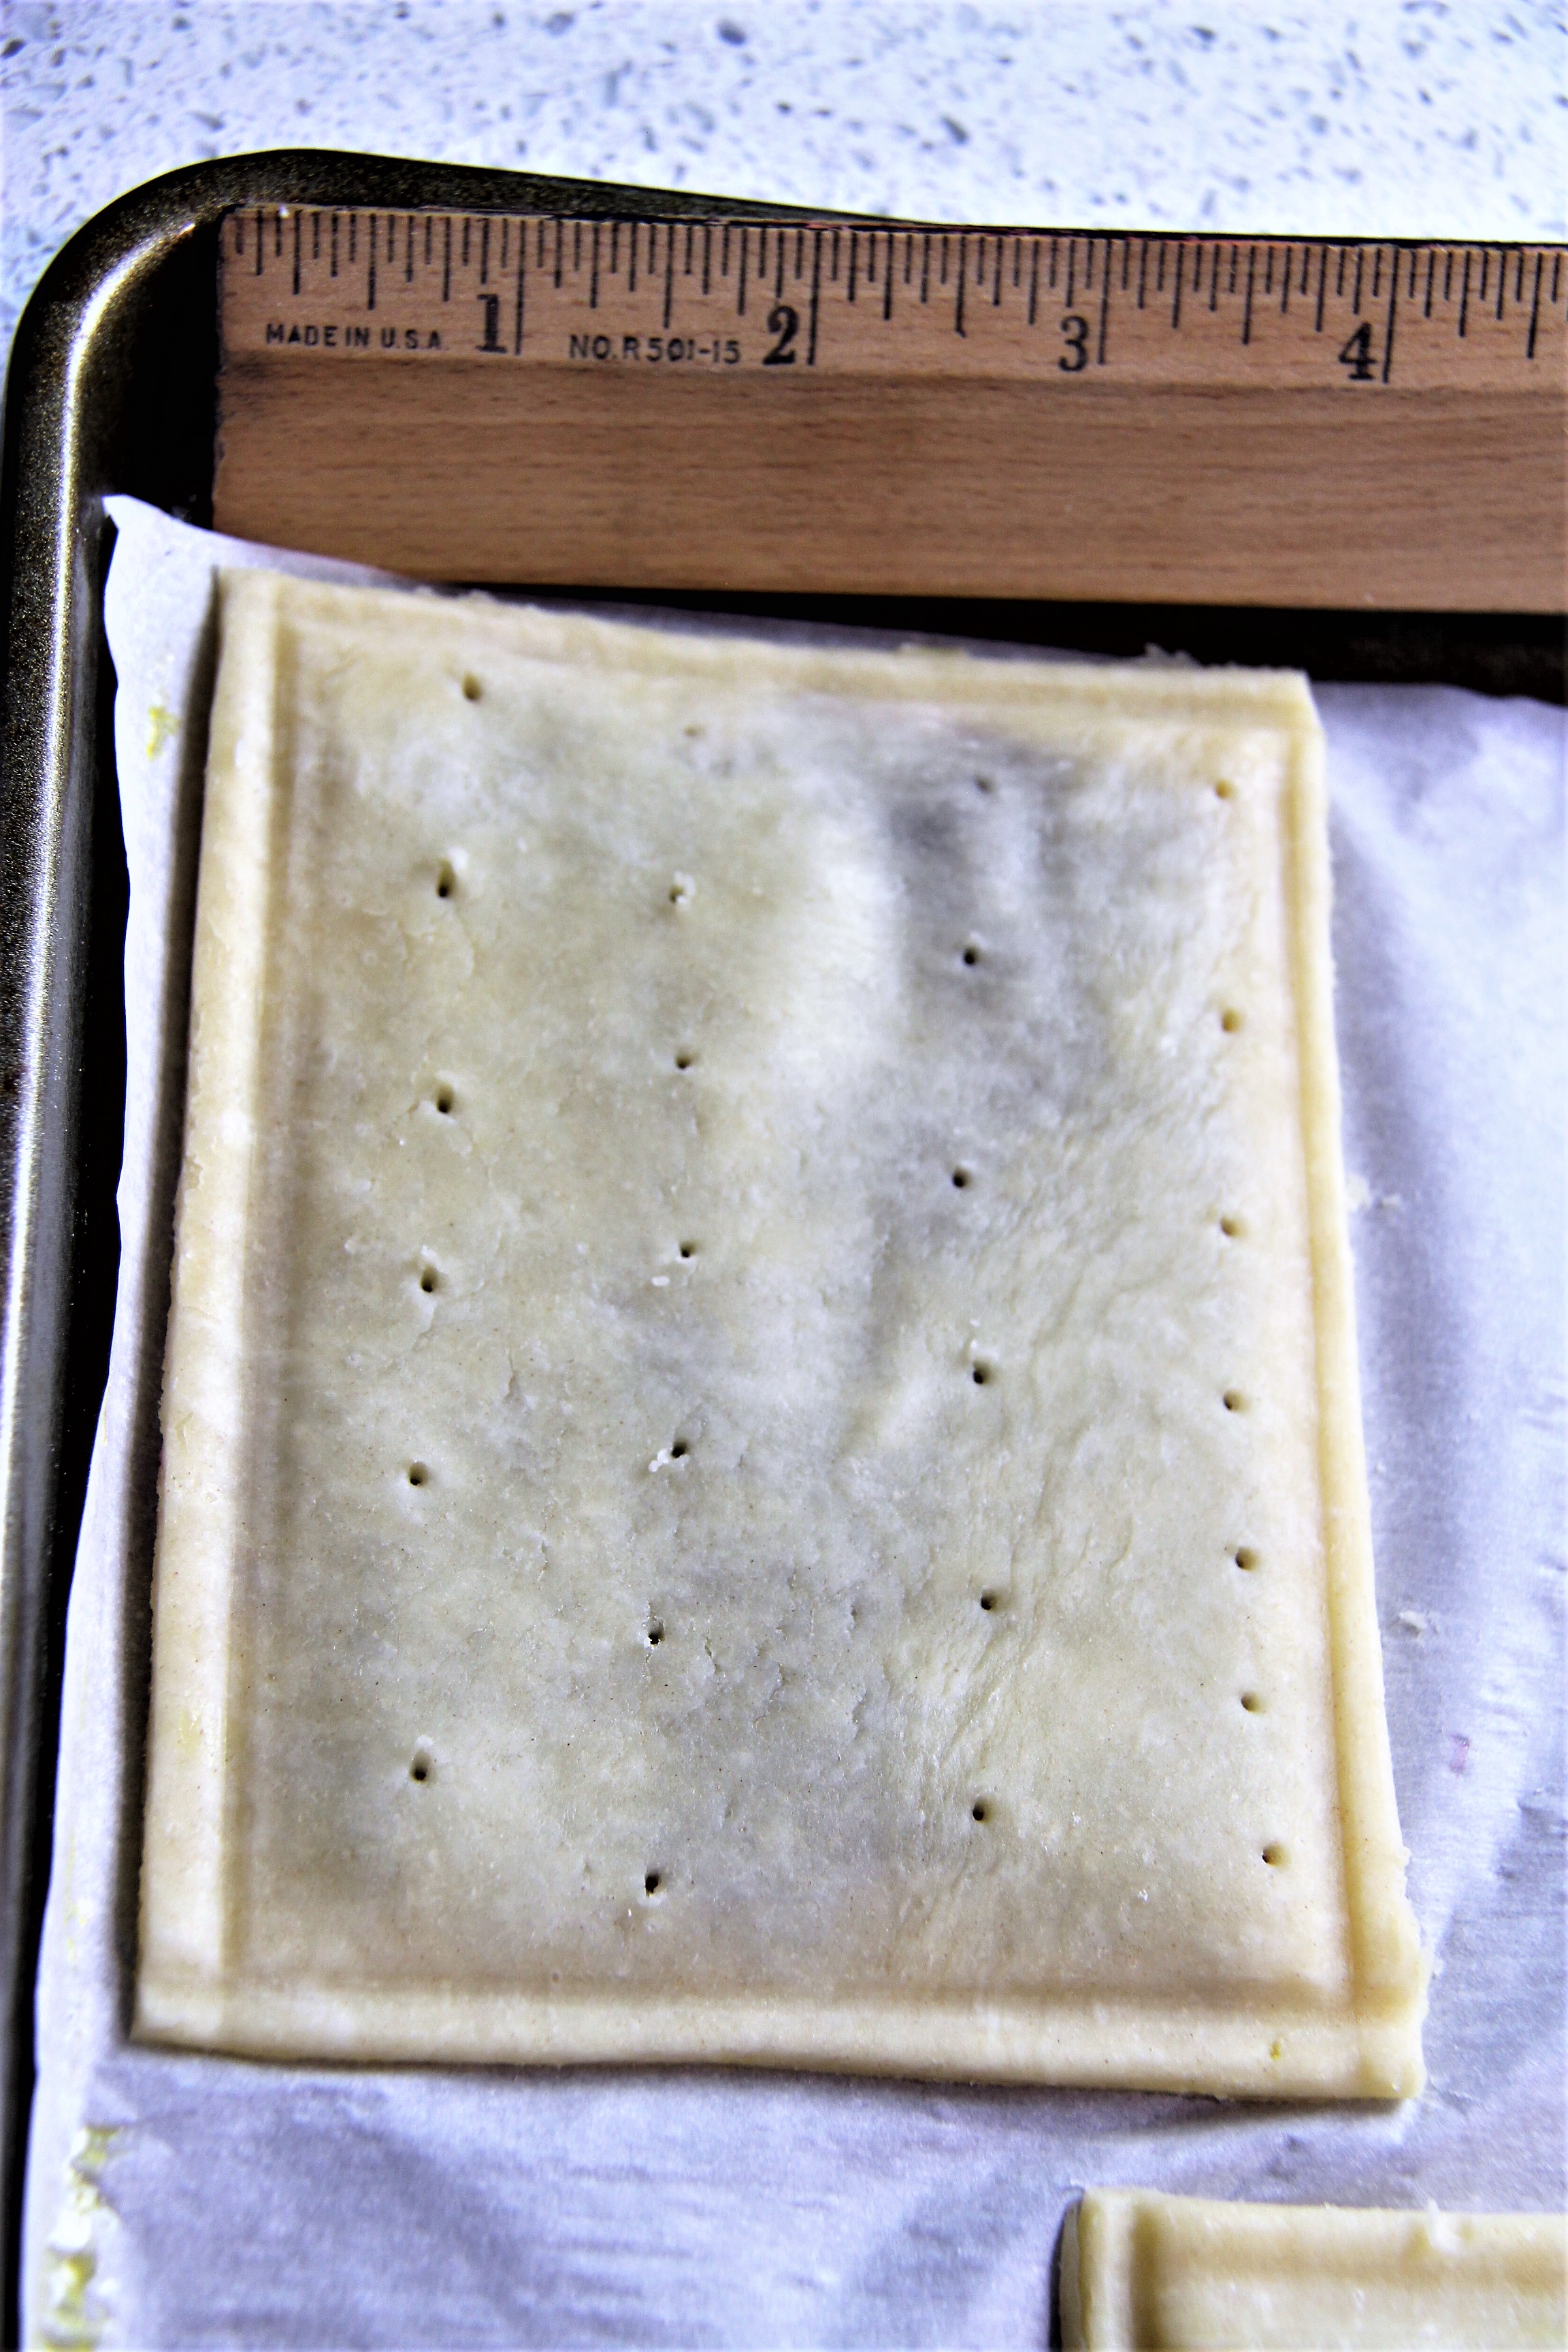
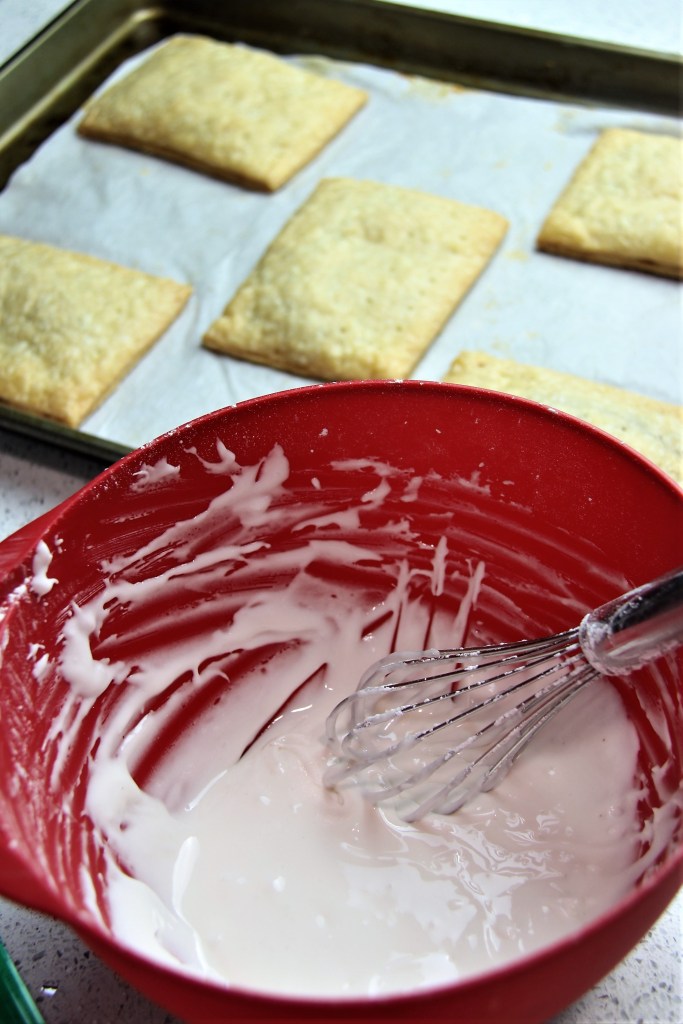
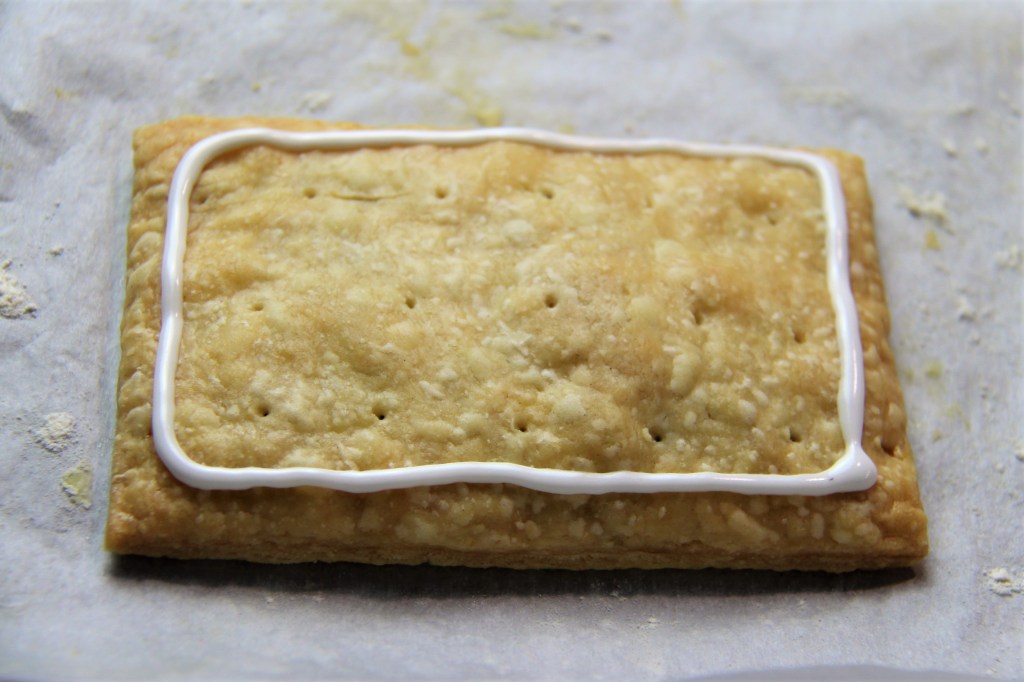
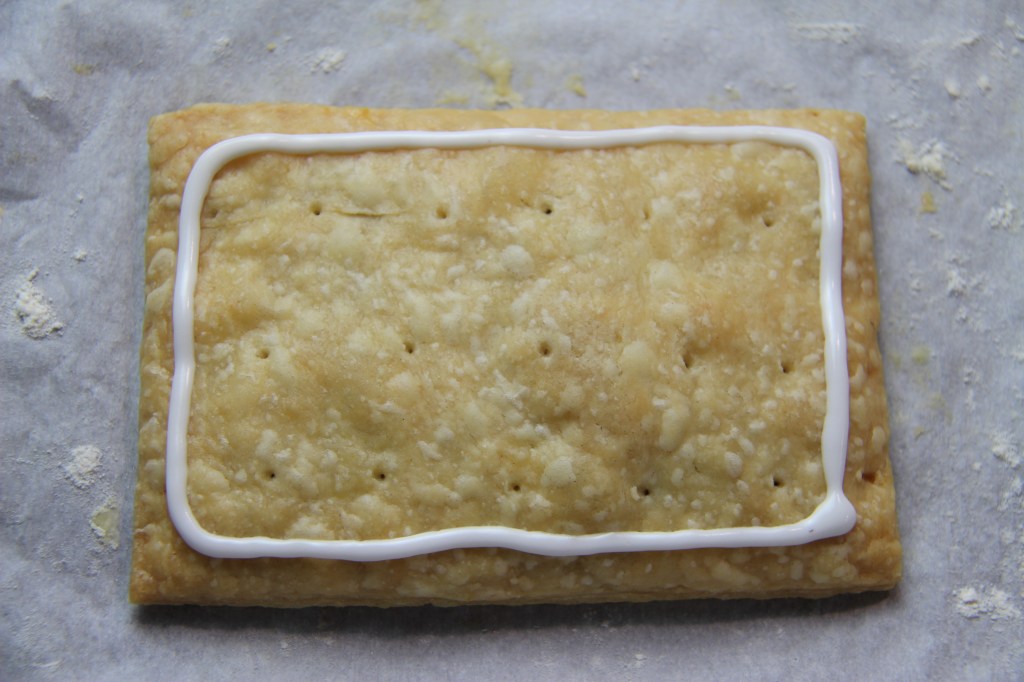
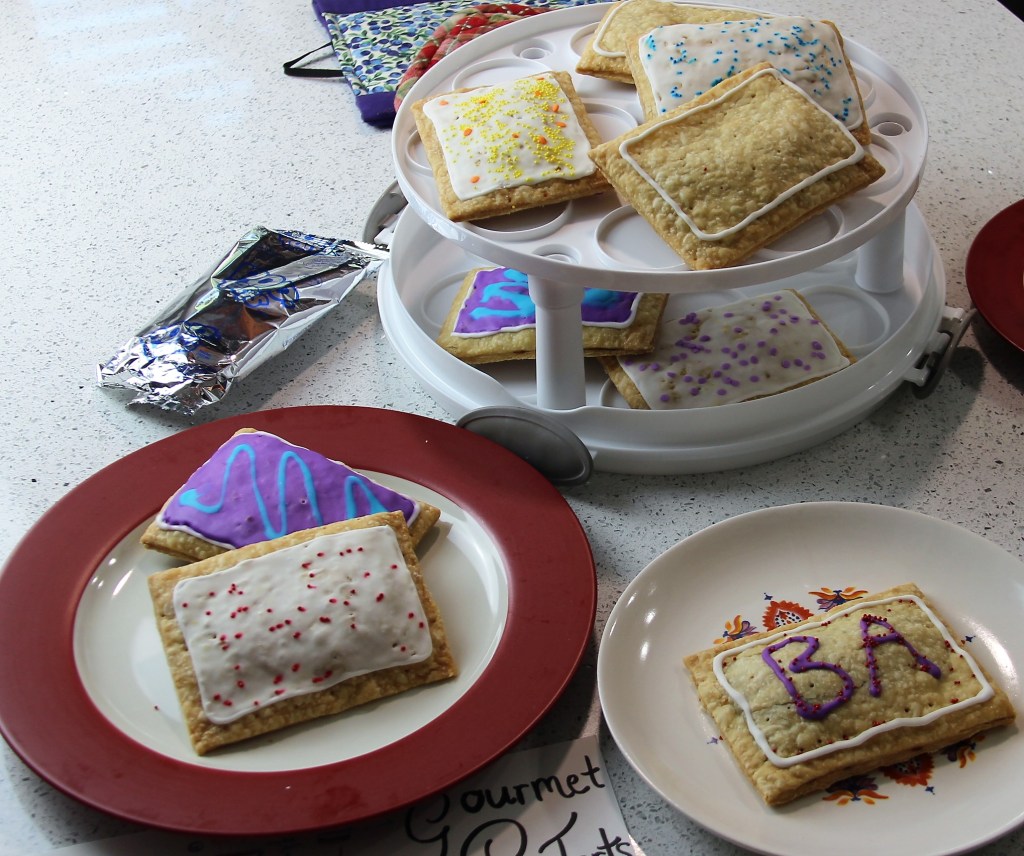
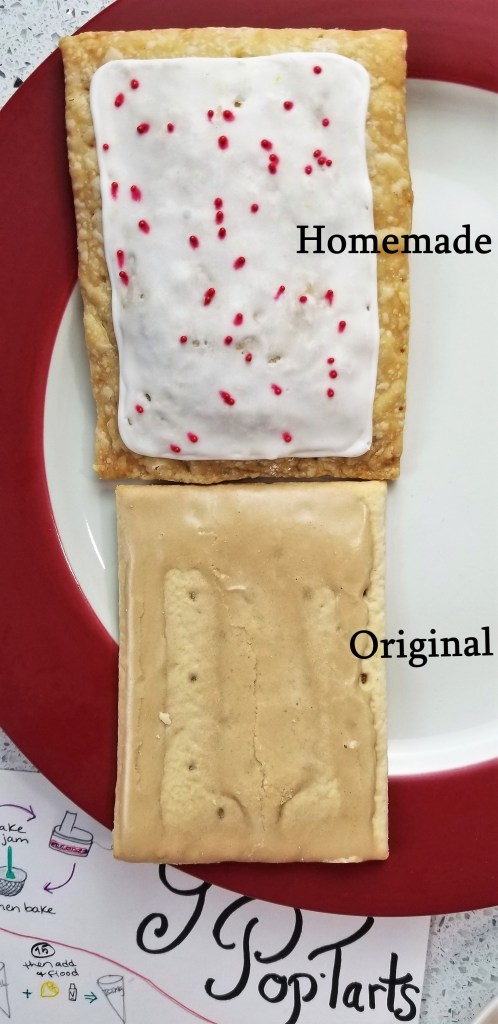
Take-Home Tips: The recipe is written in the best flow to prepare for the next step, but read ahead and be ready. Using store bought jam is easier and will give you back an hour of free time, but does not cut off total time as it is prepared while the dough chills. The taste of the homemade wild berry jam did come through perfectly, and you will be able to taste the filling. Err on the side of too little lemon or orange juice vs. too much. However, do not skimp on how much filling is in each pastry. Use whatever berries you like, or trade it for a cinnamon, brown sugar filling. If your fork pokes do not penetrate the top layer, you will find unwanted air pockets in your pastry. Use the skewer to firmly press and seal the pastries closed. Although decorating is fun, the pastries do taste better with less icing. When icing, add plenty and spread using a toothpick, being careful not to pull the flaky crust away. Pastries are toaster friendly.
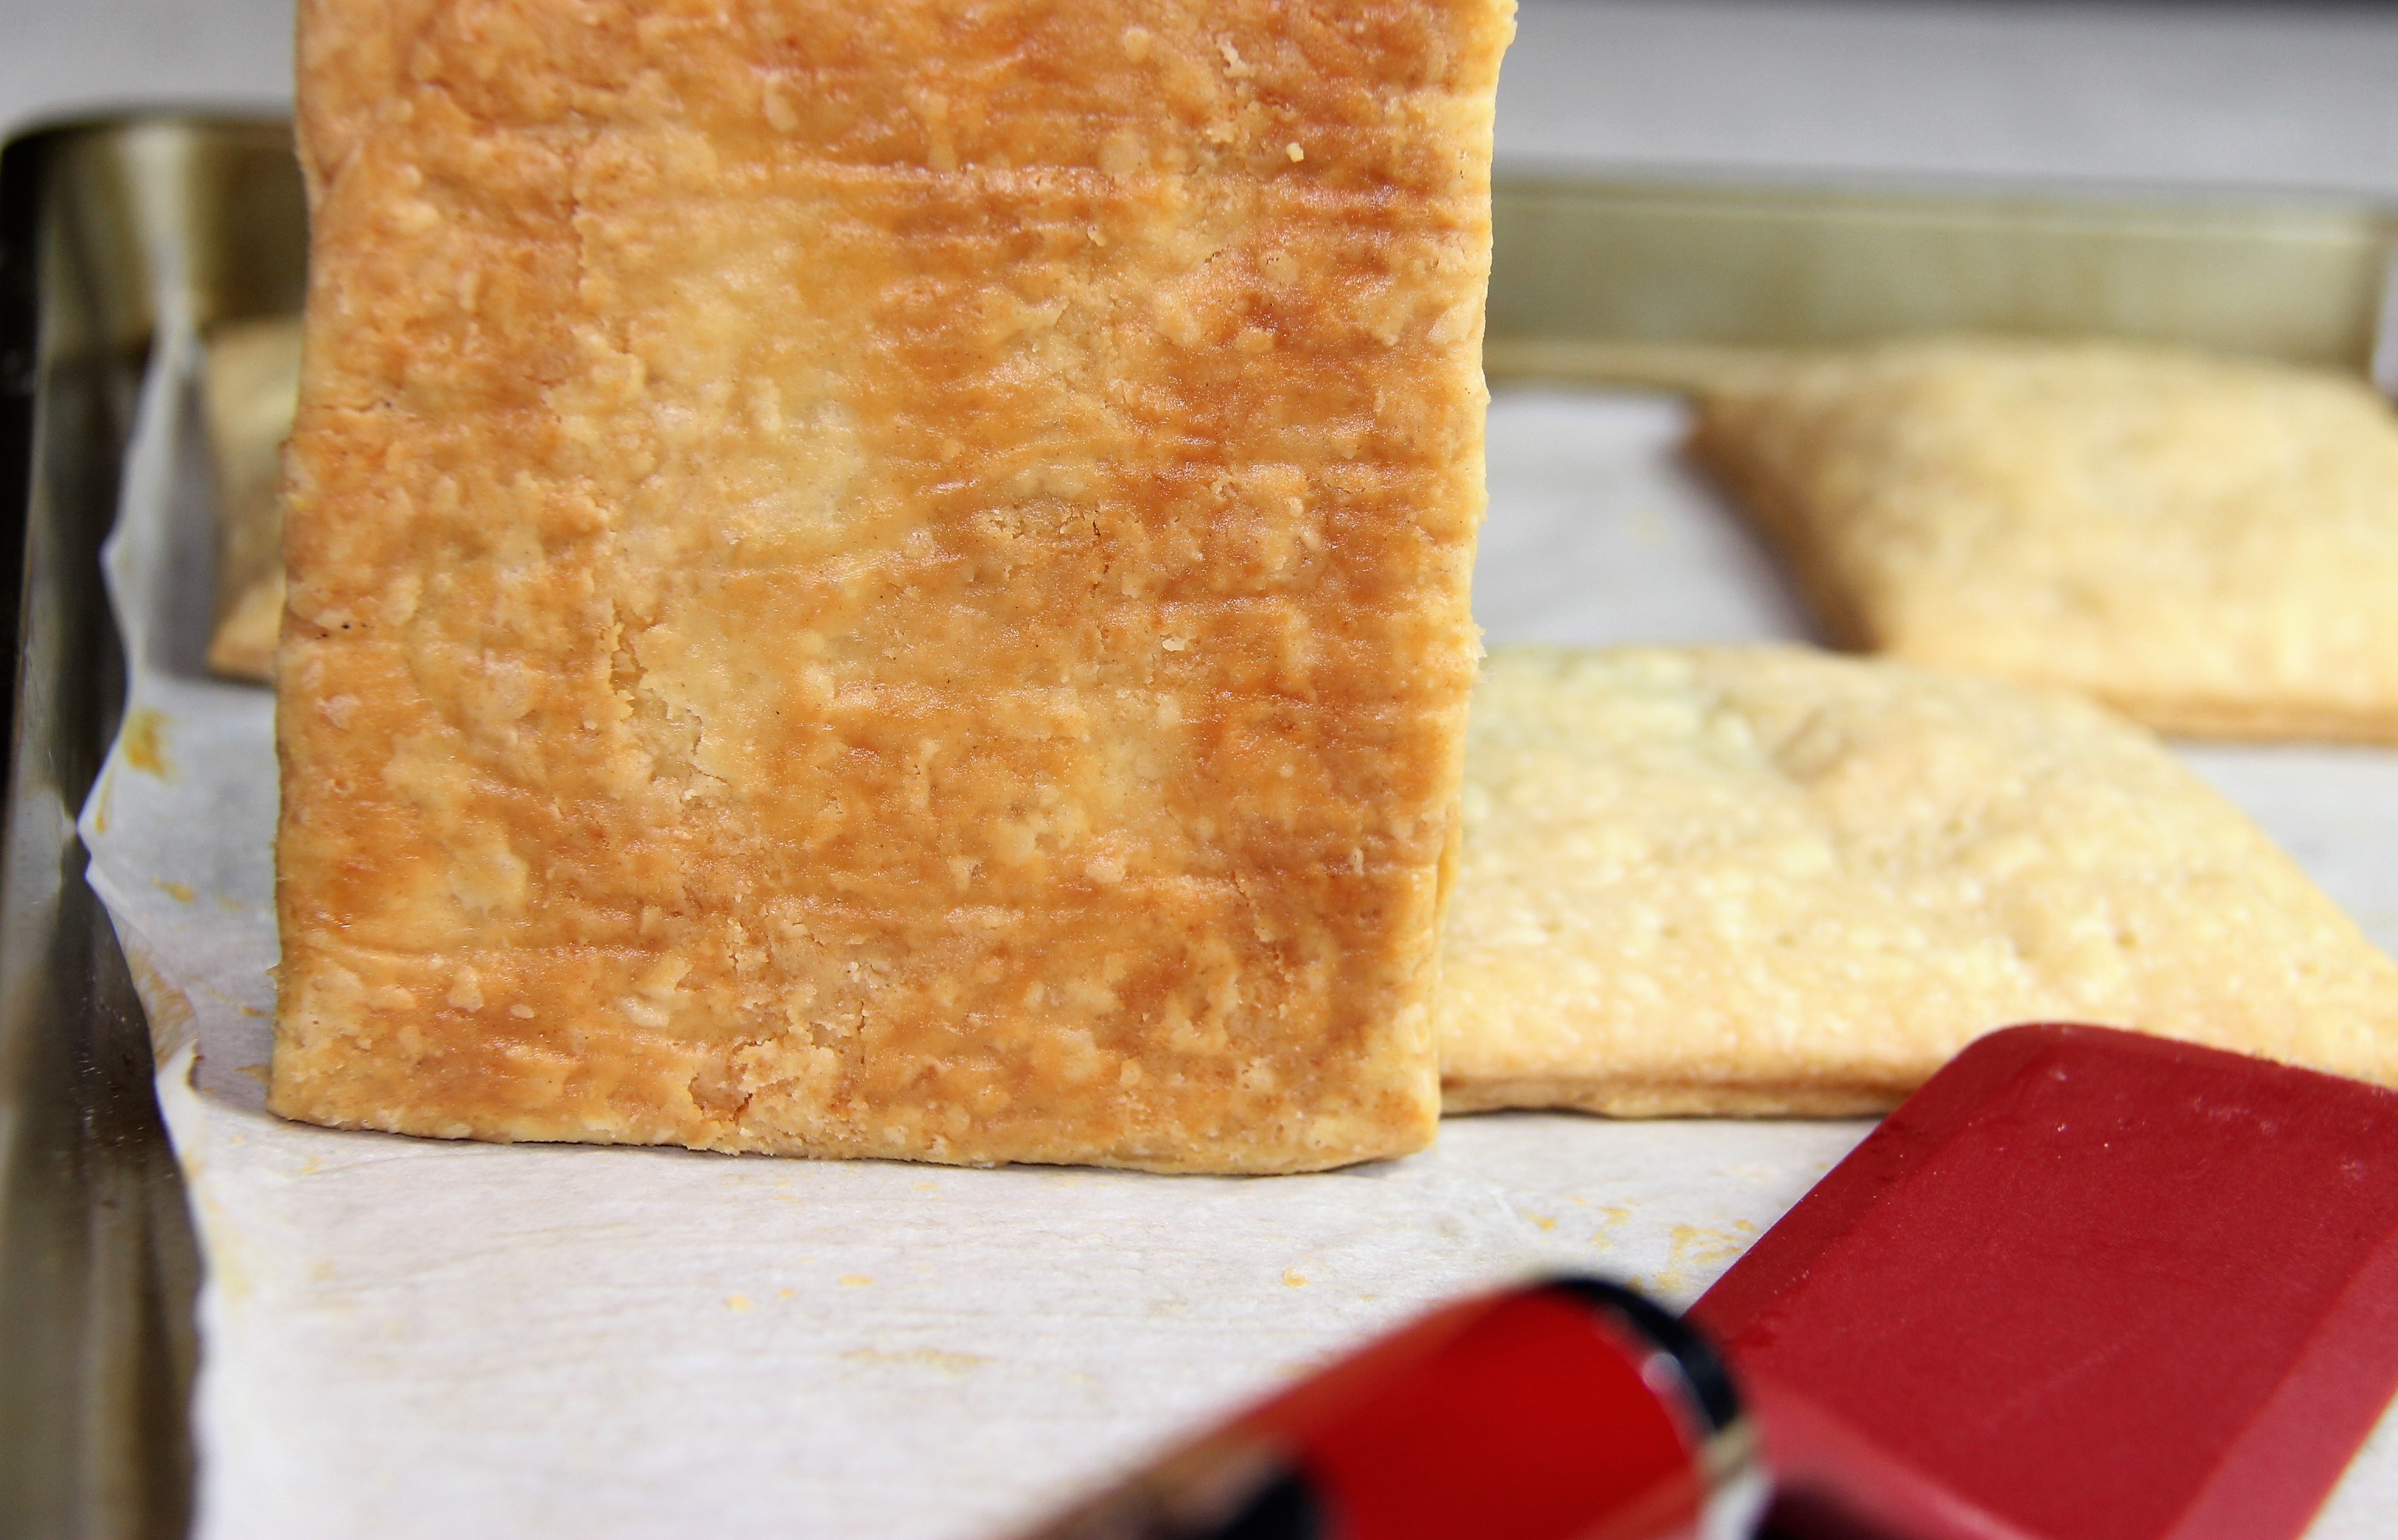
Scoring: 8 of 10. The pastry crust was the best part, very buttery and flaky! The filling was possibly too acidic, but pleasantly flavorful. Without enough filling they are a little dry, but do reheat well in the oven, microwave, or toaster. They take too long to make regularly, but are worth the sacrifice to try at least once in your life.
Visual recipe guide
Lemon or orange juice and zest
Recipe adopted from Claire Saffitz Gourmet Pop Tarts.
At long last the month of pastry and lamination has arrived! Due to some unforeseen events, April’s theme was pushed out two months to allow for time to collect the necessary supplies (e.g. flour). There are countless types and variations of pastry as plenty of regions have left their mark on the patisserie world. It is impractical to attempt to identify precisely how many kinds of basic dough there are due to the complexity of culture, variations, and renaming similar or the same ones. According to Bake Off there are 6 kinds: Sweet crust (Pate Sucree), Shortcrust, Suet, Puff, Hot water crust, Choux. A very British perspective.
Pre-Phyllo Pastry
I did attempt to pinpoint the most common, cross-cultural, and crucial pastry dough that every baker should strive to master. With the help of the world wide web, I was able to narrow the list of 229 pastries on Wikipedia to 7, as opposed to the 5 main ones they selected. While I do agree there are probably 5 main ones to master, being introduced further and expanding beyond the star performers will increase our understanding of those 5. I added toaster pastry and hot water crust to their list because they look fun and unique. I did debate between fig newtons for some time but perhaps we save it for a deeper dive into pastry during another month.
For June, we will explore 7 (only to limit the flour consumption and carbs) varieties of pastry, that once understood will open doors to becoming a patisserie chef. At least the goal here is to understand the different kinds of pastry and to practice using them to make some of our favorite store-bought treats and eats.
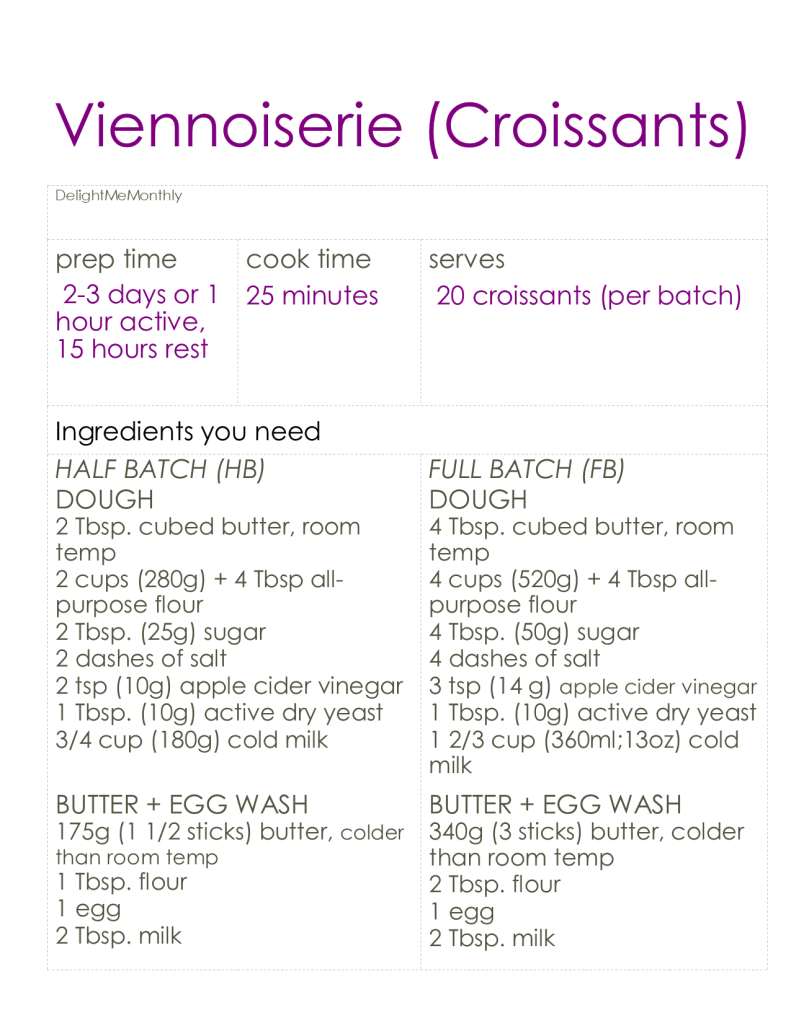
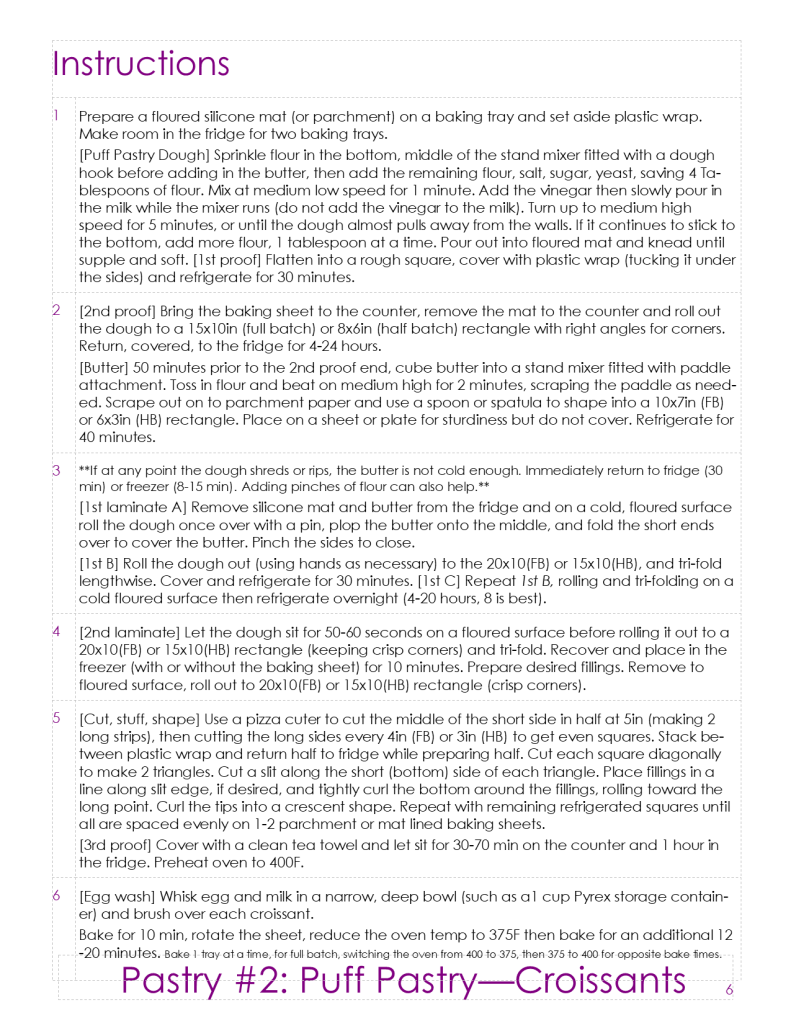
Viennoiserie Puff Pastry – Croissants
Popular Pastries:
Toaster pastry
designed to withstand reheating in the toaster – such as Pop Tarts
Puff pastry
fat (butter), flour, water – typically unleavened
the infamous arduously time consuming laminated classic pastry
there are sub-categories here, and we will explore the very popular croissants (leavened!) from the Viennoiserie (Vienna-Style) adapted in France in the 19th century
Filo / Phyllo
very thin individually layered dough separated by oil or butter and common in the Mediterranean and Middle East, called filo in England
once mastering puff pastry, this cheater’s pastry is the go-to from then on – although still time consuming, it is easier and cuts the lamination time in half
Shortcrust pastry
surplus fat (butter and/or lard), flour, water or egg
pie crust
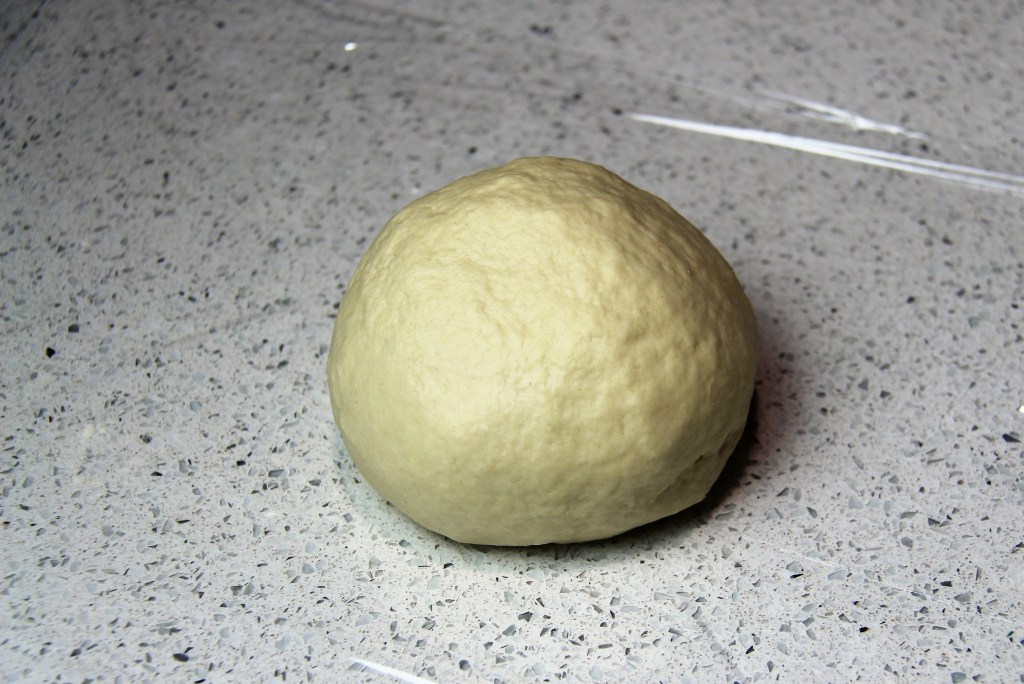
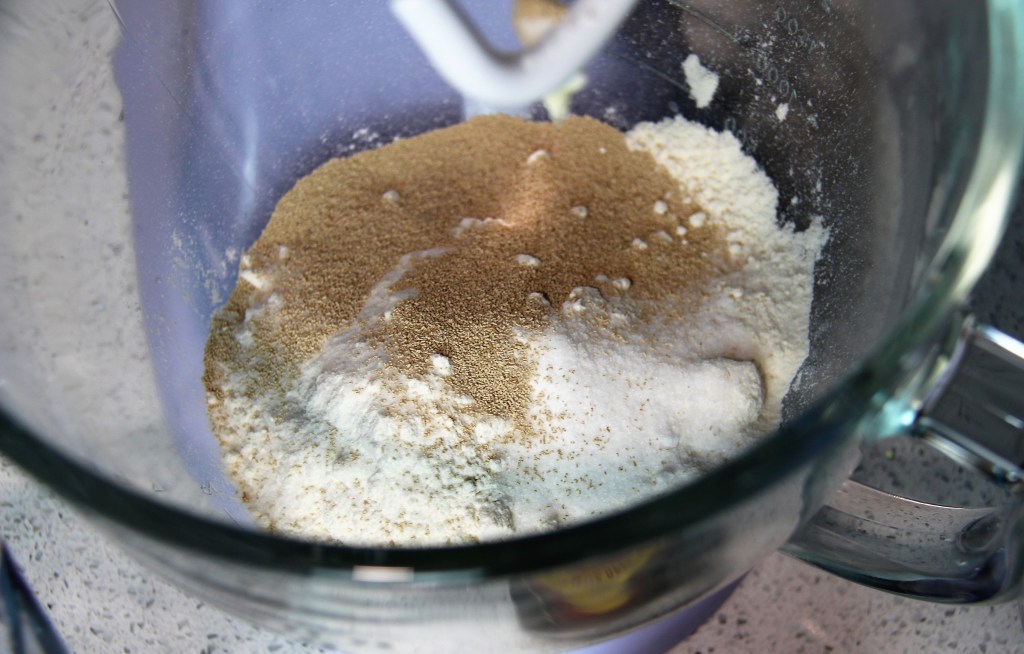
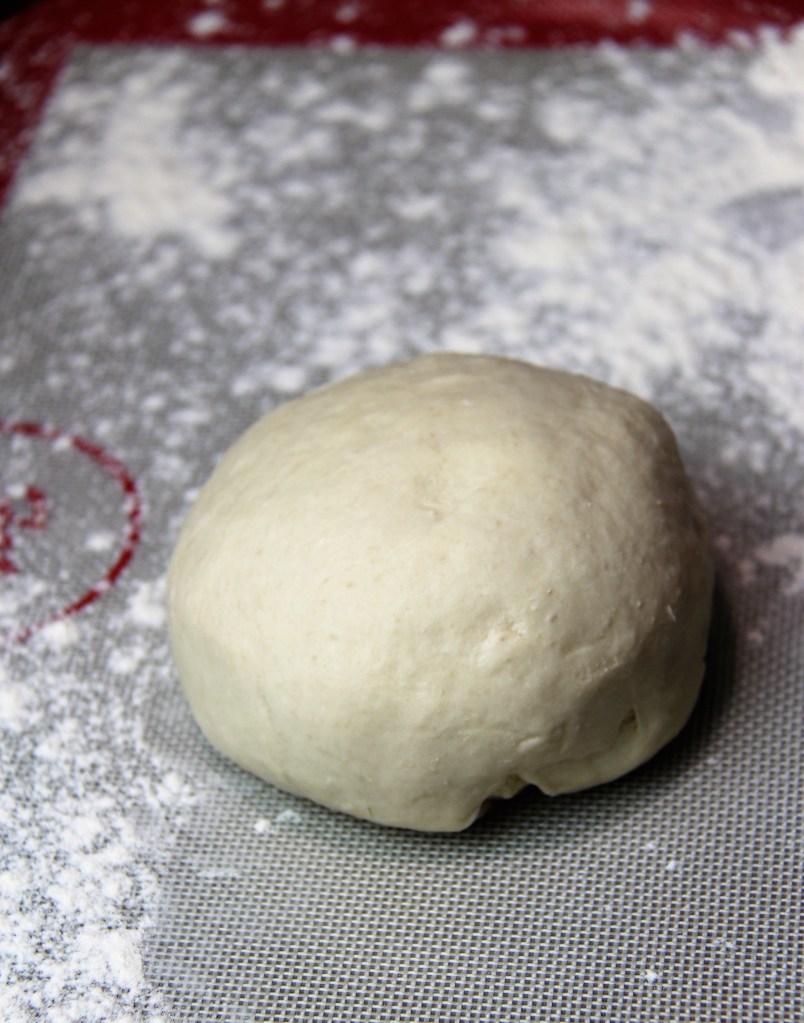
Hot water crust pastry
fat (shortening), flour, water, salt
very old fashioned British dough typically used to convert game animals (brought home by hunting parties) into tall meat pies
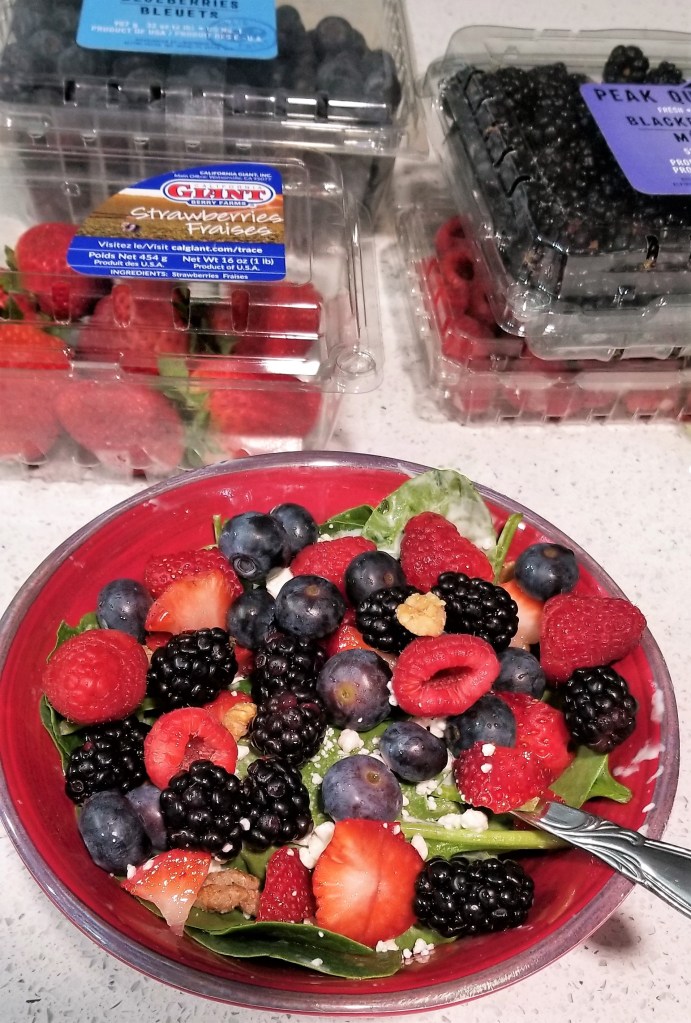
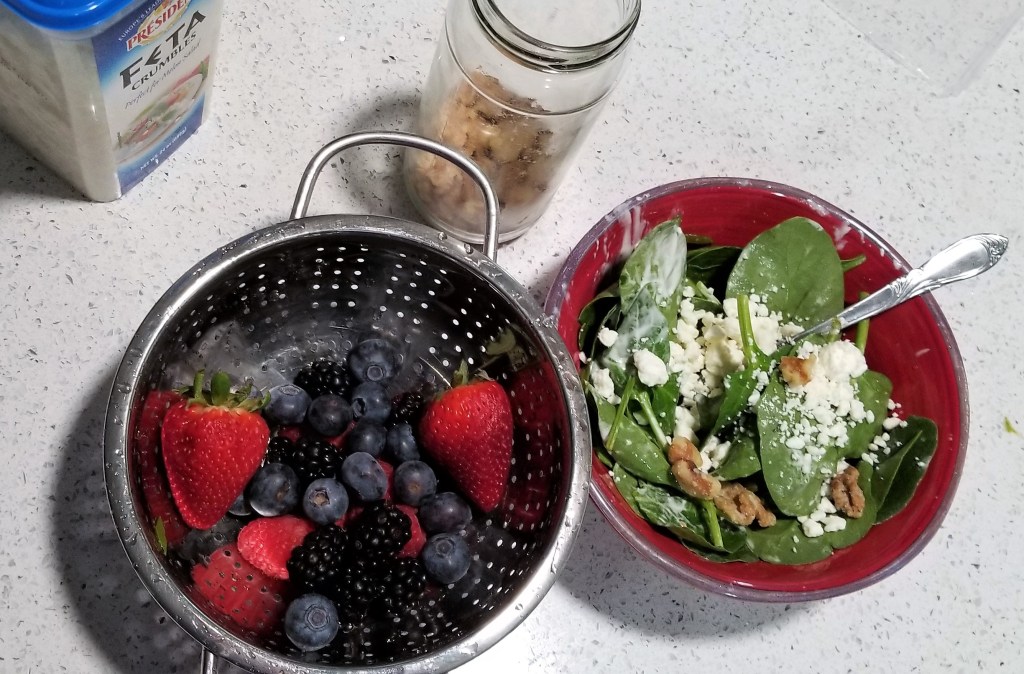
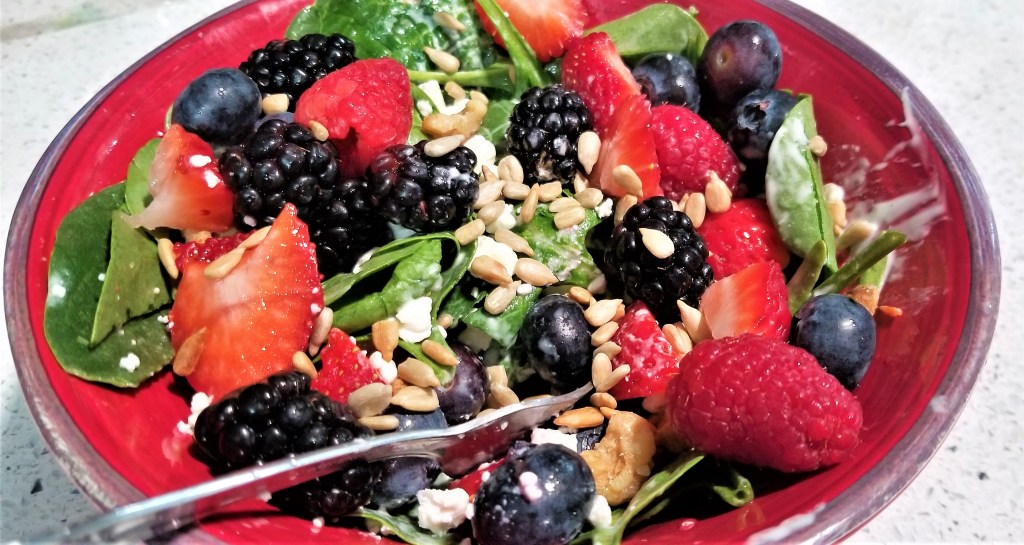
There are too many fantastic, refreshing sides to make this summer. To inspire your social distancing outdoor parties, I am leaving these photos below. Let me know in the comments if you would like me to make a post about any of them as summer shares its rays with us.
Fresh berry salad: pair with your favorite nuts and seeds for a crunch.
Which flowers do you eat?
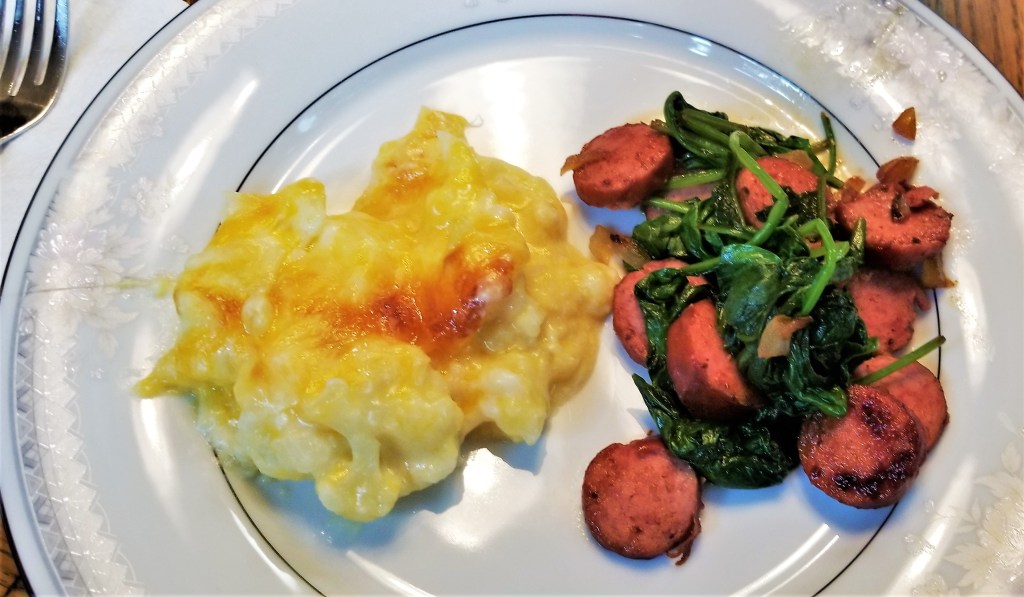
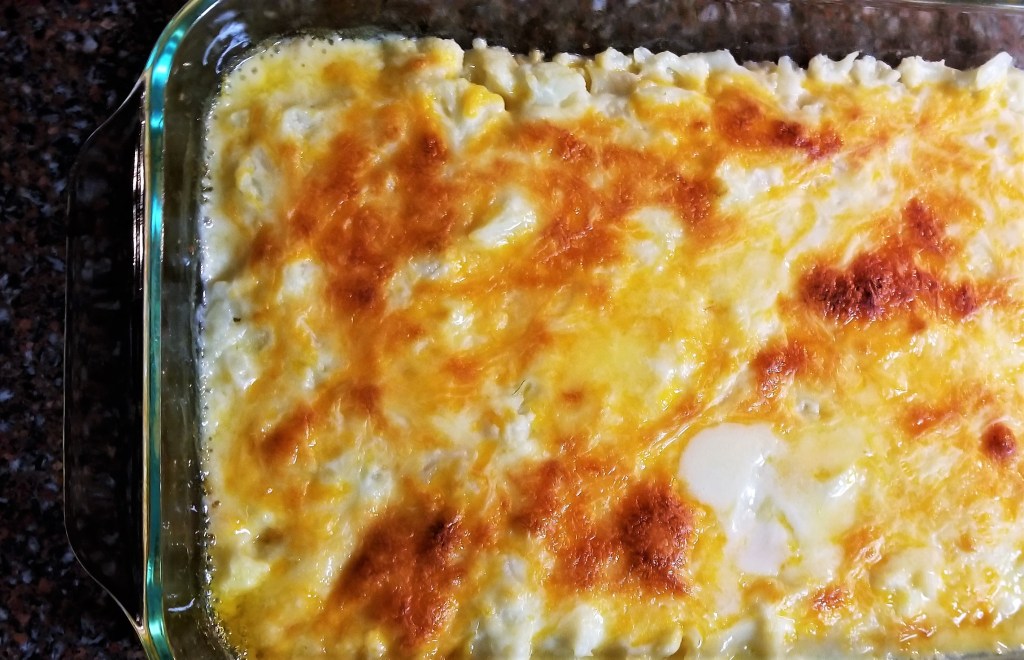
Is Cauliflower and Cheese better than Mac and Cheese? We think so.
Planting anything beautiful this year?
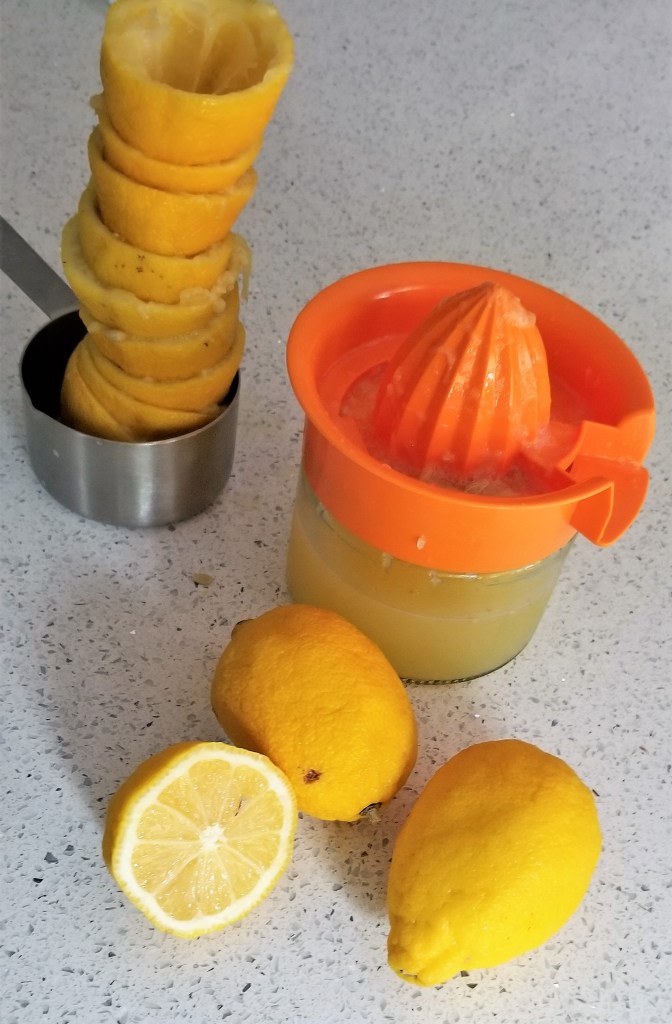
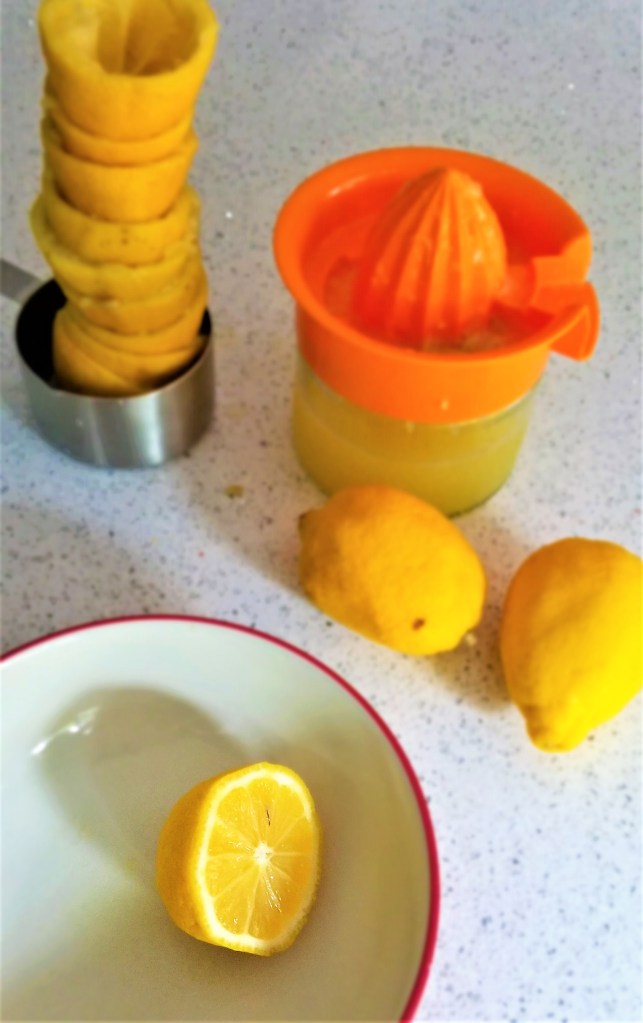
The juice of 7 lemons
Use alternative sugars such as Stevia to sweeten your lemonade but leave it light in calories.
Maybe plain on the outside, but full of character within.
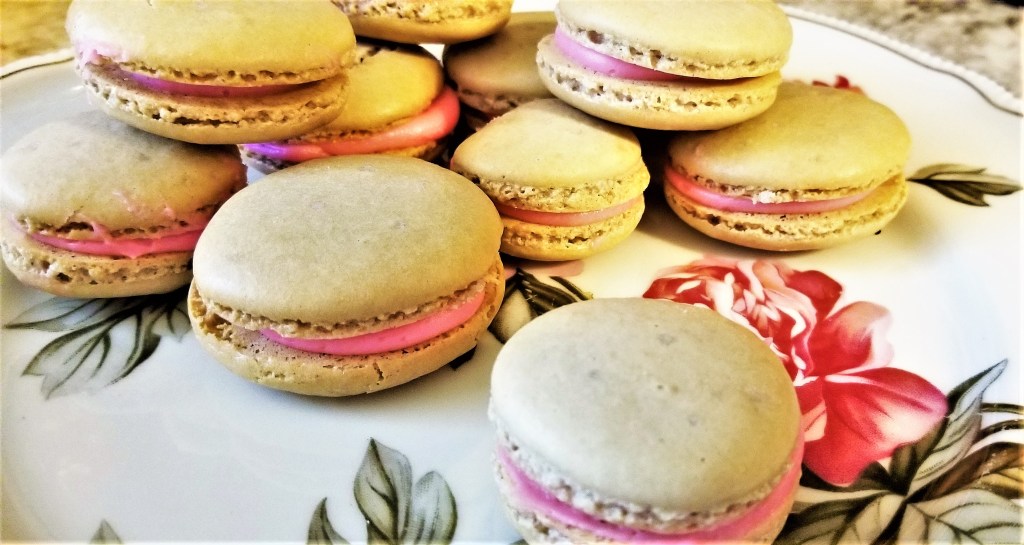
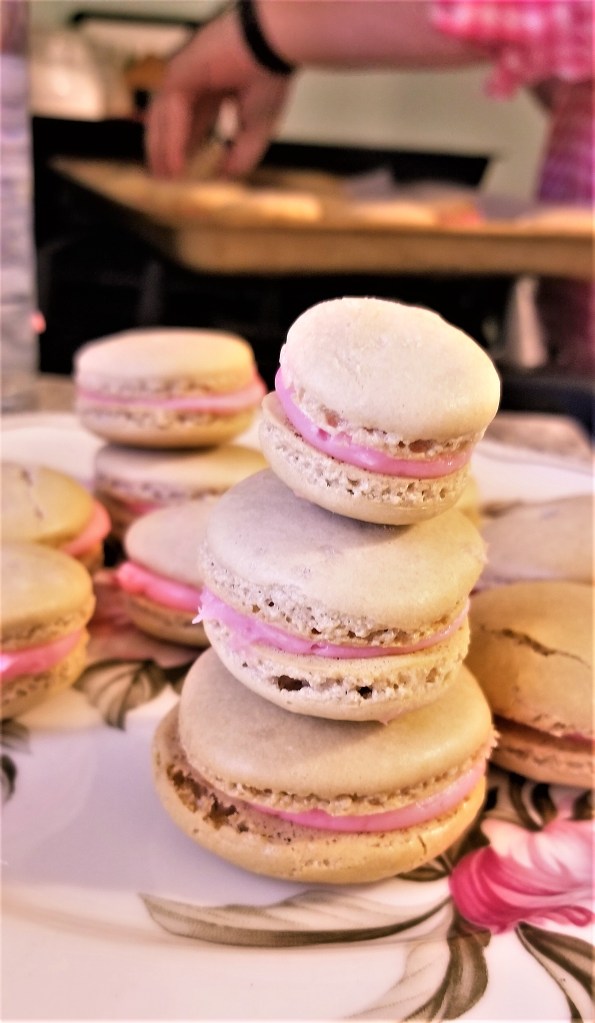
Mother’s Day Macrons!
The early bird sees the flowers open their petals.
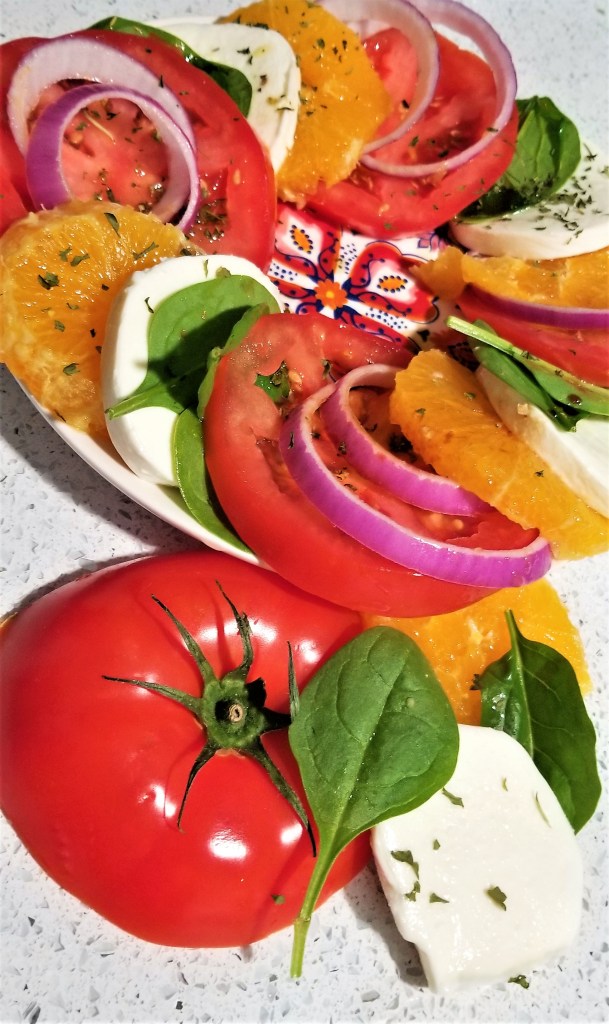
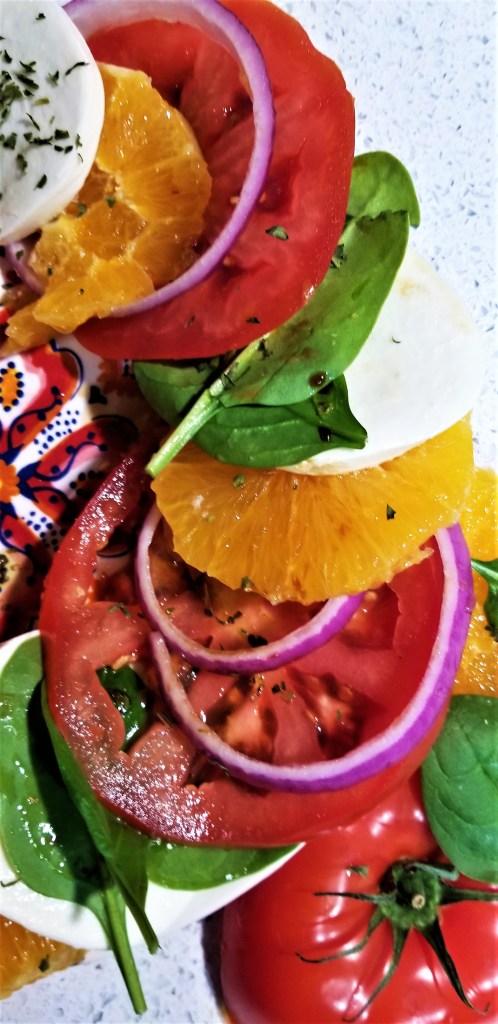
Often times salads can have a negative connotation when the diner immediately pictures a bowl of lettuce with toppings. Salad, or in this case caprese, does not require or even have to involve the begrudged lettuce! While the orange slices really make this side perfect for the summertime, I’m honestly just here for the fresh mozzarella.
Orange, tomato, and onion are an unusual combination. A tilt of the head and wrinkling of the nose might be your first reaction. However, if you approach this side with a positive and thoughtful attitude, you could turn these simple Caprese ingredients into a summertime masterpiece to make you drool.
Ingredients:
1 navel orange
1/2 red onion
5 slices of fresh mozzarella (plus whatever you eat while assembling)
Sprigs of fresh basil or spinach leaves
1 large red tomato
Italian seasoning, parsley
1 tsp olive oil
1 tsp balsamic vinegar
Instructions:
Slice the onion crosswise (perpendicular to the 2 ends) to get the rings. Cut the end off the orange and gently squeeze the juice over the onion and let soak for 10-30 minutes.
Slice the rest of the orange as thick as you prefer then trim the peal off (or vice versa if you prefer). Slice the tomato (horizontally), discarding the ends. Slice the mozzarella about 1/4 inch thick.
Assemble the platter by laying the ingredients in a sorted pattern, a straight line on a platter would be easiest.
Drizzle the oil, vinegar and spices on top. Serve chilled. Can make ahead by storing in the fridge on a grate (cooling rack with a tray under to catch the juice) and transferring to a serving platter before displaying.
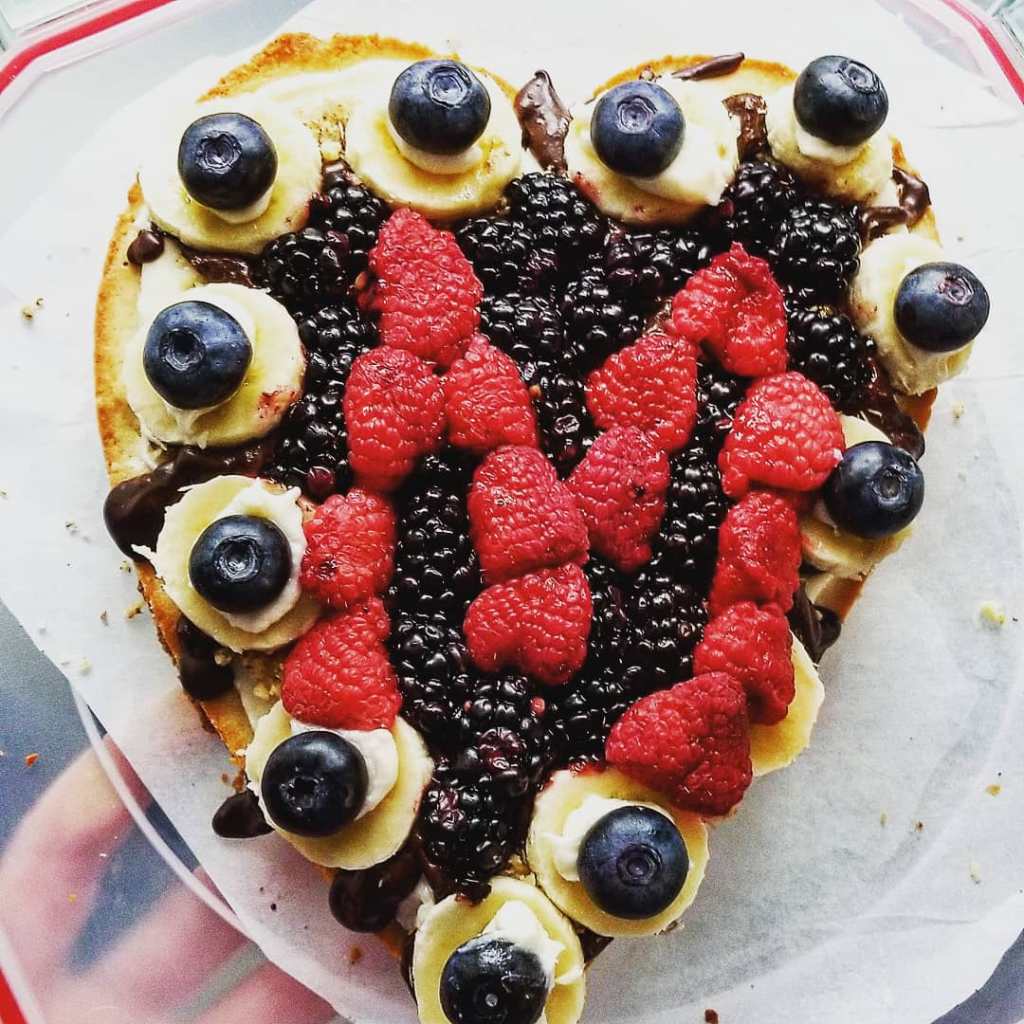
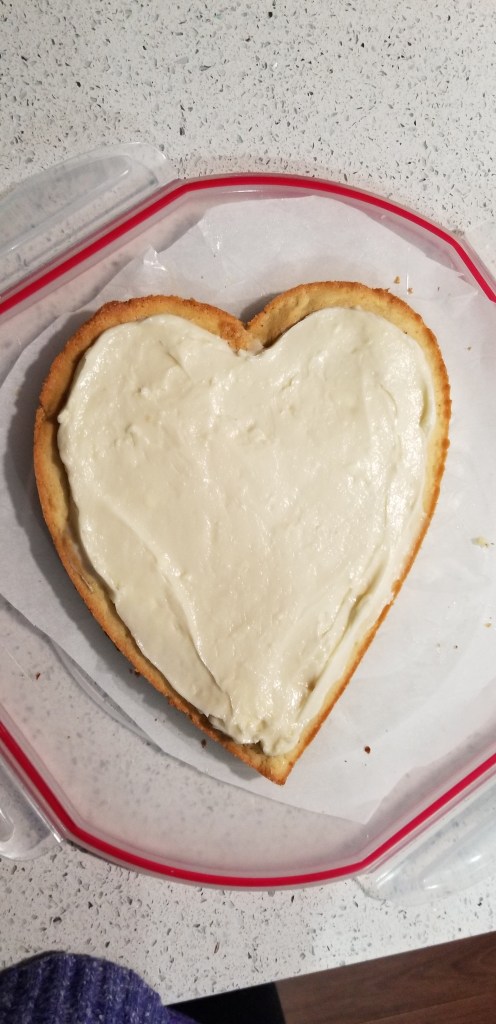
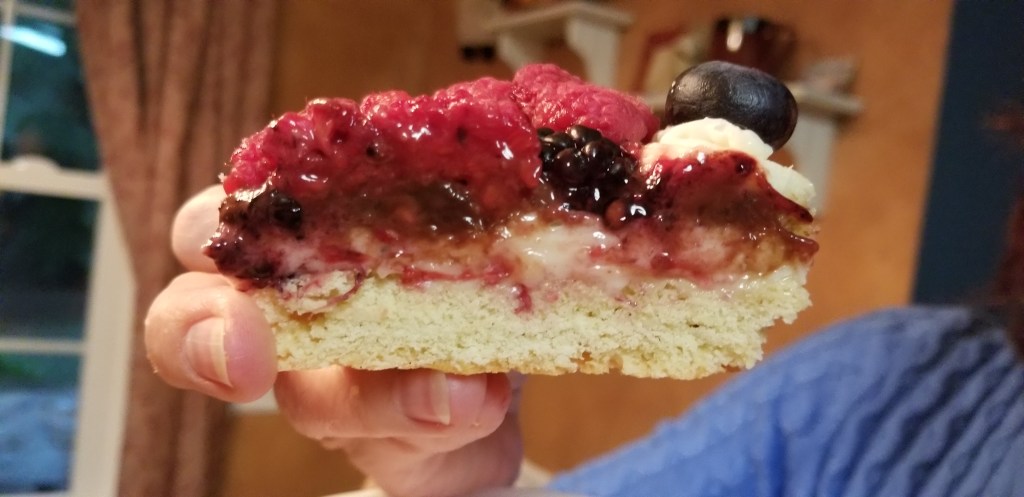
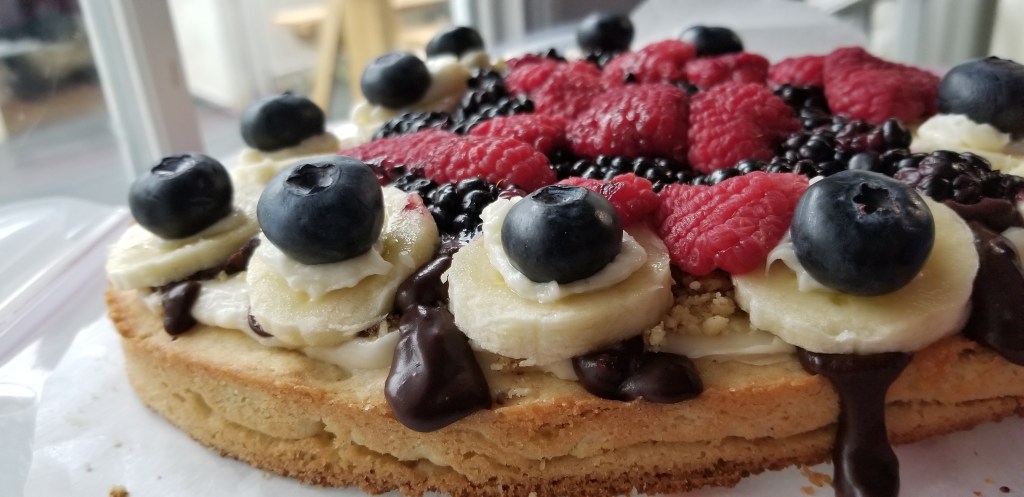
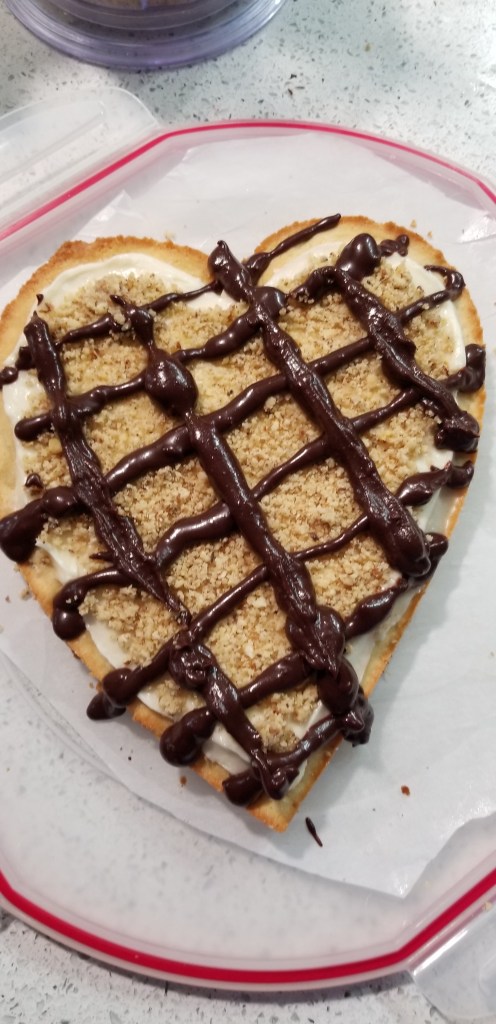
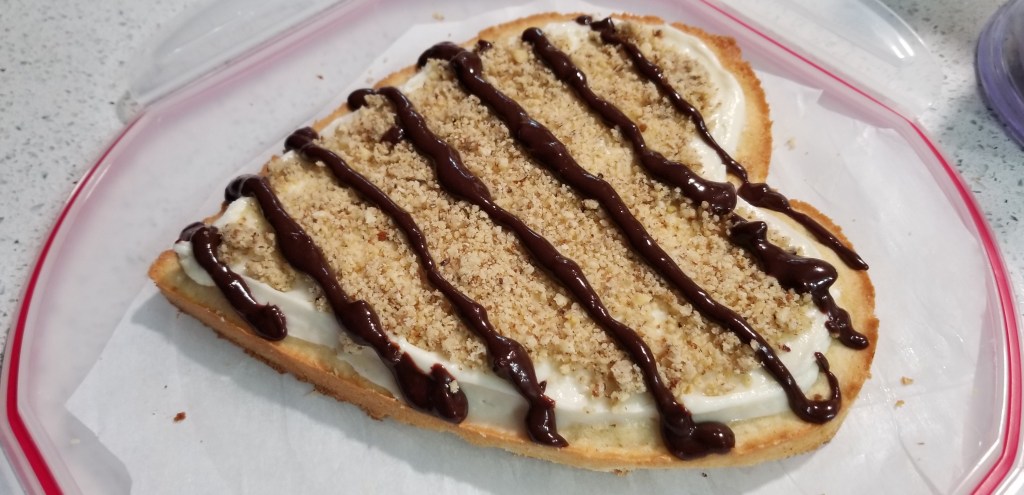
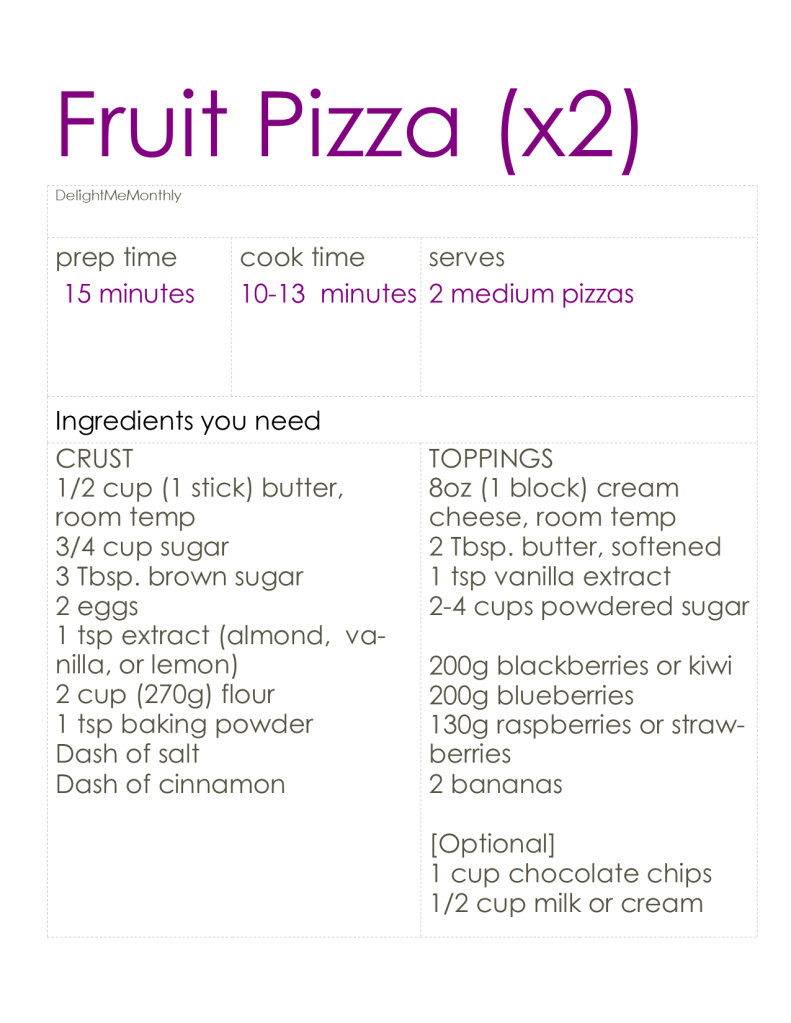
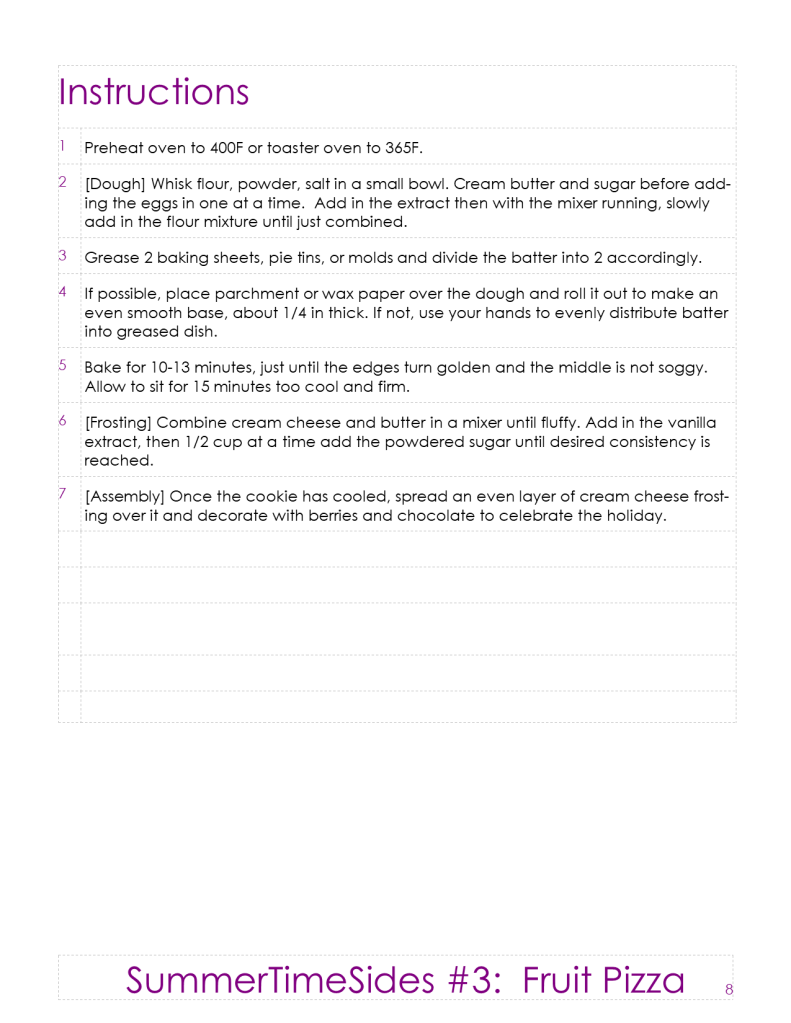
Typically a great Fourth of July celebratory pizza, this light and sweet dessert can be adapted for different holidays. Today, in the U.S. we celebrate Mothers everywhere who inspire, love, and raise us to be the capable bakers they deserve. “Mom’s Best…” recipies are special to us, bring us happy memories together, and are kept secret to pass along only to those deserving of those sacred memories. Mom’s Meatloaf, Mom’s Famous Chicken Pot Pie, and Moms Best Banana Bread are some of our first favorite foods and through them she kindles our interest in cooking and baking.
We celebrate Mom and her many, numerous, uncountable successes. We can never sufficiently express our gratitude to her, but we try through using the skills she patiently taught us to create delicious treats for her.
Thank you moms for all you do!
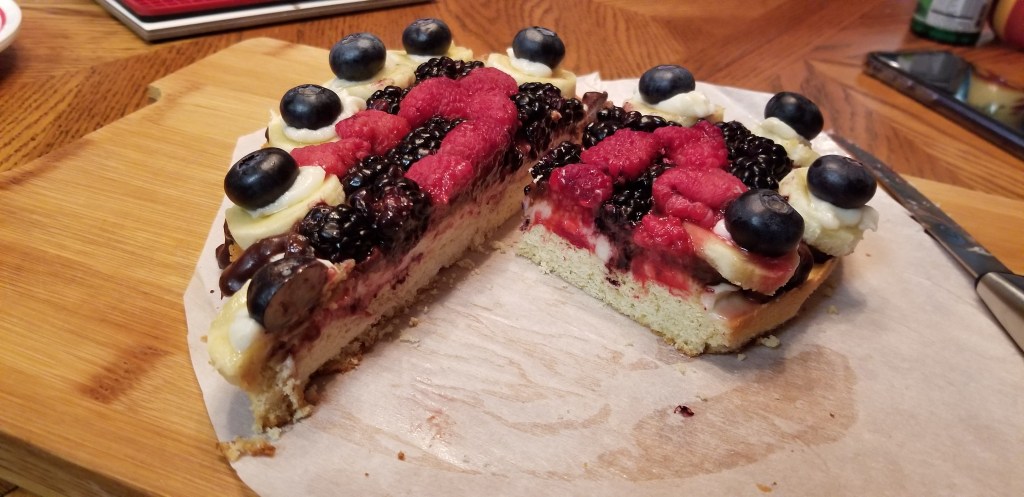
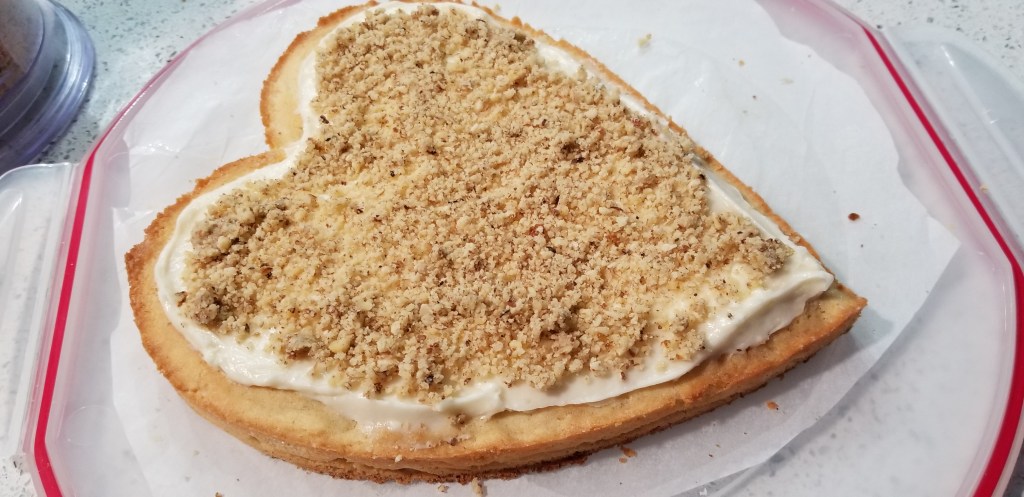
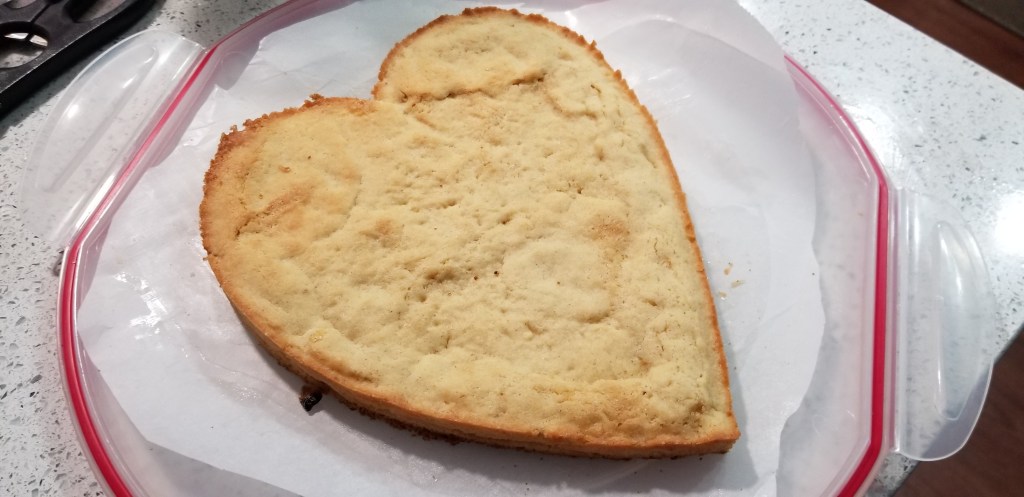
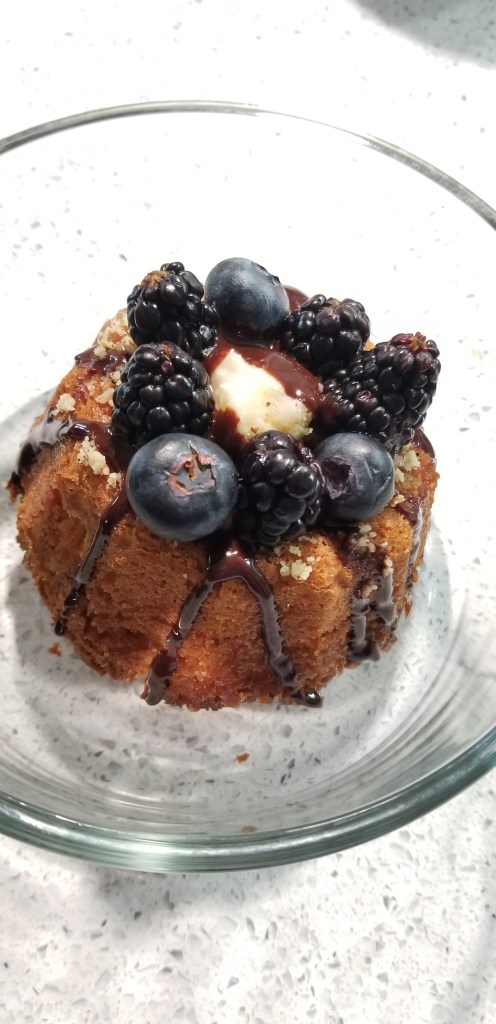
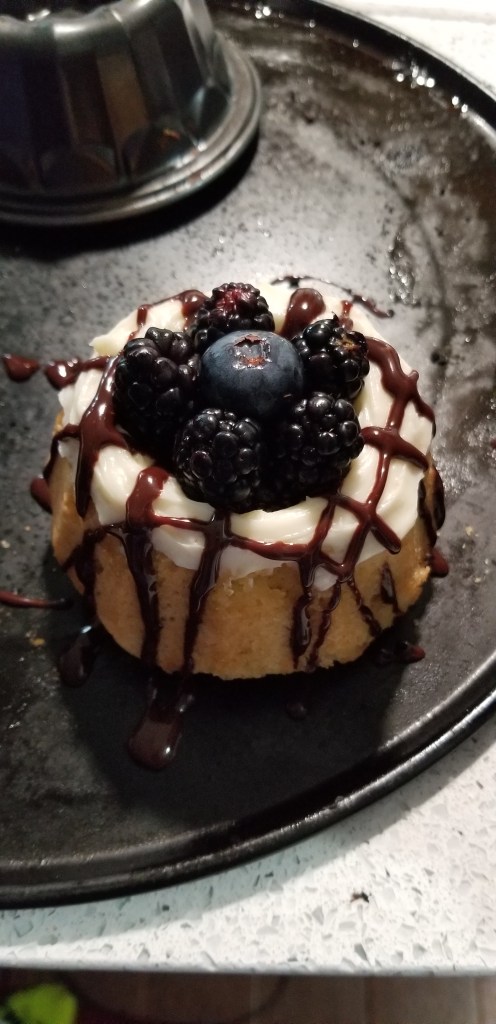
Take-Home Tips: The pizza will taste like whatever fruit is strongest. The sugar cookie is merely a vessel for the fruit. I would recommend not piling on the fruits to make a solid design, although tempting, and to add crushed nuts to tone down the sweetness. I added walnuts and hazelnuts, but you can hardly taste them – they serve to add texture and control the sugar. Omit the chocolate or switch to white chocolate as you prefer. I do not recommend citrus fruits because the juices ruin the integrity and structure. Try a shortbread crust or add pecans to give a nuttier flavor.
Get creative with your mold and presentation!
Scoring: 7 of 10. The fruit is a bit overwhelming when piling it for a decorative spin. The sugar cookie does not have a strong flavor unless the extract comes through – almond being the strongest of the three. Choose your favorite fruits!