

For every successful baker, learning how to temper chocolate is one of the key techniques to master. Until recently, I never understood why tempering was a challenging task or why it was so important to do correctly. If your goal is to make hard chocolates that will hold their shape, look professionally made and taste decent, then you really should consider tempering first. Tempering is a process of heating (melting) chocolate to a certain temperature (106-113-122F) then immediately dropping that temperature and bringing it back up to somewhere between 82-92F depending on the type. Doing so agitates the molecules so that they form a crystal structure that is ideal for a firm, crisp chocolate snap, solid, or shell.
Once you are familiar with the process, it only takes one time to learn it and do it properly from then on. In a double boiler, with a medium large pot containing an inch or two of water on bottom and a heat-proof bowl set on it, bring water to almost a boil and add real chocolate to the the bowl. The cooling and agitation process can be done in a couple of ways:
- Traditional Tempering Once the chocolate reaches the max temperature of 113F, take the bowl off the heat and place it in a larger bowl of cold water or fill your sink part way with cold water. No need to add ice. Stir the chocolate without getting any water in it until it cools to 81F. Then return it to the double boiler until it gets back up to roughly 85F (depending on the type of chocolate).
- Tabling. After reaching the 113F, remove the bowl from the boiler and pour most of the chocolate onto a marble, or similar, cool slab. Spread the chocolate around to a thin layer with an offset spatula until it begins to thicken then return it to the bowl of chocolate.
- A professional might be able to get the chocolate precisely to the 86-90F range and keep it there. I am not interested in testing my luck with this method.
- Seeding The method I will be using requires, again, heating the chocolate in the double boiler, then removing from the heat. Add in more of the same chocolate and stir until combined. It will melt in, just keep stirring until your arm hurts. Be patient and do not rush the process. Continue stirring (agitating) and check the temperature until 86-90 (dark or semi-sweet) or 84 (milk to white). This can vary depending on the brand. Spend the time to get to know the chocolate and pay more attention to what it looks like and how it feels once you learn what it should or should not look like.
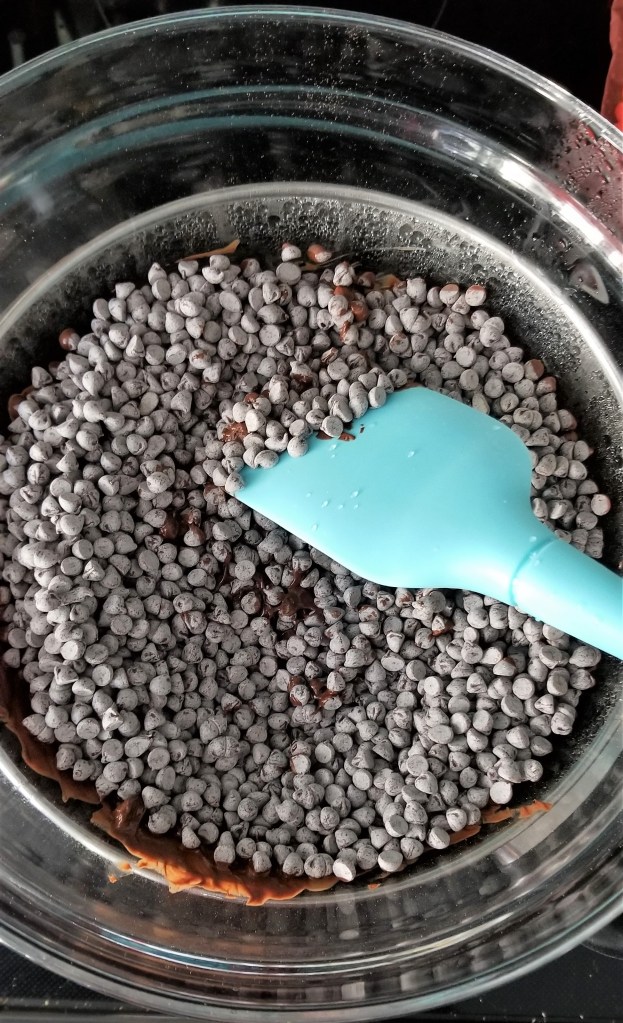
The science behind tempering: The method I prefer is referred to as seeding. If you ever had to grow crystals in science class then this is finally a time when you can apply that knowledge. The chocolate you buy from the store was already tempered by the manufacture and shaped into the mold as you purchased it. When we melt the chocolate, we are dissolving the crystal structure of the cocoa butter that the manufacturer’s tempering built. The chocolate loses it’s structure and becomes a puddle. Then we remove it from the heat to build a new structure. However, we can cheat and look at the answers. The chocolate we purchased already had the structure we need. If we add part of that original store bought chocolate to our puddle, then the puddle will copy the code of the solid chocolate, seeding it. With the seed map to guide our puddle fellow, we are back on track to being beautifully tempered in a new physical shape.
This confirms that we can re-temper chocolate that has solidified by reheating it, destroying the crystal code and rebuilding it.
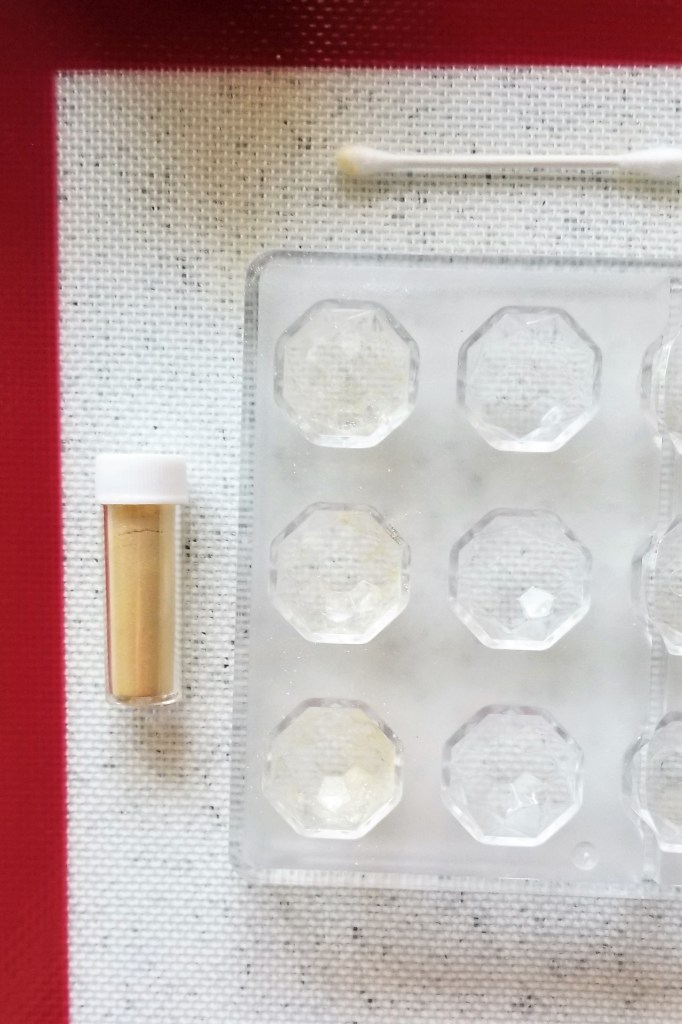
Gold dust first 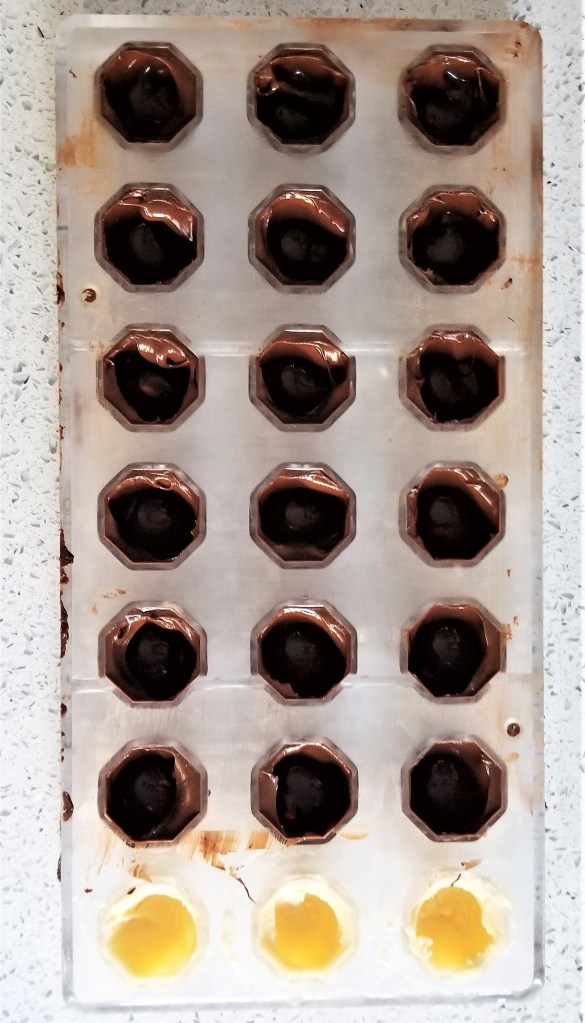
Remove excess 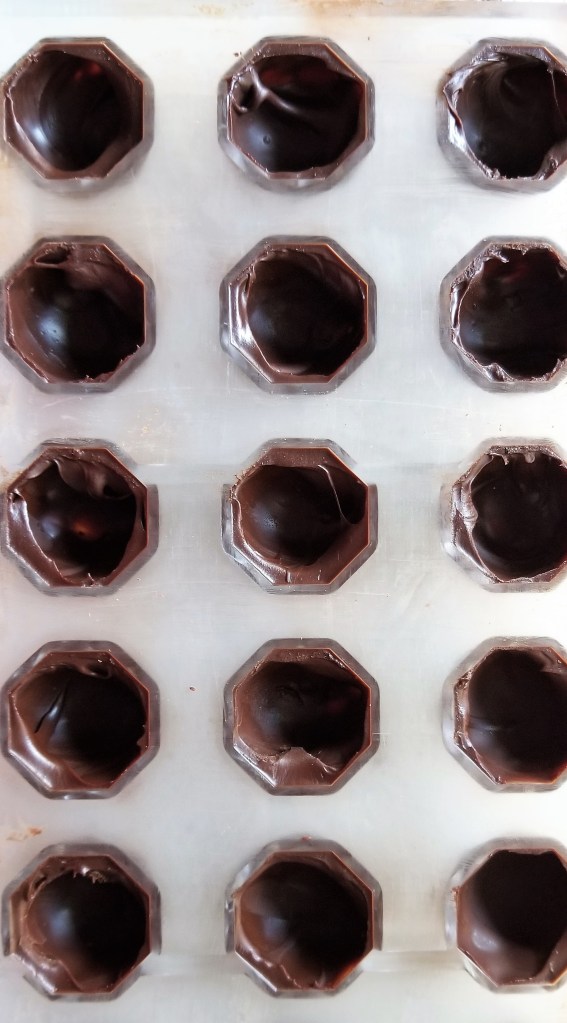
Post-chill
Noble Chocolate vs. Candy: We can only temper real chocolate. Candy “chocolate” (hydrogenated or fractionated) does not need to be tempered. Candy coatings are easier to work with, and are great for certain activities, but do not give us the same solidness, crisp break, or shiny shell. When purchasing chocolate, the important thing to remember is that a single brand can sell both candy and real chocolate in similar packaging. Be sure to check the ingredients to determine which you are buying. Real chocolate is made of cocoa liquor (cocoa mass), cocoa butter, and sugar. Soy lecithin is often added to keep chocolate chips from sticking together, but this does not ruin the chocolate. Be sure to note that cocoa butter is listed as an ingredient and that it does not mention vegetable fats.

Take-Home Tips: If you are worried about tempering for your first try, remember the environment you are in can impact your success. The bakers on the Great British Bake Off complain about their chocolate melting on hot days and there is a reason I am making chocolates in November and not July. Wait for a dry, cool day to try tempering. Also, polycarbonate molds (plastic) are preferable for your first batch of chocolates. This is my opinion because it is harder to ruin your batch when using them. If you use a silicone mold, you could remove the chocolate from the mold before it fully sets. While with a firm structure, the chocolate will not release until it is ready. For these, the white chocolate would take less time to firm than the dark chocolate and those came out of the mold with the first flip. The remaining chocolates let me know they needed more time to chill by not coming out of the mold, regardless of my banging insistence. Otherwise, it is really a preference of the options and costs. The shine and other attributes are not effected by the type of mold, even though some companies will try to convince you otherwise. Place a baking mat, sheet, or parchment paper under the mold and bowl of chocolate for easier clean up.

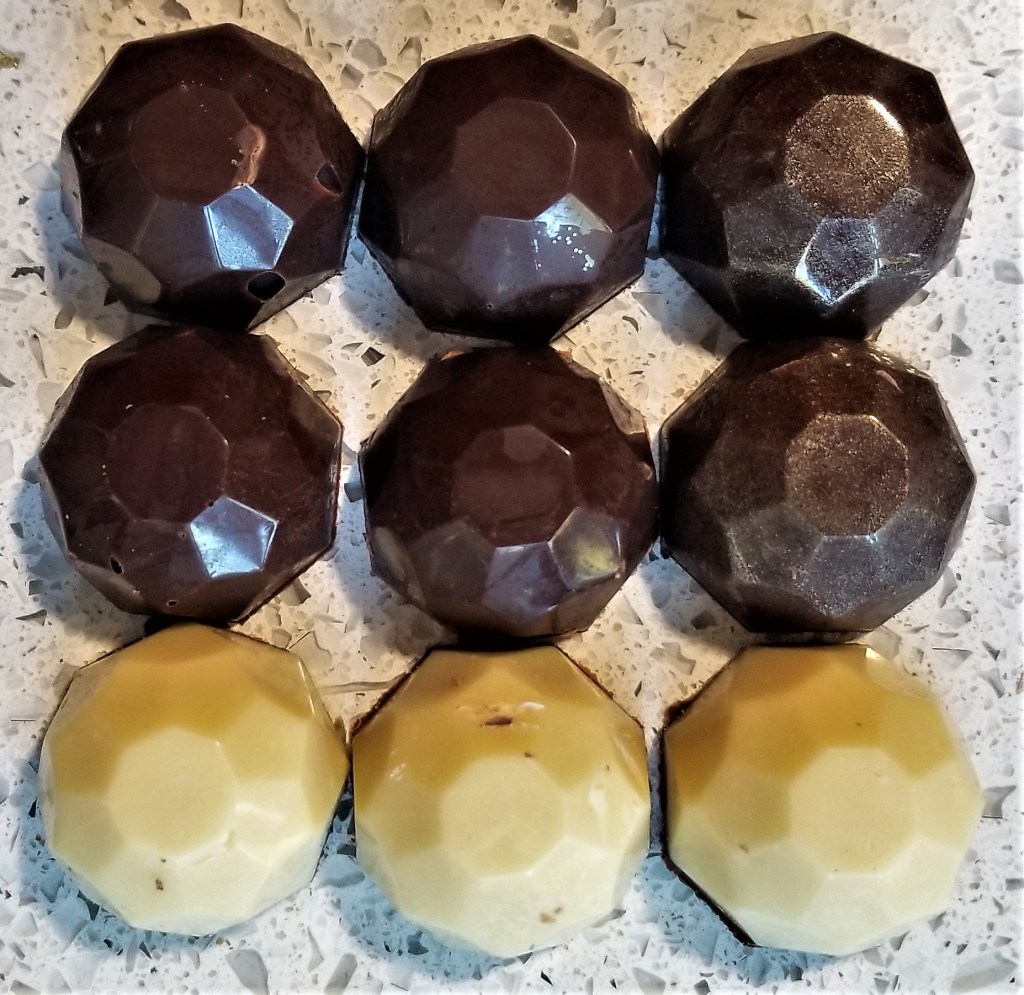
Scoring: 7 of 10. The flavors I chose for these particular chocolates were lack-luster. I will update with better flavors soon! I recommend using these techniques with your own fillings.
Instructions
- Temper semi-sweet chocolate in a double boiler until chocolate is between 86 and 90F. Pour over mold, completely filling the shapes, tilting the mold as necessary to do so, and use a bench scraper to remove excess chocolate from the top of the mold.
- Chill in the fridge for 10 minutes or until hardened.
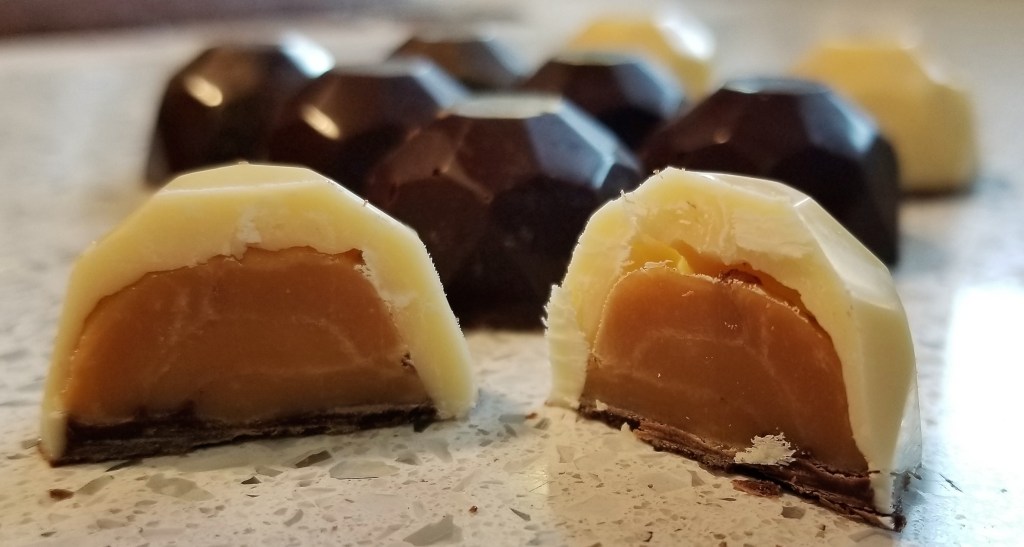
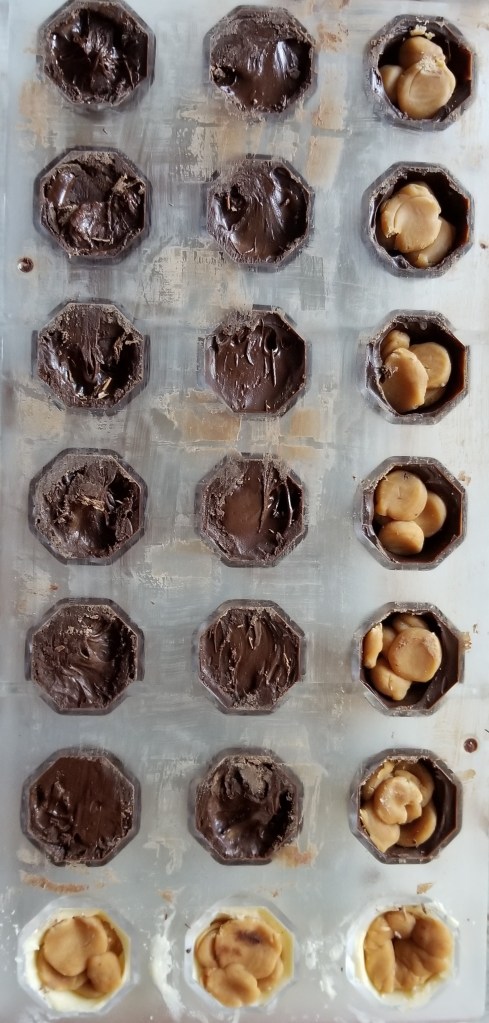
- Fill in the mold with desired filling, about 3/4 of the way full, being sure to leave a small gap for the base of the chocolate.
- Recover with the tempered chocolate and scrape off excess with a bench scraper, ensuring a flat and even base. Chill in fridge for 15-20 minutes. Remove mold from fridge and bang on the counter until chocolates come out. They might need twisting of the mold, similar to removing ice from a tray. If they do not remove with some amount of effort, then return to the fridge and try again after 5 more minutes. Repeat until they pop out.
- Cover any left over tempered chocolate and re-temper to use again.
